Fireplace Changes That Keep the Mantel, Hearth, and Firebox in Proportion
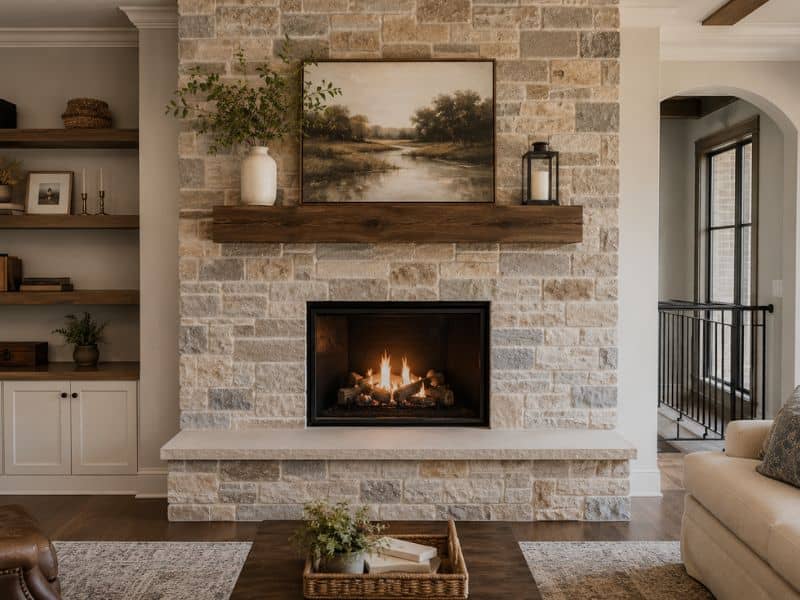
Balanced fireplace changes showing a properly proportioned mantel, hearth, and firebox in McKinney, Texas.

Fireplace changes can go wrong fast if the new mantel or hearth does not match the rest of the fireplace. A homeowner in McKinney, Texas might pick a mantel they love in a store, only to hang it up and find it makes the whole wall look strange. The firebox looks too small. The hearth looks like it belongs to a different room. This happens when one piece gets changed without thinking about how it fits with everything around it. Here is how to keep every part of the fireplace working together.

Use the Firebox Opening as the Starting Point for Fireplace Proportions

The firebox opening, the actual hole where the fire burns, should be the first thing you measure before changing anything else. Its width and height set the scale for everything built around it.

A wide, tall opening can carry a bigger mantel and a broader stone surround without looking strange. A smaller opening needs smaller pieces around it, or the fireplace starts to look top-heavy, like a small painting stuffed inside a giant frame. Before picking out a new mantel or planning new masonry, start with the numbers on the firebox itself. Every other measurement should grow out from there, not get chosen on its own.

Size the Mantel to Frame the Fireplace Without Overpowering It

A mantel is supposed to frame the fireplace, not steal the show. Its length, thickness, depth, and exact placement all shape how balanced the whole wall looks once it’s installed.

Go too big, and a modest firebox can end up looking tiny underneath a mantel that belongs on a much larger fireplace. Go too thin or too narrow, and the mantel can disappear against a wide brick or stone surround, leaving the wall feeling unfinished. Any change to mantel size also has to respect the required clearance from the firebox opening. Building codes set those distances for a reason, and no design choice should ignore them just for a certain look.

Keep the Hearth Width and Projection Connected to the Fireplace Face

The hearth, that flat area in front of the fireplace, needs to feel connected to both the firebox and the masonry around it. When it does not, the whole design starts to feel disjointed.

A hearth that’s too short can look like an afterthought, barely wide enough to matter. One that’s too deep or too wide can swallow up floor space, crowding furniture or blocking a natural walking path. The goal is a hearth that reads as part of the fireplace, wide enough to feel intentional, but not so large that it takes over the room.

Adjust Masonry Borders Without Creating Awkward Left-to-Right Imbalance

Sometimes the firebox itself never moves, yet the whole fireplace still looks crooked or off-center. Usually the real culprit is uneven brick or stone margins running down each side of the opening.

Even a small difference between the left and right border can throw off how the eye reads the whole wall. Coursing, meaning how the brick or stone rows line up, along with border widths and trim pieces, needs planning before a single brick comes out or a new one goes in. Working this out ahead of time saves a lot of frustration partway through a project.

Review the Entire Fireplace Wall Before Finalizing One Isolated Change

It’s tempting to focus on just the mantel, or just the hearth, and call the project done once that piece looks right. But a fireplace does not exist by itself. It shares the wall with ceiling height, wall width, maybe a television mounted above, built-in cabinets, nearby windows, and whatever furniture sits in front of it.

A mantel that looks perfectly balanced in a close-up drawing can suddenly feel too big or too small once you step back and see it as part of the full room. Before locking in any single change, picture the fireplace the way you’ll actually experience it, from across the living room, with everything else around it in view.

Frequently Asked Questions

Should the mantel be wider than the firebox? 

Usually, yes. Mantels commonly extend past the firebox opening on both sides. How much depends on the width of the surround, the wall itself, the mantel style, and any clearance rules that apply. The goal is a visible frame around the opening, not something so wide it makes the firebox look narrow by comparison.

Can the hearth be enlarged without changing the firebox? 

Often, yes. But the new size still needs to feel connected to the firebox visually. It also should not eat into walkways, block doors, crowd furniture, or make it harder to reach nearby features in the room.

Why does a new mantel sometimes make a fireplace look smaller? 

A mantel that’s too thick, too deep, too long, or just visually heavy can compete with the firebox for attention, which makes the opening seem smaller than it actually is. Scaling the mantel down or simplifying its shape often restores the balance that got lost.

Do brick and stone patterns affect fireplace proportions? 

Yes. Large stone pieces, strong horizontal rows, vertical brick patterns, and borders that contrast sharply with the rest of the wall can all change how wide or tall a fireplace appears, even when the actual measurements haven’t changed at all. Material layout deserves just as much thought as the numbers themselves.

Should fireplace proportions match a television or built-in cabinets? 

These nearby features are worth considering, but they shouldn’t dictate every measurement. A good design creates balance among the firebox, mantel, hearth, surrounding features, and the room’s overall scale, rather than forcing the fireplace to match one element exactly.
Why Stone Fireplace Joints May Change When the Fire Heats Up

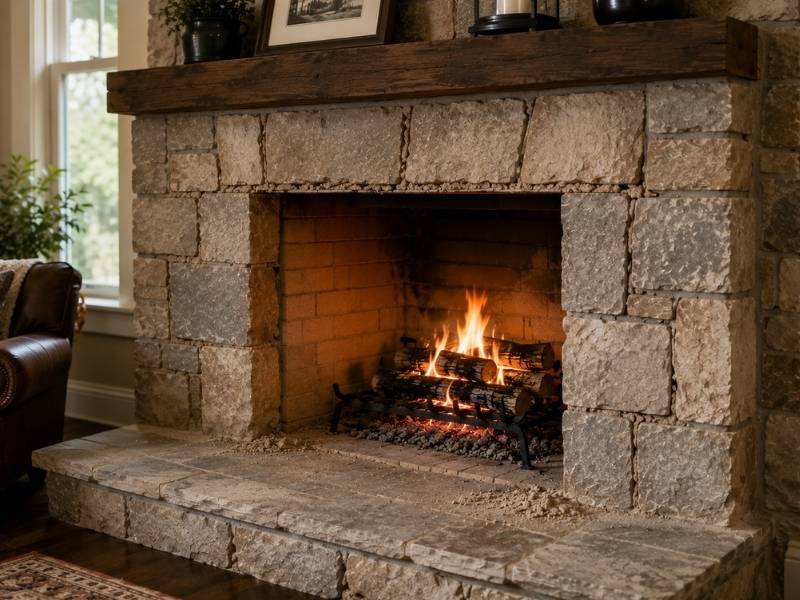
 Stone fireplace joints showing mild mortar wear and sandy debris near a heated firebox

Stone fireplace joints naturally experience small amounts of movement as the masonry heats up during use and cools afterward. Over time, repeated heating and cooling cycles can contribute to normal wear in mortar joints, particularly when combined with age, moisture, or other environmental conditions. Understanding how these changes affect a stone fireplace helps homeowners recognize the difference between expected movement and signs that may require maintenance or repair. Regular evaluation of the masonry and mortar can help identify developing issues before they become more significant. 

Heat Moves Every Part of the Assembly

Stone, mortar and firebrick all expand when they get hot, but they don’t expand at the same rate. Dense stone reacts slowly and modestly, mortar responds more readily, and firebrick sitting directly in the flame path sees far higher temperatures than anything else in the structure. Those differences create tiny amounts of shear at every joint, since two materials bonded together are trying to change size by slightly different amounts.

A single fire produces movement measured in fractions of a millimeter, which nobody notices. The effect comes from repetition. Each heating and cooling cycle works the bond between stone and mortar a little, and over many seasons the weakest joints begin to loosen. The firebox and the area immediately above it take the hardest use, since that’s where temperatures climb fastest and drop furthest. Masonry farther from the fire moves less and generally lasts longer. This is why deterioration in a stone fireplace almost always starts near the opening and works outward rather than appearing evenly across the whole face.

Mortar Gives Way Before the Stone Does

Mortar is designed to be the softer, more sacrificial part of a masonry system, and that design choice matters here. A mortar softer than the surrounding stone absorbs movement and wears out gradually, which protects the stone. A mortar harder than the stone forces the stone faces to take the stress instead, and spalled or chipped stone is a far more expensive repair than repointing.

Wear shows up in predictable ways. Joints look recessed or hollow compared to the stone face, small sections crumble when touched, and fine cracks run along the joint line rather than through the stone. Sandy residue collecting on the hearth is a common early clue that joints are breaking down above. Once a joint opens far enough, heat and combustion gases have a route into the masonry behind, and moisture has one too. Repointing at that stage stays a straightforward job. Delaying it lets the deterioration reach deeper courses, where the repair means taking apart and rebuilding rather than raking out and refilling.

Firebox Condition Affects Everything Around It

The firebox does the hardest work in the whole assembly, so its condition shapes how the surrounding stone performs. Firebrick develops hairline cracks from thermal cycling, and refractory mortar between those bricks erodes from repeated heating combined with the acidic residue that combustion leaves behind. Neither problem looks dramatic at first.

The consequences reach past the firebox itself. Gaps in the firebrick let heat contact the structural masonry that was never meant to take direct flame, and that heat accelerates joint deterioration in the stonework outside. Smoke and gases entering through those gaps can stain adjacent walls and carry moisture into the assembly. Owners sometimes notice performance changes first, such as fires that draw poorly or heat felt on the wall beside the fireplace. Because much of this sits out of easy view, a visual check of the face tells you almost nothing about the firebox. Looking inside, with a light and a mirror or a camera, belongs in any honest evaluation of a fireplace’s condition.

Water Makes Seasonal Movement Worse

Moisture in masonry changes the whole picture, because wet mortar behaves differently than dry mortar under temperature swings. Water absorbed into joints expands when it freezes, and that expansion pushes mortar apart from the inside. A joint already loosened by years of heating cycles takes far more damage from that than a sound one would.

The water usually arrives from above rather than through the face. A cracked chimney crown, a missing or damaged cap, failed flashing at the roof line, or open joints on an exterior chimney all let rain into the system. That water travels down through the masonry, and it carries dissolved salts with it that leave white deposits on the stone as it evaporates. Those deposits often show up as the first visible sign of a moisture path nobody knew existed. Controlling the water at its entry point does more for the long term condition of the joints than any repair to the joints themselves, so leaks get fixed before repointing starts.

Regular Inspections Catch Change While It’s Small

The value of periodic inspection comes from comparison. One look tells you the current condition, and repeated looks tell you whether something is moving. A joint that appeared slightly recessed two years ago and now shows a quarter inch of loss is a different situation than one that hasn’t changed.

Most homeowners get good results from an annual check before burning season, with a professional inspection at a longer interval or whenever something changes. A chimney professional evaluates the flue liner, the crown, the cap, the flashing, the firebox and the smoke chamber, which covers the parts an owner can’t reasonably see. Between those visits, watching for sandy debris on the hearth, loose joints near the opening, white staining on the stone, water marks on nearby walls and any change in how the fireplace draws will flag most developing problems. Repairs made at that stage stay modest. Repairs made after a season of ignoring the signs rarely do.