Stone Patio Leveling Beside a Pool Starts With the Base

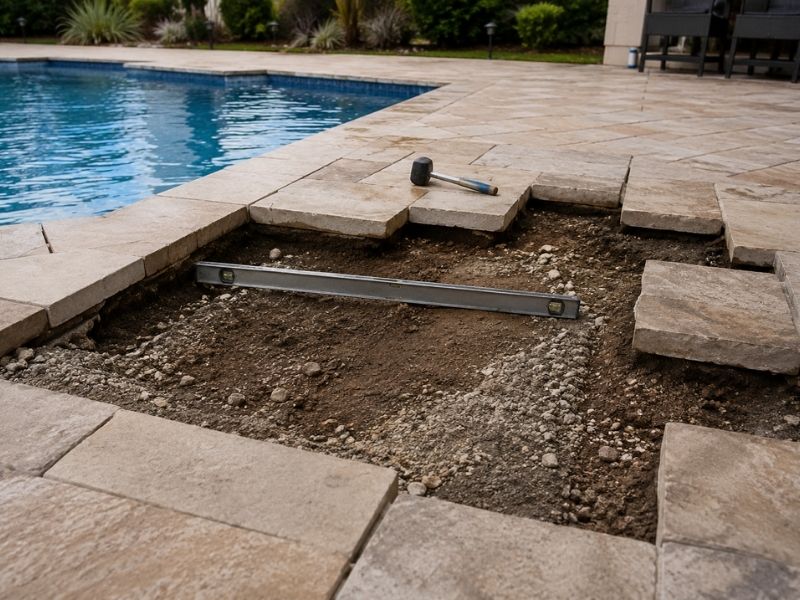
Stone patio leveling beside a pool with base preparation and drainage repair in McKinney, TX.

A stone patio next to a pool takes more abuse than almost any other surface in the yard. Splash-out keeps the ground damp, swimmers track water across it all day, and the soil underneath never fully dries. Add McKinney’s clay, which swells and shrinks with every wet and dry spell, and even a well-built patio can start to tilt or sink. Leveling it back down looks simple. It isn’t. Lasting results start below the stone, in the base that holds everything up. Reset the base right, and the surface stays put.

Why Poolside Stone Patios Settle Faster Than Other Outdoor Surfaces

Poolside patios settle faster because water and shifting soil work on the base at the same time. Pool water splashes out and drips off swimmers, so the ground beside the deck stays wet far longer than the rest of the yard. Wet soil loses strength and packs down under weight. Heavy foot traffic around the pool presses the stone into that softening ground. McKinney sits on expansive clay soils that swells when it’s wet and pulls back when it dries, so the base is always moving a little. Over a few seasons, that movement shows up as low spots, tilted stones, and gaps at the joints.

Preparing a Stable Base Before Resetting Poolside Stone

A lasting repair means rebuilding the base, not just lifting the low stones back up. Start by pulling the settled stone and digging out the soft, wet, or loose material underneath. That weak layer is why the patio sank, so it has to go. Compact the soil below, then build the base back with clean crushed aggregate that locks together and drains well. Lay it in thin layers and compact each one, because a base dumped in all at once never reaches full strength. Give it real thickness too. Many poolside patios need four to six inches of compacted base, and clay soils often call for more, plus a fabric layer that separates the base from the ground below.

Managing Drainage to Prevent Future Patio Movement

Even a perfect base fails if water keeps pooling under it. Control the water, and the repair holds. Grade the finished patio so it sheds water away from the pool and the house, usually around a quarter inch of fall per foot. Plan for where splash-out and pool overflow actually go, since that water runs to the same low spots every time. Downspouts and yard runoff shouldn’t drain across the patio base either. Where water tends to collect, a drain line or channel can carry it off before it washes the fines out of the base. In McKinney’s clay, steady drainage also calms the constant wet-dry swing that lifts and drops the stone.

Creating Smooth and Stable Transitions Between the Pool Deck and Stone Patio

The spots where the patio meets the pool coping, the deck, or a walkway are where trouble shows first. Different hardscapes sit on different bases and move at their own pace, so their shared edges lift and drop unevenly. A good mason sets those transitions level and leaves a clean joint between the materials so each side can flex a little as it moves. That soft joint keeps one section from cracking the next. It also removes the raised lip that catches a bare foot. Around a pool, where people walk fast on wet stone, an even transition keeps everyone safer.

When Professional Stone Patio Leveling Is Better Than Spot Repairs

Some settling is a single low stone. Some is the whole base giving way, and no amount of spot-fixing will hold. A few signs point to deeper failure:

  • Several stones sinking together across a wide area
  • Low spots that come back within a season after you reset them
  • Wide, growing gaps at the joints or stones that rock underfoot
  • Water that pools in the same place after every rain or pool day

When you see those, lifting one stone at a time just resets the clock. Rebuilding the base under the failed section costs more up front, but it fixes the cause instead of the symptom. That’s the repair that actually lasts.

Frequently Asked Questions

Why is my stone patio sinking next to my pool?

Constant moisture is the usual cause. Splash-out and drip keep the soil under the patio wet, which weakens it, and heavy poolside traffic presses the stone down. McKinney’s expansive clay adds to the problem by swelling and shrinking with the weather. The base softens, and the stone follows.

Can a stone patio be leveled without replacing all the stone?

Usually, yes. In most cases a mason lifts the existing stone, rebuilds the base underneath, and resets the same pieces. You only replace stones that are cracked or badly worn. The real work happens in the base, so the surface stone often goes right back down.

What type of base is best for a poolside stone patio?

A compacted crushed-aggregate base works best. It locks together, drains well, and holds its shape under weight. Four to six inches is common for patios, with more depth over clay soil. A fabric layer between the base and the ground helps on soft or shifting clay.

How does poor drainage affect a stone patio around a swimming pool?

Standing water washes the fine material out of the base and softens the soil below. Once that support erodes, the stone sinks, tilts, and separates at the joints. Good grading and drainage keep water moving away, which protects the base and holds the patio level.

How can homeowners in McKinney help prevent future patio settlement?

Keep water under control. Direct splash-out, downspouts, and runoff away from the patio, and fix low spots before they pool. Steady moisture around the base also calms the clay’s wet-dry swing. A yearly check for early tilting or gaps catches small movement before it spreads.

How a Stone Mason Blends Utility Access Into an Outdoor Feature

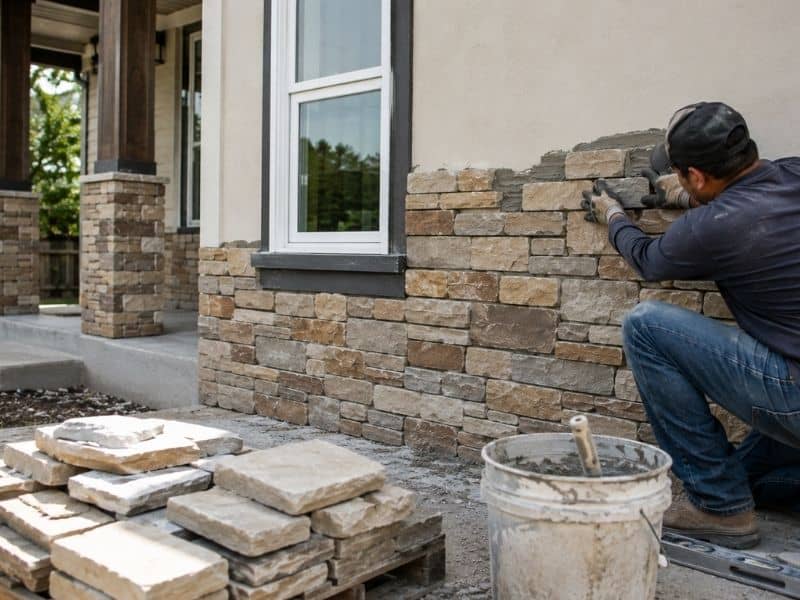
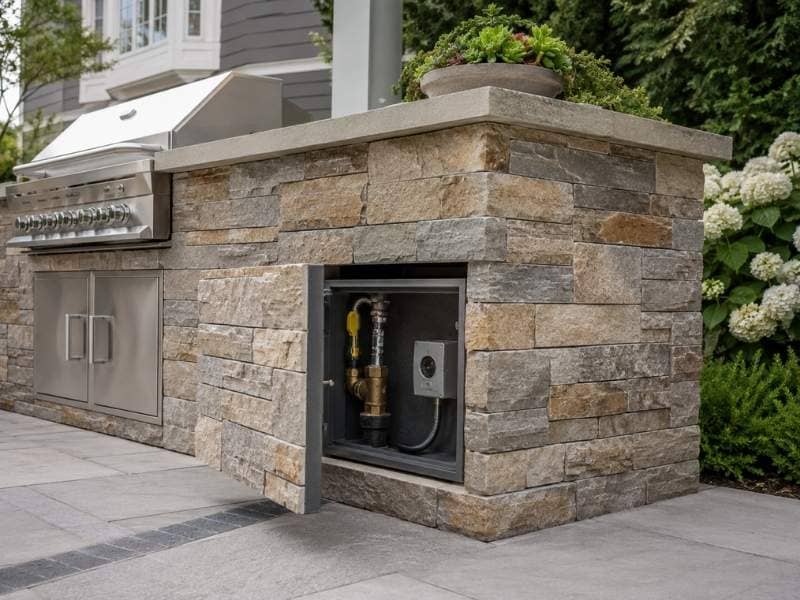
Stone mason in McKinney, TX blending utility access into an outdoor feature with a stone-faced panel covering reachable gas and electrical connections.

A well-built outdoor feature often hides a working system inside it. Behind the stone of a grill island, a fountain, or a fire feature sit valves, wires, and connections that someone will need to reach one day. A good stone mason plans for that day before the first stone goes down. When access gets ignored, the fix later means tearing into finished masonry to reach a shutoff or a box. Building the access in from the start keeps the feature good-looking and easy to service for years to come.

Locate Every Service Point Before Design Begins

You can’t build around something you haven’t mapped. Valves, cleanouts, electrical boxes, irrigation controls, and gas connections all need to be found and marked before the design is set. Each one is a spot a person will have to reach again someday. Knowing where they sit shapes the whole layout of the feature from the start.

These service points can change the size, position, and shape of the masonry more than people expect. A valve that has to stay reachable might shift a wall a few inches or determine where an opening goes. A cleanout buried under a solid stone base becomes a major problem the first time a drain backs up. A gas connection sealed behind finished stone can force a full teardown for a repair that should have taken minutes. Planning these details early allows professional masonry services to design the feature around real access needs instead of running into costly problems halfway through construction.

Access Panels Should Follow the Stone Pattern

An access point doesn’t have to break up the look of a feature. Framed access doors, removable faced panels, coordinated covers, and lift-off caps can all carry the same stone as the surface around them. Done well, the opening reads as part of the pattern rather than a patch stuck on top of it. The eye slides right past it without stopping.

The key is planning the panel as part of the design, not adding it once the stone is up. A panel worked in from the start lines up with the coursing and matches the joints around it. One cut in later almost always looks like an afterthought, with mismatched edges and a frame that fights the surrounding pattern. When the access piece gets the same care as the rest of the face, it hides in plain sight while still opening the moment someone needs it. That balance between looks and function is the whole point of doing it early.

Leave Room to Reach and Repair

An access point only helps if a person can actually use it. Utilities packed in too tight leave no room for a hand, a tool, or a replacement part. A shutoff you can see but can’t turn is nearly as useless as one you can’t reach at all. Space is what makes access real rather than just a nice idea.

Planning that space means thinking about the whole job someone might do there. A valve needs room to operate, not just room to look at. Routine maintenance, inspection, and swapping out worn equipment all take working clearance around the part. A mason who leaves enough space saves the next person from cutting into good stone to finish a simple repair. That room costs almost nothing to plan into the design and a real fortune to carve back in after the fact.

Openings Hide Best Along Design Breaks

Where an opening sits decides how much it stands out. An access point dropped in the middle of a clean stone face pulls the eye straight to it. Placed at a natural break in the design, that same opening nearly disappears. Smart positioning does most of the work of hiding it.

Corners, cabinet doors, material transitions, seating divisions, and shifts in the stone pattern all make good homes for an opening. These spots already interrupt the surface, so a panel there blends into a break the eye is expecting anyway. A cover that lines up with a cabinet door looks like part of the cabinetry. A panel set at a change in material reads as part of that transition rather than a separate feature. Lining the opening up with an intentional break keeps it fully usable while making it far harder to spot.

Coordinate With the Right Trade First

Different systems come with different rules, and a mason isn’t the one who sets them. Plumbing, electrical, gas, irrigation, and mechanical parts each carry their own needs for clearance, venting, labeling, and access. Building stone around a service point without checking those needs first can trap a component that was supposed to stay reachable or vented.

A quick coordination step with the right trade heads that off:

  • Plumbing needs room to work shutoffs and clear cleanouts
  • Electrical boxes need code clearance and covers that stay reachable
  • Gas connections need proper ventilation and an accessible shutoff
  • Irrigation controls need access to valves and wiring
  • Mechanical equipment may need airflow and space for service

Checking with the trade before the masonry closes in means the stone works with the system instead of against it. The mason builds once, the utility stays safe and serviceable, and nobody has to reopen a finished feature to fix a detail that a short conversation would have solved. That coordination is what separates a feature that looks good on day one from one that still works twenty years down the line.

How Stone Pavers Improve Outdoor Living Spaces

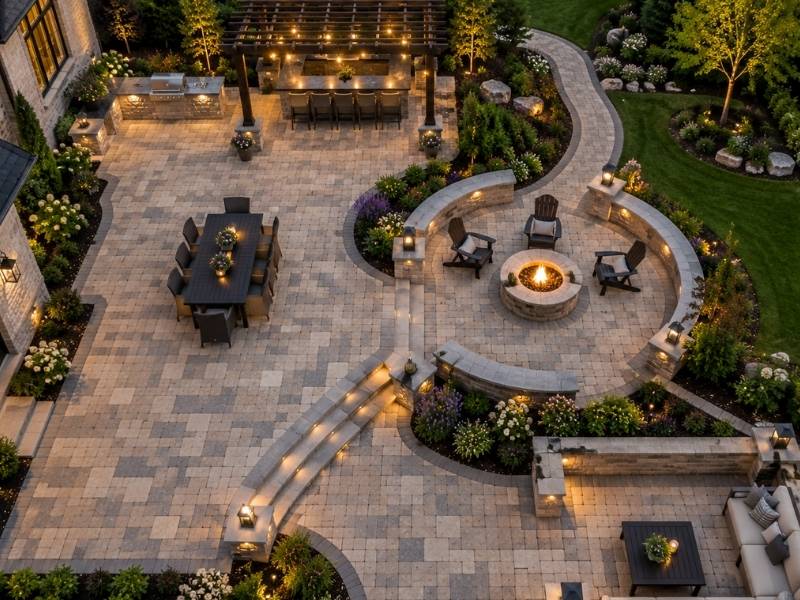
Aerial view of a natural stone paver patio with outdoor dining, fire pit, seating walls, and landscaped backyard in McKinney, TX.

Everybody compares stone pavers to the other pavers. Almost nobody compares them to the thing they’re actually replacing, which is a slab of poured concrete with a broom finish. That’s the real decision on most projects, and it gets made on price in about four minutes. Ten years later, one of those two surfaces still looks like something and the other one has a crack running corner to corner.

The crack question settles it

Poured concrete is one rigid piece. Soil moves underneath it, and a rigid piece that can’t move cracks instead. Control joints help by telling the crack where to go, and they don’t stop it from happening.

Pavers are hundreds of separate pieces with sand between them. The same soil movement travels through the joints, and the surface flexes rather than breaking. A settled area shows up as a dip you can lift and reset in an afternoon.

That’s the argument in one paragraph. Every other advantage below is downstream of it.

Repair is the thing nobody prices

A cracked slab has two options. Live with it, or demolish and repour the whole thing, which means new concrete that won’t match anything nearby.

A damaged paver area has a third option. Pull the affected units, fix what’s underneath, put them back. Nobody can tell it happened, provided you kept extra units from the original run.

That flexibility matters more over time than any style choice. Utilities get trenched. Tree roots arrive. A hot tub shows up in year six and needs a bigger base. All of those are ugly on a slab and routine with pavers.

Water has somewhere to go

A slab sheds every drop of rain to its edges. That water concentrates and heads somewhere, often toward the house or across a neighbor’s yard.

A paver surface has joints, and some water moves through them into the base. Permeable systems take that further with open-graded aggregate designed to hold and infiltrate stormwater. Some jurisdictions give credit for permeable paving in their drainage calculations, so it’s worth asking your building department.

Don’t oversell this to yourself. Standard pavers with polymeric sand shed most water like any hard surface does. The permeable version is a different product with a different base, and it costs more.

Comfort you can feel

Surface temperature is a real difference and it’s rarely mentioned. Light colored stone runs cooler underfoot than dark concrete in direct sun, and that’s the difference between a patio people use in July and one they look at through the window.

Texture matters at the same level. A wire-cut or textured paver holds traction when wet, and a smooth troweled slab gets slick. Around a pool or on any slope, that’s a safety issue and not an aesthetic one.

Glare is the third one. A big pale slab throws light back into the house all afternoon. Broken up into units with joints, the same area reads softer.

Where a slab still wins

Price, on day one. A broom finish slab is cheaper per square foot than any real stone paver, and if the budget stops at the number, the slab wins and that’s a legitimate call.

Speed is the other one. Pour, finish, wait, done. A paver installation is slower because it’s a hand-set process, and on a large area the labor difference is significant.

Under a permanent structure, a slab often makes more sense. A garage floor, a shed pad or a foundation isn’t a place for pavers. Match the surface to the job instead of picking a favorite.

And where a deck wins

Wood and composite decking beats pavers wherever you’re more than a step or two above grade. Building a paver terrace on fill to reach a raised door is expensive and it settles.

Decking also spans over slopes, and a paver surface has to be built up to meet them. On a steep lot, that’s the whole ballgame.

What actually improves the space

Level changes do more for an outdoor area than material choice. A single step between two paved areas defines them as separate rooms, and stone units handle that transition cleanly with a solid cap.

Edges are the other one. A paver surface needs a restraint at every open edge or it spreads outward over years. Restraint done right disappears. Done wrong or skipped, it’s the first thing that fails.

Curves are where pavers pull ahead of everything. A slab wants to be a rectangle, because forming a curve costs money. Units follow any shape you draw, and the cuts are the only added cost.

Ask these before you choose a surface

  • What’s the ten-year plan for this area, including utilities and future structures?
  • Does anything need to get dug up under this surface later?
  • Is stormwater a permit issue on this property, and is there permeable credit available?
  • How much sun does this area take in summer, and who’s walking on it barefoot?
  • Is this at grade, or does it need to reach a raised door?
  • What’s the price gap between the slab and the pavers, and what does the repair cost look like on each?

That last question is the honest one. Run both numbers over ten years, not one. The slab wins the quote and loses the decade, and if a contractor won’t discuss that with you, get another quote.

Frequently Asked Questions

Are Stone Pavers Better Than a Concrete Patio?

Stone pavers often provide better long-term performance because individual units can move slightly with the base and be repaired without replacing the entire surface. Concrete slabs are more likely to develop permanent cracks when the ground shifts, and repairs are usually more noticeable.

Do Stone Pavers Improve Drainage?

Yes, especially when installed as a permeable paving system. Standard stone pavers shed most surface water, while permeable systems allow water to pass through the joints into an engineered base below. Some municipalities also recognize permeable paving as part of stormwater management requirements.

Do Stone Pavers Stay Cooler Than Concrete?

Light-colored natural stone generally remains cooler under direct sunlight than many concrete surfaces. Textured stone also provides better traction when wet, making it a practical choice for pool decks, walkways, and sloped outdoor areas.

When Is a Concrete Patio the Better Option?

Concrete may be the better choice when minimizing upfront cost, meeting a tight construction schedule, or supporting permanent structures such as garages or storage buildings. The best material depends on the intended use, budget, and long-term maintenance expectations.

Can Damaged Stone Pavers Be Repaired?

Yes. One of the biggest advantages of stone pavers is that individual sections can be lifted, the base repaired, and the original stones reinstalled without replacing the entire surface. Keeping extra pavers from the original installation also makes future repairs blend in more naturally.

Why Stone Masonry Continues to Outlast Many Modern Exterior Materials

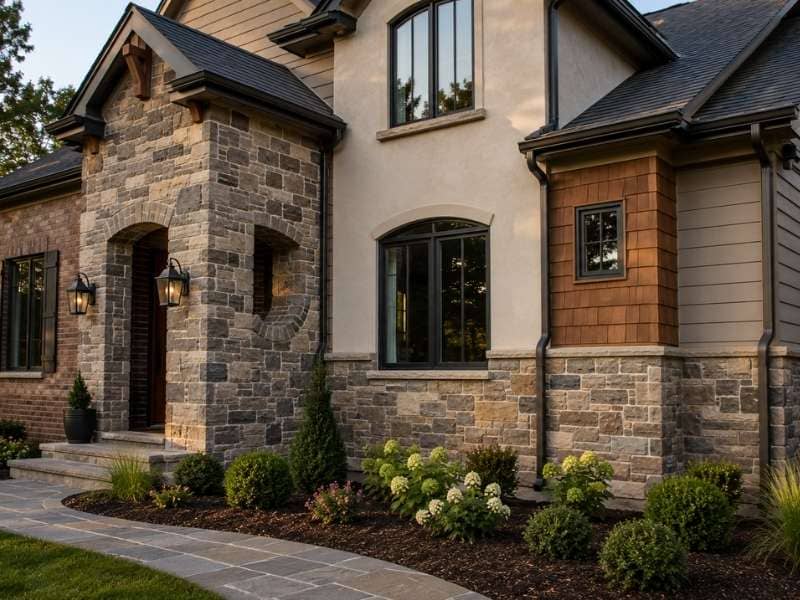
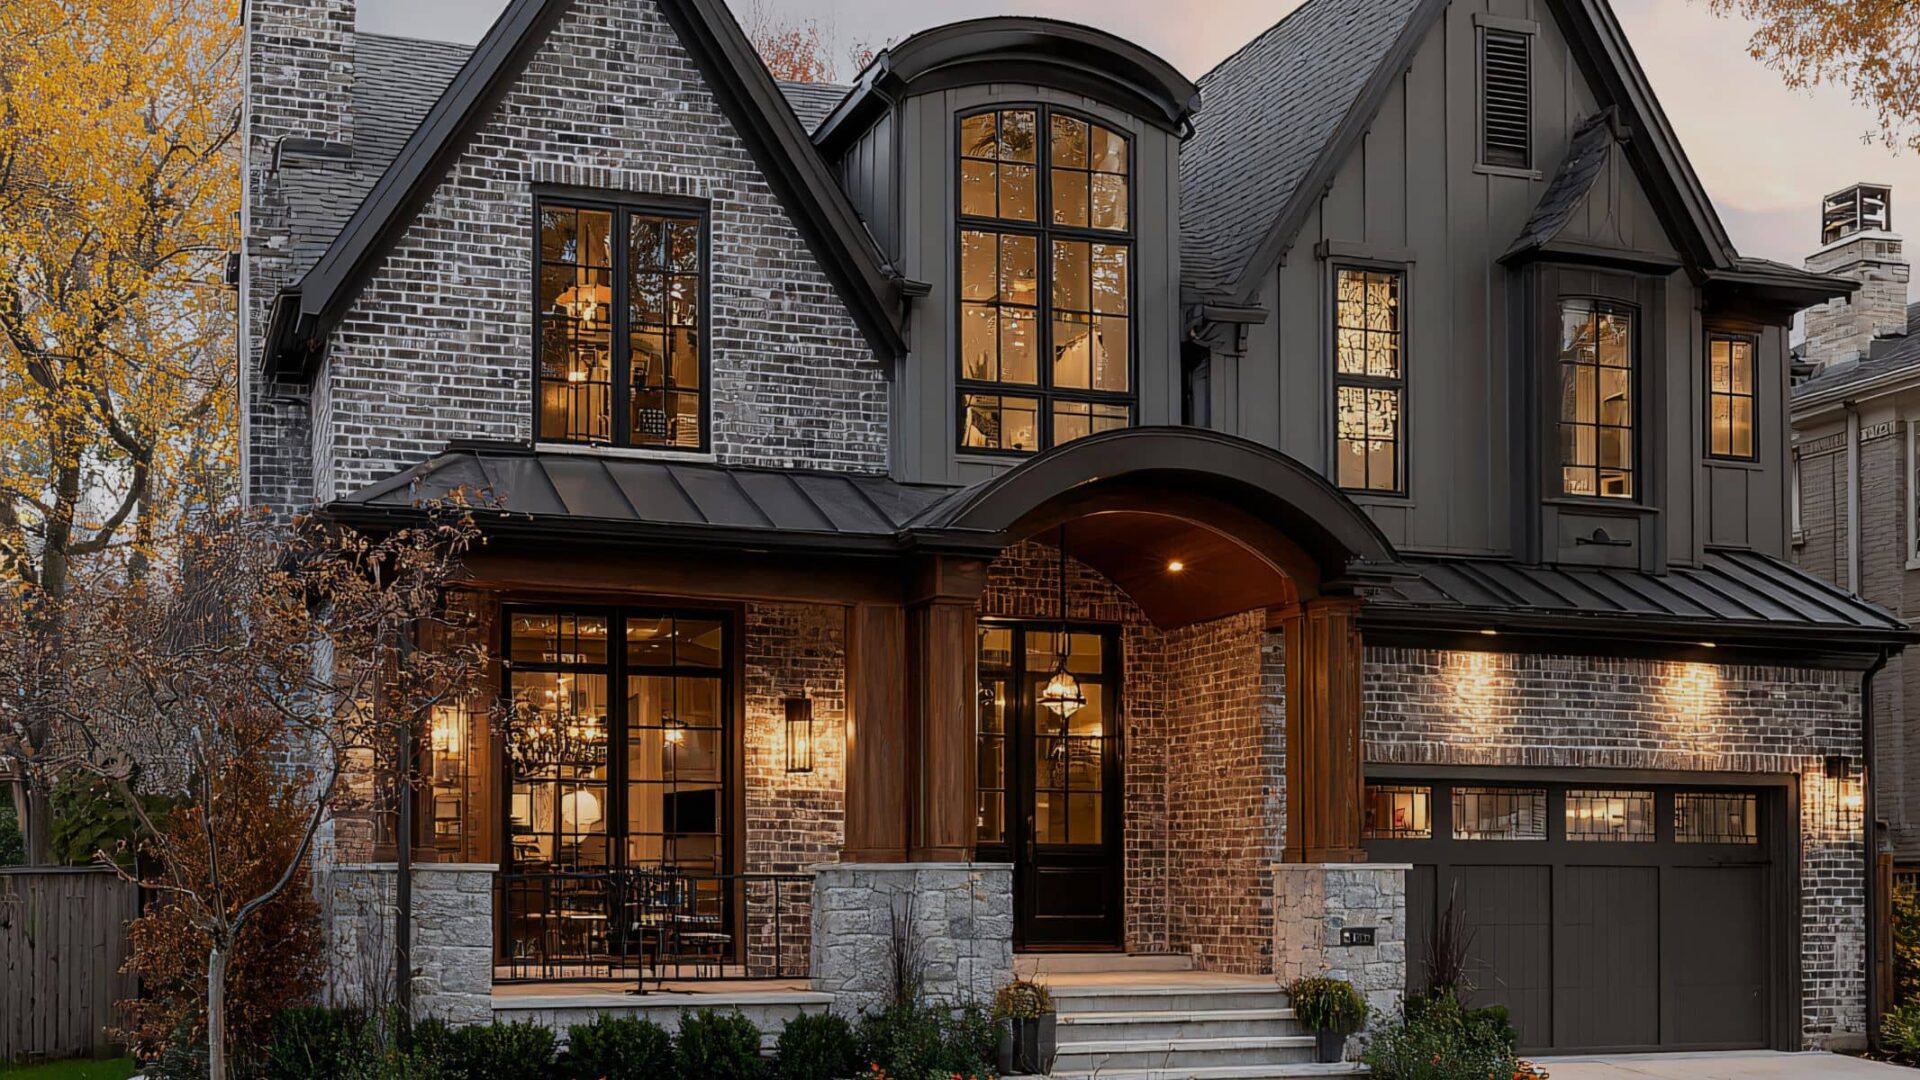
Stone masonry exterior combined with brick, stucco, wood, and siding on a custom home for long-lasting durability and timeless curb appeal.

Stone masonry has outlasted almost every exterior material people have tried next to it. Vinyl fades, wood rots and cheaper finishes crack or peel long before stone shows its age. That toughness is why so many homes use stone as the anchor of a mixed exterior, paired with brick, stucco, wood or siding. The stone holds up, but the finished look only lasts when you get the pairing and the installation right. That’s where a lot of exteriors either succeed or slowly fall apart.

Stone’s raw durability speaks for itself, and how stone holds up against weather and time has already been covered many times. This article takes a different angle. Most homes don’t wear stone from corner to corner. They combine it with other materials, and the way those materials meet often decides how well the whole exterior ages.

It Works Well With Other Exterior Materials

Stone gets along with almost every common exterior material, which is part of its appeal. The trick is using it where its weight and texture add something the other material can’t.

Stone and brick share a masonry base, so they age at a similar pace and bond well when a mason ties them together correctly. Stone and stucco play off each other through contrast, with rough stone grounding the smooth stucco above it. Wood brings warmth that softens stone’s hard face, though the wood needs upkeep the stone never will. Siding pairs with stone mostly for cost, so a home can carry a stone front while cheaper siding wraps the sides. Concrete and stone team up on foundations, steps and modern facades, where both read as solid and permanent.

The pairing does more than look good. Putting stone at the base of a wall, around an entry or along a chimney sets the toughest material where impact and splashback hit hardest. The lighter materials go higher up, out of harm’s way. Used this way, the mix outlasts any single cladding on its own.

Why Material Selection Matters

The stone you pick shapes both the look and the lifespan of the pairing. Stone type sets the tone, since a rough fieldstone reads very differently next to smooth siding than a clean-cut limestone does. Cut and thickness matter for weight and fit, because full-thickness stone needs real structural support while a thin veneer hangs on the wall behind it. Finish affects wear too, as a dense, tight surface sheds water better than an open, porous one. Matching these choices to the material beside the stone keeps the exterior balanced and supports good natural stone design.

Proper Installation Makes the Difference

Stone can only last as long as the details around it. Most stone problems don’t start in the stone. They start where the stone meets something else, and water is almost always the cause.

Flashing is the first line of defense. Where stone meets siding, a window or a roofline, metal flashing steers water out and away instead of letting it slip behind the stone. Skip it, or set it backward, and water rides the seam straight into the wall. Drainage matters just as much, since stone veneer needs a gap and weep points behind it so any water that gets in can drain out. Trap that water, and it works on the wall for years without showing on the surface.

Mortar choice ties it together. The mortar has to suit both the stone and the material next to it, or it cracks and opens a path for moisture. None of this shows once the wall goes up, which is why skilled work at the junctions counts more than almost anything else. A good-looking stone face over bad flashing is a repair waiting to happen.

Common Mistakes That Shorten the Life of Stone Masonry

Even durable stone can develop problems when installation shortcuts are taken. One of the biggest mistakes is treating stone like decorative trim instead of part of the building envelope. Every transition between stone and another material needs careful planning to keep water moving away from the wall.

Poor flashing, blocked weep holes and incompatible mortar are common causes of failure. Another mistake is installing heavy natural stone without adequate structural support or using veneer products outside their intended applications. Mixing materials without allowing for movement can also create cracks where different surfaces expand and contract over time. Small issues may stay hidden for years before stains, loose stones or moisture damage become visible. Careful planning during construction is far less expensive than repairing a wall after water has worked its way inside.

Stone Masonry Adds Long-Term Value to a Home

Stone masonry continues to stand out because it combines lasting durability with timeless curb appeal. While the upfront investment is often higher than siding or stucco alone, many homeowners recover that value through lower maintenance and a much longer service life.

A well-built stone exterior also helps a home keep its appearance as other materials age. Siding, trim or wood accents may eventually need repairs or replacement, but properly installed stone often remains in excellent condition. Buyers recognize that durability, and homes with quality stone features often leave a stronger first impression. When paired with the right materials and installed correctly, stone masonry remains one of the most reliable exterior finishes available.

Frequently Asked Questions

What exterior materials pair best with stone masonry?

Stone works with almost anything, but brick, stucco, wood, siding and concrete are the usual partners. Brick ages at a similar rate, stucco gives smooth contrast, wood adds warmth, siding keeps cost down and concrete matches stone’s solid feel. The right choice comes down to the look you want and your budget.

Why do the seams between stone and other materials matter so much?

The seams are where water tries to get in. Stone sheds weather well on its own, but the joint where it meets siding, stucco or a window is the weak point. Good flashing and drainage at those seams keep water out, and that protects the whole wall.

Can mixing stone with siding or stucco cause problems over time?

Only when someone builds the junction poorly. Stone and lighter materials shift at slightly different rates, so the transition needs proper flashing and a mortar that suits both. Get that right, and the pairing holds up for decades.

Does stone need a different installation approach than the material beside it?

Yes. Full stone and thin veneer each need their own support and drainage, and both differ from how siding or stucco go up. A mason plans the wall so every material is installed according to its requirements, helping the entire system perform as intended.

How long does a mixed stone exterior last?

With solid junctions, a mixed stone exterior can last for generations, and the stone usually outlives the materials around it. Wood or siding sections may need replacing first, while the stone keeps going. The stone rarely gives out first. What fails is usually the flashing, mortar or drainage at the seams.