Can Painted Brick Be Restored to Its Original Appearance?

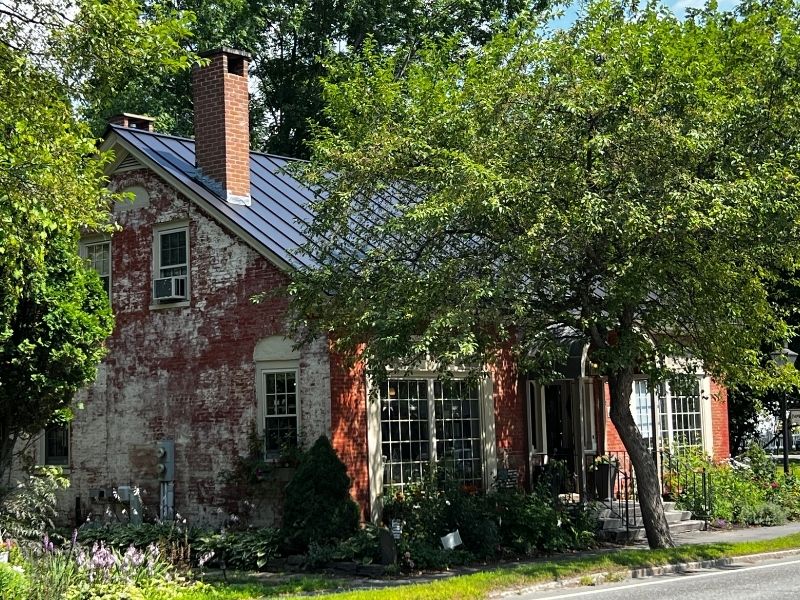
Partially restored painted brick exterior showing white paint being removed to reveal the original red brick on a home in McKinney, TX.

Somebody painted it white in 2016 and now you want the brick back. Painted brick can be stripped, and the honest range of outcomes runs from very good to permanently worse. Which one you get was mostly decided years ago, by the painter, not by you. The one thing you control is whether you test before you commit.

Setting Realistic Expectations for Painted Brick Restoration

You’ll almost never get it back to original. A skilled strip can pull off most of the coating and leave a wall that reads as brick again from the sidewalk. Up close you’ll still find paint in the pores, and the color will sit slightly off from a wall that was never touched.

Set that expectation before you spend a dollar. People who go in expecting factory-new brick end up unhappy with a genuinely good result. People who expect a weathered old wall are usually pleased.

Why the Brick’s Protective Surface Matters

Brick comes out of the kiln with a hard outer face. That skin is dense, it sheds water and it carries the color. Everything underneath it is soft and thirsty.

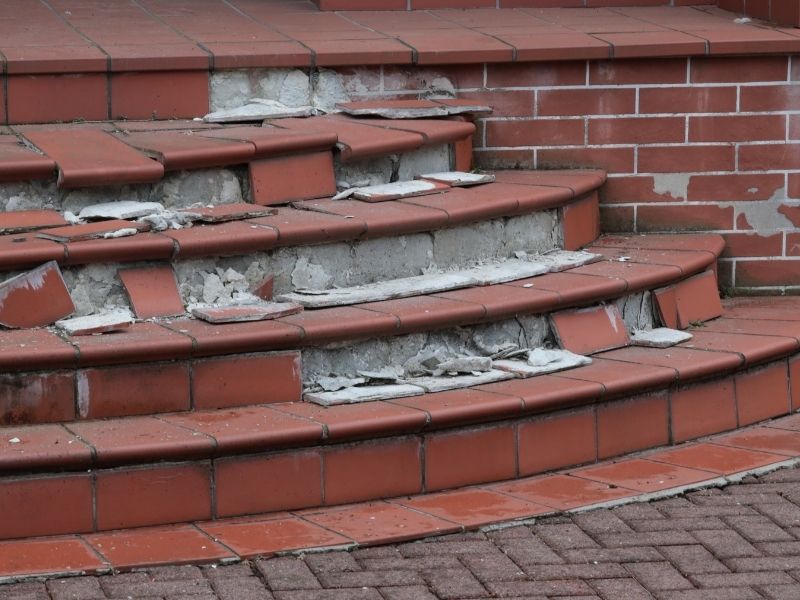
Break the skin and the brick starts drinking. Water gets in, salts move around, and the face begins to crumble over a few seasons. That’s the risk in every removal method, and it’s why aggressive cleaning ruins more brick than paint ever did.

So the real question isn’t whether the paint will come off. It’s whether the skin survives the process.

How Different Paint Types Affect Removal Results

Brick comes out of the kiln with a hard outer face. That skin is dense, it sheds water and it carries the color. Even professional brick cleaning is designed to preserve this protective surface rather than wear it away. Everything underneath it is soft and thirsty.

Latex and acrylic soaked into the pores. Those grip hard and they’re the reason so many strips end with a shadow of color left behind. Elastomeric coatings are the worst of the group, because they were built to stretch and stick to masonry forever.

Nobody knows what’s on your wall until someone tests it. Layers stack too, so a 1970s oil base under two coats of latex behaves like neither one.

Why Every Painted Brick Project Needs a Test Patch

Pick a small area that nobody sees. Behind a downspout works. Run the method there and let it sit through a rain cycle before you judge it.

A test patch tells you three things: how much paint releases, whether the brick face survives and what the cleaned brick actually looks like. That last one surprises people most. The brick under the paint may be a color you don’t want.

Chemical Paint Removal Methods for Brick

Masonry-safe strippers work by softening the paint so it can be washed or peeled away. The good ones come as a thick paste and get covered with a laminate cloth, which holds them wet for hours or days. Slow is the point.

The process is messy and it isn’t cheap. You’ll do multiple applications on a layered wall, plus a neutralizing rinse afterward if the product is caustic. Runoff has to be captured, because it’s paint waste and it’s regulated.

Match the chemistry to the coating. A stripper that eats oil paint may do nothing to elastomeric. This is where an experienced contractor earns the fee, and where a general painter usually guesses.

Why Abrasive Blasting Can Permanently Damage Brick

Sandblasting takes paint off fast. It also takes the fired skin with it, and that damage is permanent. The National Park Service has warned about abrasive cleaning on historic masonry for decades, and Preservation Brief 6 covers exactly this failure.

Soda and other soft media get sold as the gentle option. Gentle is relative, and pressure, distance and operator skill decide the outcome more than the media does. I’ve seen soda blasting go fine and I’ve seen it chew a wall.

If someone quotes you a fast blast for a low price, that price is the tell. Speed on painted brick is a warning, not a feature.

Understanding Ghosting After Paint Removal

Ghosting is the faint color left in the pores after a strip. It shows most in raking light and after rain. On a big elevation it can look like a shadow of the old paint scheme.

You can chase it with more chemistry and more rinsing, and each round costs brick face. At some point the smart move is to stop. A little ghosting on a hundred-year-old wall reads as patina, and most people stop noticing within a month.

When Repainting Is a Better Option Than Stripping

Some walls shouldn’t be stripped. Soft handmade brick, salvaged brick and anything already spalling will lose face in the process. A wall with failing units needs repair before it needs cosmetics.

Mineral paint and limewash are worth a look here. Both breathe, which matters on brick, and limewash weathers to something that looks a lot less like paint. Neither one gets you back to bare brick, and both beat trapping moisture under another coat of latex.

Brick staining is the third option. Stain soaks in instead of coating over, so the texture stays. It works on bare brick and on some stripped walls, and it can even out ghosting better than another strip round will.

Questions to Ask Before Hiring a Brick Restoration Contractor

  • What coating is on the wall, and how many layers, confirmed by test?
  • Where’s the test patch, and how long will it weather before you decide?
  • Which stripper chemistry, and is it rated for masonry?
  • Who captures the runoff, and how is the waste handled?
  • Is any blasting involved, and if so, at what pressure and by whom?
  • What does the contractor say the finished wall will look like, in writing?
  • What’s the fallback plan if the test patch takes the face off?

Ask every one of these before signing. The answers are free now. A wall with the skin blasted off is not a fixable mistake.

Frequently Asked Questions

Can paint be completely removed from brick?

Rarely. Chemical stripping can remove most paint, but coatings that have penetrated the brick’s pores often leave behind a faint shadow known as ghosting. Older oil-based paints generally come off more completely than latex or elastomeric coatings. The goal is usually to restore the appearance of natural brick rather than achieve a completely paint-free surface.

Does removing paint damage brick?

It can if the wrong removal method is used. Brick has a durable fired outer surface that protects it from moisture and weathering. Abrasive techniques can strip away this protective layer and expose the softer material underneath. Masonry-safe chemical stripping products are typically much less damaging than aggressive mechanical methods.

Is sandblasting painted brick a bad idea?

Yes. Sandblasting removes the brick’s protective fired surface along with the paint, causing permanent damage. It is generally not recommended for painted brick because it can shorten the life of the masonry. Even softer blasting methods require careful evaluation and experienced application.

How much does it cost to strip painted brick?

The cost depends on the type of paint, the number of existing layers, the size and accessibility of the wall, and local labor rates. Multiple paint layers often require additional applications, increasing the overall cost. A test patch is usually the best way to determine the appropriate removal method and provide an accurate estimate.

Should I repaint instead of stripping?

In some cases, repainting is the better option. Older, softer, or deteriorated brick may be damaged during paint removal. Breathable finishes such as mineral paint, limewash, or brick stain can improve the appearance while allowing moisture to escape, making them a practical alternative to complete paint removal.

How Brick Masonry Helps Homes Stay Beautiful Through Changing Seasons

Brick masonry exterior on a well-maintained home showing lasting color, clean mortar joints, and timeless curb appeal through changing seasons.

Brick masonry gives a home a look that holds up long after the seasons have done their worst. Heat, storms, damp weather and swings from cold to hot all wear on an exterior, and most materials show it. Paint chalks and peels. Vinyl fades and warps. Brick mostly shrugs it off and keeps looking like itself. That staying power comes from the material, though it lasts longest when the brickwork goes up right and gets simple care over the years.

Brick Keeps Its Color and Surface Season After Season

The biggest reason a brick stays good-looking is its color. Brick takes its color from the clay itself, and firing locks it in for good. Sun, rain and years of weather can’t strip a color that reaches through the whole brick rather than sitting on the surface. A painted wall loses its finish to sun and moisture, while a brick wall keeps the same tone it had on day one.

The surface holds up just as well. Brick doesn’t chalk, blister or streak the way painted and lightweight materials do after a few hard summers. It picks up a little character over time, but it never looks tired or dated. That’s why a brick home from decades ago can still look sharp, while the vinyl and paint around the neighborhood have been redone two or three times.

Brick’s Thermal Behavior Keeps the Wall Steady

Brick does something lightweight materials can’t: it handles temperature swings without stressing. Brick has high thermal mass, which means it soaks up heat slowly through the day and lets it go slowly at night. Instead of heating and cooling in fast jumps, a brick wall changes temperature gently.

That slow, steady behavior protects the way the wall looks. Materials that heat and cool quickly expand and contract hard, and over time that movement shows up as warping, buckling or stress cracks. Brick moves far less, so it stays flat and stable through the same weather. Across a full year of hot afternoons and cold nights, that stability is a big reason brick keeps its clean, even face.

Quality Brickwork Adds Lasting Curb Appeal

Good brickwork is a design decision, and the choices you make up front decide how well a home ages. The bond pattern sets the rhythm of the wall, whether it’s a simple running bond or a tighter herringbone, and a well-laid pattern reads as clean for decades. Color blends matter too, since mixing a few close tones gives a wall depth that a single flat color can’t, and it hides the small variations that show up over years.

The joints do quiet work here. Even, well-tooled mortar joints frame each brick and keep the whole wall looking crisp, while sloppy or mismatched joints drag down even good brick. When a repair does happen, matching the mortar color and joint profile keeps the fix from standing out. Those details are the difference between a wall that looks intentional and one that looks patched together.

A Little Care Keeps the Look Going

Brick earns its low-maintenance reputation, but it isn’t no-maintenance. Keeping that season-proof look means catching the few things that do go wrong before they spread. Worn mortar, seasonal cracks and water finding a way in are the usual suspects, and each has a simple fix when you catch it early.

Rather than repeat the full playbook here, the details live in a few focused guides. There’s a breakdown of how water moves behind brick walls, a look at why cracks tend to show up after a hot, wet summer, and a guide to when a small brick repair protects long-term value. Stay ahead of those three, and the appearance mostly takes care of itself.

Frequently Asked Questions

How does brick keep its color through the seasons?

Brick gets its color from the clay itself, not from a coating on top. Because the color reaches through the whole brick, weather can’t wear it off the way it strips paint. A brick wall holds close to its first-day tone for decades, even after years of sun and rain.

Why does brick handle temperature changes better than other materials?

Brick is dense and heavy, so it soaks up heat slowly and lets it go slowly rather than spiking with the weather. Lighter materials heat and cool fast, which makes them expand, warp and stress. Brick barely moves by comparison, so the wall stays flat and steady through hot days and cold nights.

Do brick patterns and color blends really affect how a home ages?

Yes, more than most people expect. A clean bond pattern and a blend of close tones give a wall depth and hide the small changes that come with age. Even, well-matched joints keep the look crisp, so the wall reads as polished year after year.

Does brick need painting or sealing to stay looking good?

No, and that’s part of the appeal. Brick’s color comes from the clay rather than a coating, so there’s nothing to repaint as it weathers. Most brick walls shed water well without a sealer, which keeps the look natural and the upkeep light.

What keeps a brick home looking its best over the years?

Mostly the brick handles it on its own. Beyond that, catching worn mortar, small cracks and water early keeps the surface clean and even. Matching any repair to the original brick and joints is what keeps the look consistent instead of patched.

Why Stone Masonry Continues to Outlast Many Modern Exterior Materials

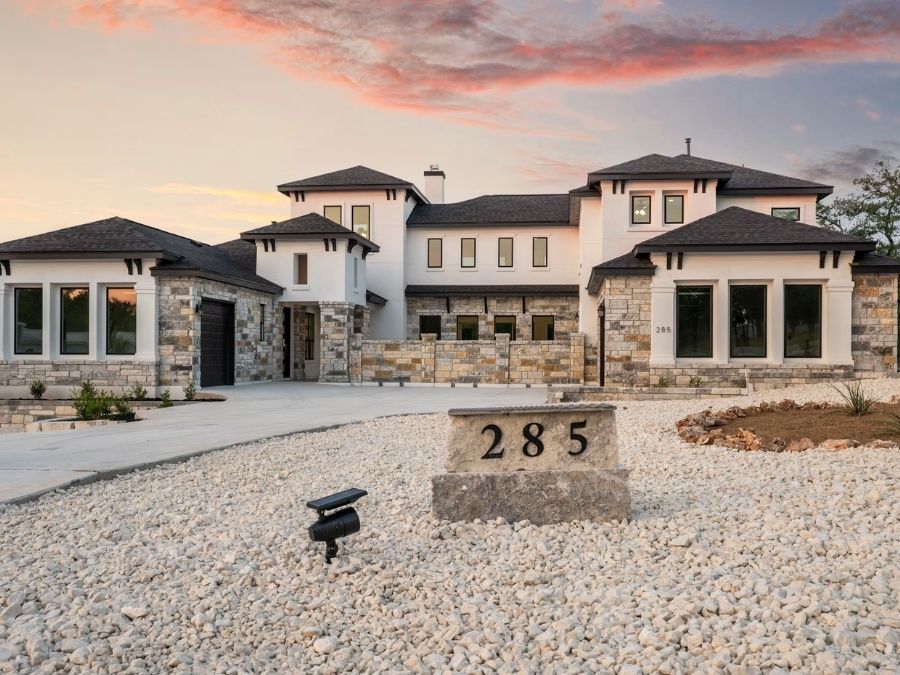
Stone masonry exterior combined with brick, stucco, wood, and siding on a custom home for long-lasting durability and timeless curb appeal.

Stone masonry has outlasted almost every exterior material people have tried next to it. Vinyl fades, wood rots and cheaper finishes crack or peel long before stone shows its age. That toughness is why so many homes use stone as the anchor of a mixed exterior, paired with brick, stucco, wood or siding. The stone holds up, but the finished look only lasts when you get the pairing and the installation right. That’s where a lot of exteriors either succeed or slowly fall apart.

Stone’s raw durability speaks for itself, and how stone holds up against weather and time has already been covered many times. This article takes a different angle. Most homes don’t wear stone from corner to corner. They combine it with other materials, and the way those materials meet often decides how well the whole exterior ages.

It Works Well With Other Exterior Materials

Stone gets along with almost every common exterior material, which is part of its appeal. The trick is using it where its weight and texture add something the other material can’t.

Stone and brick share a masonry base, so they age at a similar pace and bond well when a mason ties them together correctly. Stone and stucco play off each other through contrast, with rough stone grounding the smooth stucco above it. Wood brings warmth that softens stone’s hard face, though the wood needs upkeep the stone never will. Siding pairs with stone mostly for cost, so a home can carry a stone front while cheaper siding wraps the sides. Concrete and stone team up on foundations, steps and modern facades, where both read as solid and permanent.

The pairing does more than look good. Putting stone at the base of a wall, around an entry or along a chimney sets the toughest material where impact and splashback hit hardest. The lighter materials go higher up, out of harm’s way. Used this way, the mix outlasts any single cladding on its own.

Why Material Selection Matters

The stone you pick shapes both the look and the lifespan of the pairing. Stone type sets the tone, since a rough fieldstone reads very differently next to smooth siding than a clean-cut limestone does. Cut and thickness matter for weight and fit, because full-thickness stone needs real structural support while a thin veneer hangs on the wall behind it. Finish affects wear too, as a dense, tight surface sheds water better than an open, porous one. Matching these choices to the material beside the stone keeps the exterior balanced and supports good natural stone design.

Proper Installation Makes the Difference

Stone can only last as long as the details around it. Most stone problems don’t start in the stone. They start where the stone meets something else, and water is almost always the cause.

Flashing is the first line of defense. Where stone meets siding, a window or a roofline, metal flashing steers water out and away instead of letting it slip behind the stone. Skip it, or set it backward, and water rides the seam straight into the wall. Drainage matters just as much, since stone veneer needs a gap and weep points behind it so any water that gets in can drain out. Trap that water, and it works on the wall for years without showing on the surface.

Mortar choice ties it together. The mortar has to suit both the stone and the material next to it, or it cracks and opens a path for moisture. None of this shows once the wall goes up, which is why skilled work at the junctions counts more than almost anything else. A good-looking stone face over bad flashing is a repair waiting to happen.

Common Mistakes That Shorten the Life of Stone Masonry

Even durable stone can develop problems when installation shortcuts are taken. One of the biggest mistakes is treating stone like decorative trim instead of part of the building envelope. Every transition between stone and another material needs careful planning to keep water moving away from the wall.

Poor flashing, blocked weep holes and incompatible mortar are common causes of failure. Another mistake is installing heavy natural stone without adequate structural support or using veneer products outside their intended applications. Mixing materials without allowing for movement can also create cracks where different surfaces expand and contract over time. Small issues may stay hidden for years before stains, loose stones or moisture damage become visible. Careful planning during construction is far less expensive than repairing a wall after water has worked its way inside.

Stone Masonry Adds Long-Term Value to a Home

Stone masonry continues to stand out because it combines lasting durability with timeless curb appeal. While the upfront investment is often higher than siding or stucco alone, many homeowners recover that value through lower maintenance and a much longer service life.

A well-built stone exterior also helps a home keep its appearance as other materials age. Siding, trim or wood accents may eventually need repairs or replacement, but properly installed stone often remains in excellent condition. Buyers recognize that durability, and homes with quality stone features often leave a stronger first impression. When paired with the right materials and installed correctly, stone masonry remains one of the most reliable exterior finishes available.

Frequently Asked Questions

What exterior materials pair best with stone masonry?

Stone works with almost anything, but brick, stucco, wood, siding and concrete are the usual partners. Brick ages at a similar rate, stucco gives smooth contrast, wood adds warmth, siding keeps cost down and concrete matches stone’s solid feel. The right choice comes down to the look you want and your budget.

Why do the seams between stone and other materials matter so much?

The seams are where water tries to get in. Stone sheds weather well on its own, but the joint where it meets siding, stucco or a window is the weak point. Good flashing and drainage at those seams keep water out, and that protects the whole wall.

Can mixing stone with siding or stucco cause problems over time?

Only when someone builds the junction poorly. Stone and lighter materials shift at slightly different rates, so the transition needs proper flashing and a mortar that suits both. Get that right, and the pairing holds up for decades.

Does stone need a different installation approach than the material beside it?

Yes. Full stone and thin veneer each need their own support and drainage, and both differ from how siding or stucco go up. A mason plans the wall so every material is installed according to its requirements, helping the entire system perform as intended.

How long does a mixed stone exterior last?

With solid junctions, a mixed stone exterior can last for generations, and the stone usually outlives the materials around it. Wood or siding sections may need replacing first, while the stone keeps going. The stone rarely gives out first. What fails is usually the flashing, mortar or drainage at the seams.

Painted Brick Ideas That Preserve Timeless Curb Appeal

Painted brick ideas featuring a timeless white brick exterior with coordinated trim and landscaping to enhance long-lasting curb appeal.

A fresh coat of paint can completely change the look of an older brick home, but the best results come from choices that stand the test of time. The right painted brick ideas refresh faded exteriors, highlight classic architecture and improve curb appeal without making the home look trendy or overdone. Careful color selection and proper preparation help create a finish that stays attractive for years. 

Why Painted Brick Works for Older Homes

Older brick homes have great bones, but decades of weather can leave the brick faded, stained or stuck in a dated color. Painted brick gives these houses a clean, updated look without hiding the character that makes them special. It’s one of the simplest ways to refresh a home’s face while keeping its classic charm.

The appeal goes beyond looks. A fresh coat can cover mismatched repairs, uneven coloring and the tired orange or brown tones common in older brick. Suddenly a house that felt stuck in the past reads fresh and cared for.

Done well, painted brick also lasts. A quality job holds up for years and protects the surface underneath from moisture and wear. That mix of beauty and durability is why so many owners of older homes choose it.

Choose Classic Colors Over Trends

The secret to lasting curb appeal is picking a color that won’t feel dated in five years. Bold trend colors look exciting at first, but they age fast and can hurt resale. Soft, classic shades keep a home looking good for the long haul.

Warm whites and creams are a safe, popular choice that suits almost any older home. Greige, a blend of gray and beige, gives a modern feel while staying neutral. Deep charcoal or soft black can look striking on the right house, especially with clean white trim.

The goal is a color that flatters the home’s style, not one that fights it. A classic palette works with the architecture instead of shouting over it. When in doubt, lean toward shades you’d still love a decade from now.

Consider Limewash for a Softer Look

Not every brick update means solid, uniform paint. Limewash offers a softer, more natural finish that many older homes wear beautifully. It soaks into the brick rather than coating it, so it leaves a matte, weathered look with subtle variation.

Limewash has real practical perks too. It lets the brick breathe, which helps moisture escape instead of getting trapped behind a sealed layer. That breathability suits old masonry, which was never built for a heavy modern coating.

The look is easy to adjust as well. You can apply limewash thick for near-full coverage or thin for a faded, old-world feel. Some owners even wipe part of it back to let the original brick peek through, a trick that keeps plenty of character.

Coordinate Brick With Trim and Accents

A brick color rarely stands alone, so the smartest updates tie it together with the trim, door and roof. When these elements agree, the whole house looks intentional and polished. When they clash, even a great brick color falls flat.

For a look that holds together, coordinate the brick with:

  • Roof color, since it’s usually the hardest feature to change
  • Trim, in a crisp white, cream or a deeper contrast shade
  • The front door, where a richer tone adds a welcome pop
  • Small accents like light fixtures and house numbers

Start with the features you won’t change, then build the palette around them. A door in a deeper or warmer tone draws the eye without overwhelming the look. When every piece agrees, the curb appeal reads polished instead of pieced together.

Protect the Brick With Proper Prep and Paint

The difference between a paint job that lasts and one that peels comes down to prep and product. You have to clean, dry and repair the brick before any color goes on. Skipping that step is the fastest way to a finish that flakes within a couple of years.

Good prep means washing off dirt and mildew, fixing cracked mortar and letting the surface dry fully. Old brick holds moisture, so patience here pays off. Paint applied over damp or crumbling brick simply won’t hold.

The product matters just as much. Masonry and mineral paints let brick breathe while still protecting it, which suits older homes far better than a standard sealed coating. Choosing the right paint keeps your update looking sharp and saves you from redoing it too soon.

Frequently Asked Questions

Is painting brick a good idea for an older home?

It can be, especially when the brick is dated, stained or mismatched from past repairs. Paint gives the home a fresh, updated look while keeping its classic character. The key is proper prep and a breathable paint so the finish lasts.

What painted brick colors stay in style the longest?

Soft neutrals hold up best over time. Warm whites, creams and greige suit almost any home, while deep charcoal works well with crisp trim. These classic shades flatter the architecture and rarely feel dated.

Does painted brick require a lot of maintenance?

Some, but not a lot with a good job. You’ll want to rinse it now and then and touch up any spots where paint wears or chips. A quality breathable paint over well-prepped brick keeps that upkeep low for years.

What is limewash, and how is it different from paint?

Limewash is a lime-based finish that soaks into brick instead of coating the surface. It gives a soft, matte, weathered look and lets the brick breathe. Regular paint sits on top as a solid film, so it offers full color but less of that natural feel.

Can painted brick be undone later?

Not easily, so treat it as a long-term choice. Removing paint from brick is difficult and messy, and it can damage the surface. Because of that, it’s worth picking a color and finish you’ll be happy with for a long time.

Brick Pavers vs Concrete: What Works Best for Outdoor Surfaces

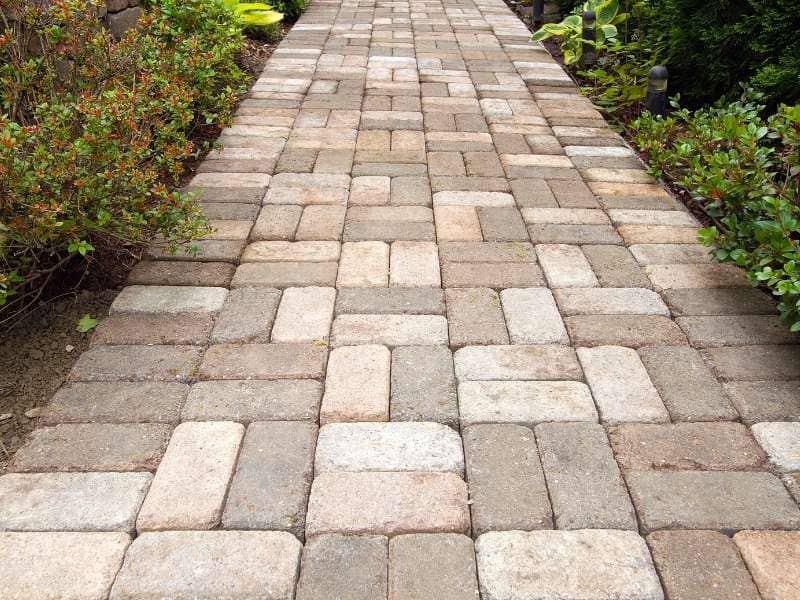
Side-by-side comparison of brick pavers and concrete driveway in a modern residential home showing different outdoor surface options in McKinney, Texas landscape setting.

Choosing between brick pavers and concrete feels simple. Then the first crack shows up. Brick pavers and poured concrete handle weather, movement, and wear in very different ways. That difference shows up years after installation, not on day one. For developers, picking the wrong surface for the site can mean costly repairs long before the warranty ends.

This article breaks down how these two materials differ. It covers stability, drainage, repair, and installation. This way, the choice comes down to facts instead of guesswork.

How Material Structure Impacts Long-Term Surface Movement and Stability

Concrete and brick pavers move in different ways. That’s because they’re built in different ways.

Concrete gets poured as one continuous slab. That single structure has to absorb every bit of ground movement across its whole surface. When soil shifts underneath, concrete has nowhere to flex. It cracks.

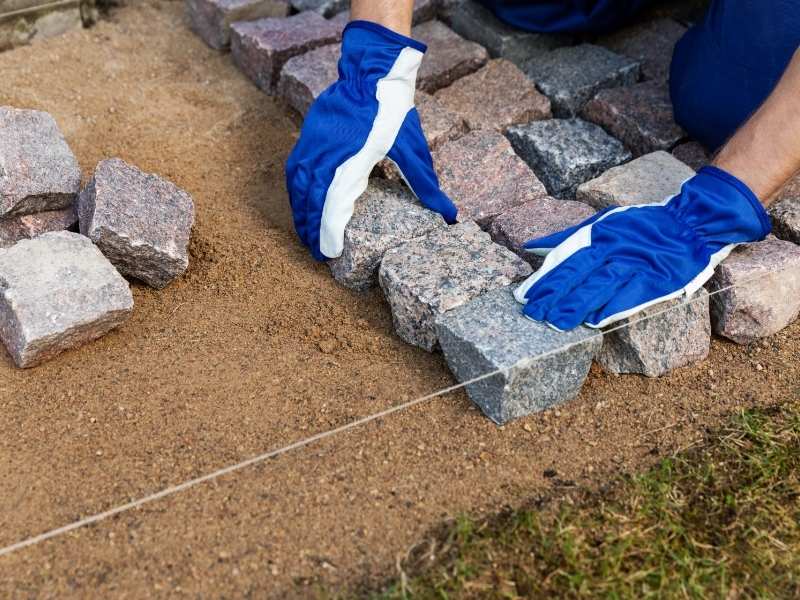
Brick pavers are separate units set in sand over a packed base. That structure changes how movement gets handled:

  • Each paver can shift a little on its own without affecting the ones next to it.
  • Small soil movements spread out across many joints instead of piling up in one spot.
  • A cracked or sunken paver can get lifted and reset without touching the rest of the surface.
  • The whole system stays flexible even as the ground beneath it settles over time.

McKinney has clay soil. This soil expands and shrinks as moisture changes through the year. That kind of shifting ground tends to be much harder on a single concrete slab than on a jointed paver system.

Why Expansion and Contraction Behave Differently in Brick and Concrete

Temperature swings make materials expand and shrink. How each material handles that swing decides whether it cracks or holds up.

Concrete expands and shrinks as one solid piece. Without control joints placed the right way, that movement creates stress points. Those stress points turn into cracks. Even with joints, concrete can still crack in random spots if the joints aren’t spaced right for the slab size.

Brick pavers expand and shrink at the joint level instead of across the whole surface:

  • Sand-filled joints between pavers leave small, natural gaps for movement.
  • No single paver carries the full stress of a temperature swing.
  • Polymeric sand in the joints stays flexible enough to handle seasonal changes without failing.

This difference matters most in places with hot summers and the odd winter freeze. That’s a common pattern across North Texas.

Drainage Performance Differences Between Paver Systems and Solid Slabs

Water acts very differently on a paver surface compared to a solid concrete slab.

A concrete slab blocks water completely. Water has nowhere to go except across the surface toward a drain or the edge of the slab. If the slope is even a little off, water pools right there.

A paver system handles water in a different way:

  1. Joint sand lets some rainwater filter down into the base layer instead of running off completely.
  2. A properly built gravel base beneath the pavers keeps that drainage path going deeper into the ground.
  3. Less water runoff means less strain on nearby drainage systems during heavy rain.
  4. Pooling happens less, even on a surface with a small slope, because some water drains straight down instead of only sideways.

Solid concrete slabs depend completely on surface grading to manage water. Get that grading wrong, and there’s no backup drainage path to help.

Repair Flexibility: Why Brick Pavers Are Easier to Maintain Than Concrete

Repairs show the biggest difference between these two materials.

Concrete repair options are limited:

  • Cracks can get filled, but the repair usually shows and doesn’t bring back full strength.
  • A damaged section often needs cutting out and repouring. This rarely matches the color or texture of the rest of the slab.
  • Full slab replacement is sometimes the only real fix for serious damage.

Brick paver repair works in a different way:

  • Damaged pavers can get pulled out and replaced one at a time, without disturbing the rest of the surface.
  • Sunken spots can get lifted, the base fixed, and the pavers set back in place.
  • Repairs blend into the surface much better, since the material and pattern already match.

For a property that needs to stay in good shape for many years, this repair flexibility often matters more than a small difference in upfront cost.

How Installation Methods Influence Lifespan and Surface Failure Risk

Both materials can last decades. Both can also fail early if installed poorly.

Concrete lifespan depends a lot on:

  • Proper base prep and packing before the pour.
  • The right concrete mix for the local climate and expected load.
  • Control joints placed at the right spacing to manage cracking.

Brick paver lifespan depends on:

  • A properly packed gravel base, usually four to six inches deep.
  • A leveling layer of coarse sand under the pavers.
  • Edge restraints that keep the outer pavers from shifting outward over time.

Both systems fail early when installers skip base prep to save time. The difference is that a failing paver system is usually easier and cheaper to fix than a failing concrete slab.

Frequently Asked Questions

Which lasts longer, brick pavers or concrete?

Both brick pavers and concrete can last several decades when properly installed. However, brick pavers often perform better in areas with shifting or expansive soil conditions.

Is concrete cheaper than brick pavers?

Concrete usually has a lower upfront cost. However, brick pavers can offset that difference over time due to lower repair costs and easier long-term maintenance.

Can cracked concrete be repaired to look like new?

Not usually. Concrete repairs are often visible because it is difficult to perfectly match the original color and texture once the slab has cured and aged.

Do brick pavers require more maintenance than concrete?

Brick pavers may require occasional joint sand refilling, but they generally need less major repair work over time compared to concrete surfaces.

Which option handles heavy rain better?

Brick paver systems typically handle heavy rain more effectively because joint sand and the gravel base allow some water infiltration instead of relying solely on surface runoff.

How Stone Patios Improve Drainage and Yard Performance

A patio isn’t just a place to put a table and chairs. It can fix or ruin how water moves across a yard. Stone patios, when built right, pull double duty. They give homeowners outdoor space and solve drainage problems at the same time. This matters more than it looks. Poor drainage under a patio can lead to foundation issues and soggy yards years down the road.

How Stone Patio Systems Redirect Water Flow Without Pooling Issues

Water needs somewhere to go. A well-built stone patio gives it a clear path instead of letting it sit and pool.

Here’s how a good patio system handles water flow:

  • The patio surface slopes slightly away from the house, guiding water toward a safe drainage point.
  • Joint spacing between stones lets some water pass through instead of running off in one direction.
  • Edge restraints keep the stone base from shifting, which would otherwise create low spots where water collects.
  • Drainage channels or French drains, when needed, catch excess water before it reaches the patio surface.

A flat patio with no slope is one of the most common causes of standing water. Even a small grade, often just a couple percent, makes a real difference over time.

The Hidden Role of Permeable Joints in Patio Drainage Performance

Most people focus on the stone. Few think about the joints between them. But those small gaps do a lot of work.

Permeable joints matter because:

  • They let rainwater soak into the ground instead of running off across the whole yard at once.
  • They reduce the load on nearby drainage systems during heavy storms.
  • They lower the risk of ice buildup on the surface in colder months, since less water sits on top.
  • They help the patio base stay properly hydrated, which can reduce shifting caused by dry, cracked soil underneath.

Joint material matters too. Polymeric sand, for example, hardens enough to resist weeds but still allows some water through. A fully sealed joint blocks drainage entirely and pushes more water onto the surrounding yard.

Why Proper Base Layers Matter More Than the Stone Surface Itself

The stone gets all the attention. The base underneath does most of the actual work.

A solid base includes:

  1. A compacted layer of crushed gravel, usually four to six inches deep, that allows water to drain through instead of pooling.
  2. A layer of coarse sand on top of the gravel, which helps level the stones and adds another draining layer.
  3. Proper compaction at each stage, since loose material settles unevenly and creates dips over time.
  4. A geotextile fabric layer in some cases, which keeps soil from mixing into the gravel base and clogging its drainage ability.

Skipping any of these layers, or rushing the compaction process, tends to show up within a year or two as uneven settling. Once that happens, low spots start collecting water no matter how well the stone itself was laid.

How Stone Patios Reduce Soil Erosion During Heavy Rainfall Events

Bare soil erodes fast during heavy rain. A properly installed stone patio slows that process down significantly.

Ways a stone patio helps control erosion:

  • It covers exposed soil, reducing the direct impact of heavy rainfall hitting bare ground.
  • It slows water velocity as it moves across the surface, compared to water rushing over open dirt.
  • It directs water to designated drainage points instead of letting it carve random paths through a yard.
  • It reduces mud and sediment runoff into nearby storm drains or neighboring properties.

McKinney sees heavy, fast-moving storms during parts of the year. A patio system designed with erosion control in mind holds up far better than a flat concrete slab with no drainage planning behind it.

The Connection Between Patio Grading and Long-Term Yard Stability

Grading isn’t just about the patio. It affects the whole yard around it.

Here’s why grading matters long term:

  • Water directed away from a patio still has to go somewhere, so overall yard grading needs to account for that flow.
  • Poor grading near a patio can undermine soil stability, leading to settling or shifting years after installation.
  • Consistent grading across the yard prevents new low spots from forming once the patio changes how water naturally moves.
  • Proper grading protects nearby foundations by keeping water from pooling too close to the house.

A patio built without considering the yard’s overall grade often just moves the drainage problem somewhere else instead of actually solving it.

Frequently Asked Questions

Can a stone patio actually prevent yard flooding?

A well-designed stone patio with proper grading and permeable joints can significantly reduce standing water, though severe drainage issues may still require additional solutions such as French drains.

How much slope does a patio need for proper drainage?

Most patios require a slope of about one to two percent away from the structure. This is enough to move water effectively without creating a noticeable incline underfoot.

Do permeable joints require more maintenance than sealed surfaces?

Permeable joints may need occasional replenishment with polymeric sand over time, but they generally help reduce broader drainage issues, which can offset the maintenance requirement.

What happens if the base layer is not properly compacted?

Poor compaction often leads to uneven settling within one to two years, creating low spots where water can collect on the patio surface.

Is a stone patio a good solution for yards with erosion problems?

Yes. When properly designed with grading and drainage in mind, stone patios can help reduce erosion by protecting exposed soil and guiding water flow.

Fireplace Repair Tips for Older Masonry Fireplaces

Fireplace repair on an older masonry fireplace with a mason replacing firebrick using heat-resistant mortar to preserve the original structure.

An older masonry fireplace carries charm that newer models can’t match, but age brings its own repair needs. Decades of fires, weather and settling slowly wear down the brick and mortar inside. Fireplace repair on an older unit calls for a gentler touch than a modern one. The materials are different. The wear runs deeper, and the safety stakes are higher. Knowing what an old fireplace needs keeps it both beautiful and safe to use.

Here’s how to care for an older fireplace the right way.

Why Older Fireboxes Need Gentle Care

The firebox, where the fire actually burns, takes the hardest beating in any fireplace. In an older home, that firebox has weathered thousands of fires. Its brick and mortar are often tired and brittle. Heavy-handed repair can crack fragile old brick that still has years left in it.

Age changes how the firebox should be handled. A mason working on an old firebox moves carefully. The aim is to clear damaged spots without shaking loose the sound brick nearby. Aggressive scraping or modern power tools can do more harm than good here.

The goal is to repair only what needs it. Replacing a single cracked firebrick or repointing a few joints often restores an old firebox without a full rebuild. Saving the original material keeps the fireplace true to its age.

Match Old Firebrick and Use the Right Mortar

The materials inside a firebox matter more than many people realize. A firebox should be repaired with firebrick and refractory mortar. This special mix is built to survive the heat of a fire. Fires can push a firebox well past 1,000 degrees. Ordinary mortar simply can’t handle that.

This is a common trap with older fireplaces. Many were built long ago with standard mortar, before the heat-resistant kind was common. So old repairs may already be failing. Patching an old firebox with regular cement mortar repeats that mistake and won’t last.

Matching the brick counts too. A mason looks for firebrick close in size and color to the original, so a repair blends in instead of standing out. The right materials keep an old firebox both safe and true to its look.

Know When an Old Flue Needs Relining

The flue is the passage that carries smoke up the chimney. In older homes it’s often the weak link. Many old chimneys have clay tile liners that crack with age. Some very old ones have no liner at all. A damaged or missing liner is a real safety problem, not just a repair item.

A cracked flue lets heat and sparks reach the wood framing around the chimney. It can also let smoke and dangerous gases leak into the home instead of venting outside. These risks make the flue worth a careful professional check on any older fireplace.

When a liner is failing, relining restores safe venting. A mason or chimney pro fits a new liner inside the chimney to seal the passage again. This repair is one of the most important an older fireplace can get.

Preserve the Original Look

Part of repairing an older fireplace is protecting what makes it special. The original brick, the worn hearth and the mantel are often the heart of a room’s character. A careful repair keeps these features rather than tearing them out for something new.

Matching is the key to invisible work. A mason blends new mortar and brick to match the old. That way a repair doesn’t leave an obvious patch. The way the joints are tooled should copy the original style too.

Restraint protects character as well. Cleaning gently, repairing only what’s damaged and leaving sound original material in place all keep the fireplace looking like itself. The best repair is one nobody can spot.

Know When an Older Fireplace Is Safe to Use

With an old fireplace, safety comes before looks. Before lighting a fire each season, give an older unit a close look. Problems can grow quietly over the years. A few warning signs mean the fireplace shouldn’t be used until a pro repairs it.

  • Crumbling or missing mortar in the firebox, which leaves gaps where heat can reach the wall framing.
  • Cracked or badly spalling firebrick, a sign the firebox can no longer contain the fire safely.
  • A cracked flue or chimney liner, which can let heat, sparks or gases escape into the home.
  • Smoke backing into the room, which often means the flue is blocked or damaged.

When in doubt, get a professional inspection. Fireplace and chimney experts recommend a check at least once a year. That matters even more on an aging fireplace. A quick inspection is a small price for knowing the fire stays where it belongs.

Frequently Asked Questions

What are common signs an older fireplace needs repair?

Look for crumbling mortar in the firebox, cracked or spalling firebrick and gaps in the joints. Smoke pushing into the room or a cracked flue are more serious signs that need quick attention. On an older unit, any of these is worth a professional look before you light a fire.

Why does an old firebox need special mortar?

The firebox faces extreme heat that ordinary mortar can’t survive. It needs refractory mortar, a heat-resistant mix made to handle the repeated heating and cooling of a fire. Many old fireplaces were built with standard mortar, which is why their fireboxes often need repair.

What does it mean to reline a chimney?

Relining means fitting a new liner inside an existing chimney to restore safe venting. Older chimneys often have cracked clay tiles or no liner at all, which can let heat and gases escape. A new liner seals the passage so smoke exits safely up and out.

Can old fireplace brick be repaired without replacing it?

Yes, much of the time the original brick can stay. A mason can replace a single cracked firebrick or repoint worn joints while leaving sound brick in place. Saving original material keeps the fireplace safe while protecting its older character.

When should I stop using an older fireplace?

Stop using it if you see crumbling firebox mortar, a cracked flue or smoke entering the room. These point to heat or gases possibly reaching places they shouldn’t. Have it inspected and repaired before lighting another fire, since safety comes first with an aging fireplace.

How a Brickmason Solves Complex Masonry Challenges

Brickmason repairing a damaged brick chimney on scaffolding using professional masonry techniques to solve complex masonry challenges.

Most masonry jobs are straightforward, but some are anything but. A bulging wall, a cracked chimney high off the ground or a custom build can stump anyone but a brickmason who has seen it all. These harder jobs are where real skill shows, since there’s no standard fix to copy. A seasoned brickmason reads the situation, weighs the options and solves the problem without creating new ones. That judgment is what sets complex work apart from routine bricklaying.

Diagnose the Real Problem First

The hardest part of a tough masonry job is often finding the true cause. Cracks, leaning and crumbling are symptoms, not the disease. Treating the symptom alone wastes money. A skilled brickmason reads the pattern of damage to trace it back to the source.

Different cracks tell different stories. Stair-step cracks through the mortar joints often point to foundation movement. Vertical cracks can signal overloading or settling. A bulge in a wall usually means moisture has gotten behind the brick and pushed it outward.

Finding the root cause shapes the whole repair. If water is the culprit, fixing drainage comes before any new brick goes up. A mason who skips this step ends up repairing the same wall again a year later.

Reach Difficult Spots Safely

Some of the toughest masonry sits in the hardest places to reach. Chimneys rise high above the roofline, tall walls climb past easy ladder height, and tight corners leave little room to work. Reaching these areas safely is a skill of its own.

A professional plans access before the repair begins. Proper scaffolding or staging gives a stable place to work, which matters more the higher the job goes. Rushing this setup is how accidents and sloppy work happen.

Height also changes how the work gets done. Materials have to be hauled up safely, and mortar has to be mixed and used before it sets in the open air. An experienced brickmason manages all of this so the repair up high matches the quality of work down low.

Stabilize and Rebuild Failing Walls

When a wall is already failing, the fix is bigger than swapping a few bricks. A section that bulges, leans or crumbles may need partial tear-down and rebuilding to make it sound again. This is delicate work, since the rest of the structure has to stay supported throughout.

A careful brickmason braces the surrounding masonry before removing the damaged part. Taking out a failing section without support can bring down more than intended. Temporary shoring holds everything in place until the new brick is laid and cured.

Rebuilding then restores both strength and looks. The mason ties the new section firmly into the sound brick around it, so the wall acts as one piece again. Done right, the repaired area carries its share of the load just like the original.

Build Custom Masonry Features

Custom work is where masonry turns from repair into craft. Arches over doorways, curved garden walls, columns and detailed steps all demand planning that standard straight walls don’t. There’s no kit for these, so the mason works them out by hand.

An arch is a good example. It needs a temporary form to hold its shape while the brick is laid. The bricks have to be cut and angled so they lock together under their own weight. Get the geometry wrong and the arch won’t stand.

Curves and columns bring their own puzzles. A curved wall takes careful brick spacing so the bend looks smooth rather than jagged. This kind of work rewards a mason who plans every course before lifting a trowel.

Reinforce Masonry for the Long Haul

Solving a complex problem means making sure it doesn’t come back. After a major repair, a good brickmason fixes the weaknesses that caused the trouble. That often means more than just new brick and mortar.

A few reinforcements make a lasting difference.

  • Steel lintels or proper arches over openings, which carry the weight that otherwise cracks unsupported brick above doors and windows.
  • Wall ties that lock the brick to the structure behind it, keeping a wall from bulging or pulling away.
  • Weep holes and flashing that give trapped water a way out before it damages the brick.

These additions tackle the root causes rather than the symptoms. A wall that’s properly supported and drained holds its shape far longer. The mark of strong work is a repair that simply lasts.

Frequently Asked Questions

How does a brickmason find the cause of a masonry problem?

A mason studies the pattern of damage, since different cracks point to different causes. Stair-step cracks often mean foundation movement, while a bulging wall usually signals trapped water. Tracing the symptom to its source is what makes the repair last instead of returning.

Can serious cracks or bulging walls be repaired?

Yes, though serious damage often needs more than a patch. A mason may brace the area, remove the failing section and rebuild it tied into the sound brick around it. The key is fixing the underlying cause so the same damage doesn’t come back.

How do masons safely work on chimneys and tall walls?

They set up proper scaffolding or staging to create a stable place to work at height. Safe access matters as much as the masonry itself, since rushed setups lead to accidents and sloppy results. Good planning lets the work up high match the quality down low.

Can a brickmason build custom shapes like arches?

Yes, custom features such as arches, curves and columns are part of skilled masonry. An arch needs a temporary form and carefully cut brick so the pieces lock together and hold. This kind of work takes planning and a steady, experienced hand.

What makes a complex masonry repair last?

Lasting repairs fix the cause, not just the visible damage. Adding support over openings, tying walls to the structure and improving drainage all keep problems from returning. A repair built on solid diagnosis and reinforcement holds up for years.

Brick Mailbox Upgrades That Make a Strong First Impression

Brick mailbox with a classic design, stone cap, black mailbox insert, and landscaped curb enhancing the home's first impression and curb appeal.

Your mailbox sits at the curb, where every visitor and passerby sees it first. A brick mailbox turns that small spot into a feature instead of an afterthought. Built and finished well, it adds a touch of permanence and curb appeal that a plain metal post can’t match. A few smart upgrades can make it both good-looking and genuinely useful. The trick is balancing looks, function and durability so the mailbox works as hard as it looks good.

Choose a Design That Fits Your Home

A brick mailbox looks best when it echoes the house behind it. Pull the brick color and style from the home itself, so the mailbox reads as part of the property rather than a random add-on. A red-brick house pairs naturally with a matching red mailbox, while a stone or painted home might call for a softer blend.

Scale matters at the curb. A tall, bulky mailbox can overwhelm a modest house, while a too-small one gets lost in front of a large one. Aim for a size that feels balanced from the street, where most people will see it.

Shape sets the tone too. A simple rectangular column feels classic and clean, while a wider base with a planter or cap adds a bit more presence. Match that shape to your home’s overall style, whether traditional or modern.

Add Helpful Features

A brick mailbox can do more than hold the mail. Building in a few practical features turns it into a small hub for the front of your home. The best upgrades blend into the brick so the mailbox stays clean and uncluttered.

  • House numbers set into or mounted on the brick, which make your home easy to find for guests and deliveries.
  • A newspaper holder built into the base, so papers stay dry and up off the ground.
  • A larger mailbox insert, which handles packages and heavy mail days far better than a standard box.
  • A small light or solar cap on top, which adds visibility and a touch of charm after dark.

Pick the features you’ll actually use rather than adding every option. One or two well-placed extras keep the mailbox useful without making it look busy. The goal is help, not clutter.

Build on a Strong Base

A brick mailbox is heavy, so it needs a solid base to stay straight for years. Without a proper footing, the structure can settle, tilt or crack as the ground shifts beneath it. A leaning mailbox is the clearest sign the base was skipped or rushed.

The footing should reach below the frost line in cold areas. When water in the soil freezes and thaws, it heaves the ground, and a shallow base rides that movement. A deeper, concrete footing keeps the mailbox anchored through the seasons.

Level matters from the start. A mason sets the base flat and square before laying the first brick, since any lean only grows as the column rises. Getting the foundation right is what separates a mailbox that lasts from one that topples.

Keep the Design Simple

With a small structure like a mailbox, simple almost always wins. Clean brick lines and a tidy cap look sharp and timeless, while too many add-ons make a small column feel cluttered. Restraint is what gives a brick mailbox its quiet, finished look.

Let the brickwork itself be the main feature. Even spacing, neat joints and a consistent color do more for the look than fancy trim or mixed materials. A well-built plain column beats a busy, over-decorated one every time.

Pick one accent at most, not several. A single contrasting cap or a soft arch over the box adds interest without tipping into clutter. Simple choices age better and keep the focus on solid, clean work.

Care for Your Brick Mailbox

A brick mailbox sits out in the weather and traffic, so a little care keeps it sharp. Road dust, splashed mud and the odd bump from a passing car all take a toll over time. A rinse with water and a soft brush handles most of the grime.

Check the mortar joints once or twice a year. Roadside mailboxes face splashing water and, in some areas, road salt, both of which wear mortar faster than a sheltered wall. Catching a crumbling joint early means a quick repoint instead of a rebuild.

Handle small damage before it spreads. A loose brick or a hairline crack is simple to fix when it’s small, but weather and passing traffic will widen it if ignored. A quick repair now keeps the mailbox standing straight and looking its best.

Frequently Asked Questions

Why is a brick mailbox a good choice?

A brick mailbox is sturdy, low-maintenance and adds real curb appeal. It stands up to weather and time far better than a metal post, and it ties the front of your property together. Built well, it can last for decades with only occasional care.

Can I add house numbers to a brick mailbox?

Yes, and house numbers are one of the most useful upgrades. You can set numbers into the mortar, mount them on a brick face or add a small plaque. Clear numbers help guests and delivery drivers find your home quickly.

How do I clean a brick mailbox?

A rinse with water and a scrub with a soft brush removes most road dust and grime. For tougher spots, a mild cleaner made for masonry works without harming the brick. Skip harsh acids and strong pressure washers, which can wear the surface and mortar.

What causes a brick mailbox to lean?

Most leaning traces back to a weak or shallow base. When the footing doesn’t reach below the frost line, freezing and thawing ground pushes the structure out of plumb. A solid, deep foundation is the best way to keep a mailbox standing straight.

How long can a brick mailbox last?

A well-built brick mailbox can last for decades with basic care. The brick itself holds up for a very long time, while the mortar may need a small repair now and then. Keeping the base solid and the joints sound is what carries it through the years.

Welcome to McKinney Brick & Stone

McKinney Brick & Stone specializes in stone masonry and brick masonry construction. Our expertise in masonry covers brickwork, block work, stonework, and all sorts of related products and applications. We serve the City of McKinney and the surrounding North Texas communities.

Call us at (469) 947-7793 to discuss your project.

What is Masonry Work?

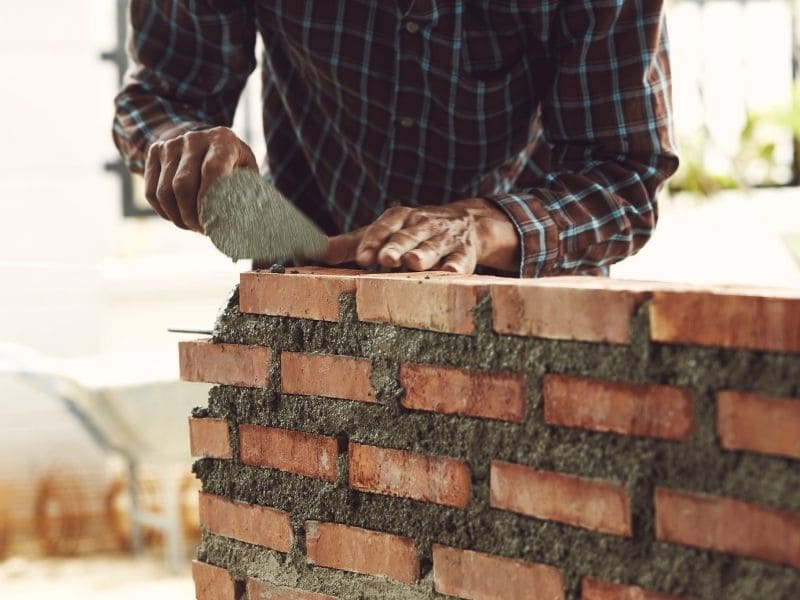
Seamless Masonry Stone WallsMasonry is building structures from individual units, which are often laid in and bound together by mortar. Common materials of masonry construction are brick, natural stone (such as marble, granite, travertine, and limestone,) cast stone, concrete block, stucco, tile, and glass block. Masonry is a highly durable form of construction.

The strength and durability of masonry are affected by the materials used, the quality of the mortar, the workmanship, and the pattern in which they are assembled. A person who constructs masonry is called a mason, a brick mason, stone mason, or bricklayer.

Applications of Masonry

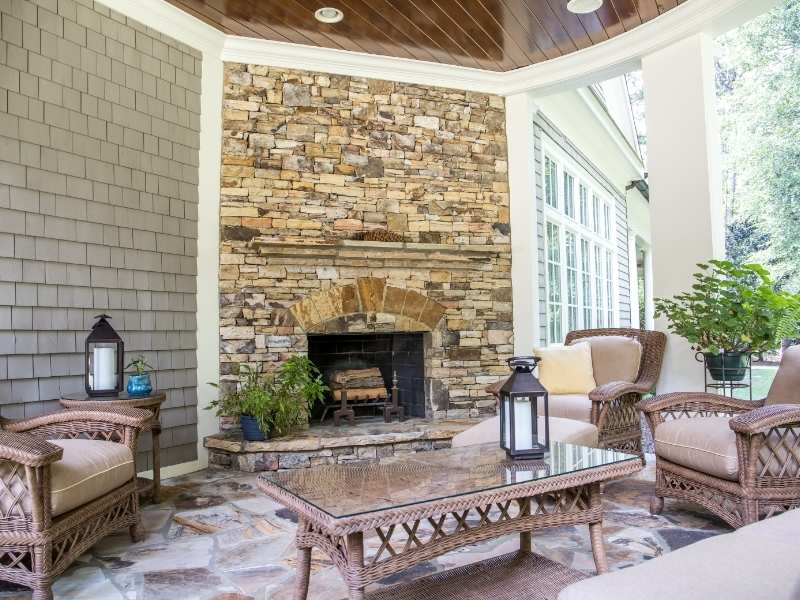
brick stone wall landscapingMasonry is commonly used for walls and buildings, either inside or outside. Brick and concrete block are the most common types of masonry in use and may be either weight-bearing or a veneer.  Stone, both natural and man-made, is being used more and more for decorative features inside, outside and in backyards. Patios, outdoor kitchens, outdoor fireplaces, fire pits, decorative walls, decking, retaining walls, landscaping or hardscaping, and lots of other amenity applications are common place now. Natural stone masonry can provide very aesthetically pleasing projects.

Advantages of Brick or Stone in Building

  • Bricks and stone masonry increases the thermal mass of a building
  • Brick and stone masonry is non-combustible and provides fire protection
  • Brick and stone masonry walls are more resistant to projectiles, such as debris from hurricanes or tornadoes.
  • Brick and stone masonry weathers well and needs much less maintenance over time than other natural materials.
  • No painting is necessary for brick or stone. Color and finish selections are almost endless.
  • Brick and stone masonry typically lasts longer than wood products
  • Brick and stone masonry has higher compressive strength compared to wood and other natural products.
  • Brick and blockwork walls provide excellent sound insulation.
  • Stone does not warp, swell, bend, splinter, or dent.
  • Brick and stone are versatile in their aesthetic appeal and can work well with other construction materials.
  • Use of brick and stone signals a strong sense of permanence and longevity.

Call McKinney Brick & Stone at (469) 947-7793 for a free quote on your brick or stone masonry project. Or, fill out the contact form to the right.