Planning Masonry Movement for Large Exterior Features and Custom Designs

A large stone chimney or sweeping exterior brickwork makes a strong first impression. These custom features anchor a home and set it apart. What many owners do not see is that all that masonry moves.

Brick and stone expand and shrink with heat, cold, and moisture. The ground beneath them shifts too. On a big feature, those tiny movements add up across a long span. Without a plan to handle them, the masonry cracks, and those cracks are hard to hide or fix.

Large custom masonry needs a movement plan before it is built. Movement planning means building in spots that allow for natural material movement as the masonry expands, shrinks, and settles without cracking. The sections below explain why it matters, where the joints go, and what to review before construction.

Why Large Masonry Features Need Movement Planning
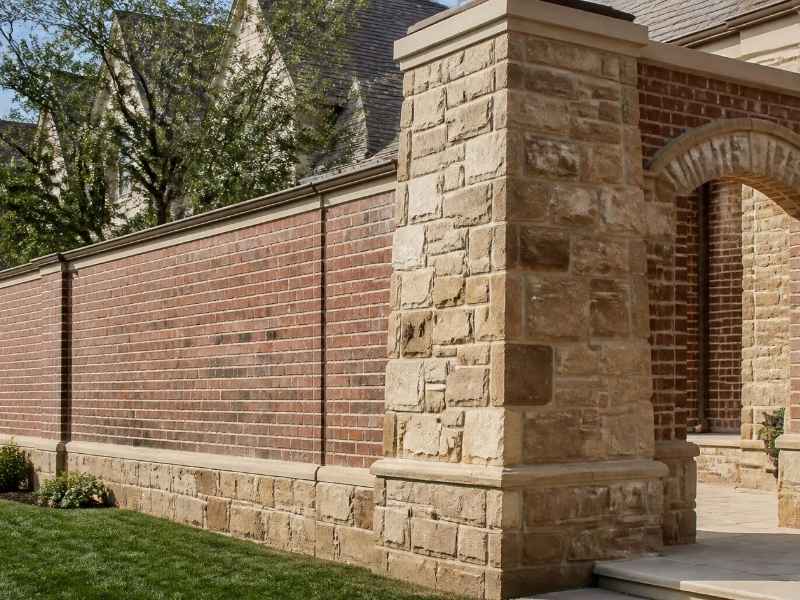
Movement joints incorporated into a large custom brick and stone exterior in McKinney, Texas.

All masonry moves a little, even when it looks rock solid. Brick expands as it takes on moisture over the years. Stone and mortar swell in heat and contract in cold, and long-term mortar performance can influence how well those movements are accommodated. These shifts are small, but they never fully stop.

Size is what turns small movement into a big problem. A short wall barely feels it. A long wall or a tall feature stretches that movement across many feet. The forces build until something has to give, and that something is usually a crack.

Texas weather adds pressure. The Dallas area swings from hot summers to freezing snaps, and that cycle works the masonry hard. Local clay soil shifts with moisture too, moving whatever sits on it. A movement plan gives all that force somewhere to go.

Locating Control Joints in Custom Masonry Designs

The main tool for managing movement is the control joint. A control joint is a planned gap that lets masonry expand and contract without cracking. It gives the wall a place to move on purpose.

These joints have to be placed with care in custom work. A mason plans them at points where stress tends to build. Common spots include long runs of wall, changes in height, and openings like windows or gaps. Placing joints at these points relieves the pressure before a crack forms.

In custom designs, the joints also have to respect the look. A good mason hides or blends them into the pattern of the brick or stone. Key places a mason considers include:

  • Long, uninterrupted wall sections
  • Changes in wall height or thickness
  • Corners and intersections
  • Around large openings
  • Where new masonry meets existing work

Careful placement keeps the feature both sound and good-looking.

Coordinating Masonry Movement With Foundations and Site Conditions

Masonry does not move on its own. What sits below it matters just as much. The foundation and the soil shape how a feature moves over time.

A large masonry feature needs a foundation built to carry it. If the base settles unevenly, the masonry above it cracks. This is a real concern on the clay-heavy soil common around McKinney. That soil swells when wet and shrinks when dry, pulling on anything it supports.

Good planning ties the masonry to the site conditions. A mason works with the foundation design so the two move together. For very large or complex features, a structural engineer may be involved. Foundation and soil needs can vary by site, so confirm what your project requires early.

Allowing Different Materials to Move Independently

Custom features often combine materials. A design might mix brick, stone, concrete, and steel in one structure. Each of these moves at its own rate.

That difference matters. Brick, stone, and metal all expand and contract by different amounts. When they are locked tightly together, one material can pull or push against another. That stress leads to cracks where the materials meet.

A good movement plan lets each material move on its own. Masons use flexible ties, gaps, and joints to separate materials where needed. This gives brick room to move against stone or steel without damage. Planning these connections up front keeps a mixed-material feature intact.

Reviewing Movement Details Before Construction Begins

The best time to catch a movement problem is before any masonry goes up. Once the feature is built, adding a joint means cutting into finished work. A review at the start avoids that.

The plan should show where every control joint and flexible connection goes. A mason walks through these details with the design before building. This is also the time to confirm the foundation and material connections. Catching a gap on paper is simple, while fixing it in finished masonry is not.

This review protects a big investment. Movement planning is what keeps a custom feature crack-free for years. Ask your mason to confirm the movement details before construction starts. If the design is large or complex, involve a structural engineer early.

Frequently Asked Questions

Why does masonry need movement planning?

Brick, stone, and mortar expand and contract with heat, cold, and moisture. The ground beneath them shifts as well. On large features, these small movements build into forces that crack the masonry. Movement planning gives those forces a safe place to go.

What is a control joint in masonry?

A control joint is a planned gap that lets masonry move without cracking. It gives the wall room to expand and contract on purpose. Masons place these joints where stress tends to build, such as long walls or openings. In custom work, the joints are blended into the design.

Where do control joints go in a custom feature?

They go where movement forces concentrate in the structure. Common spots include long wall runs, height changes, corners, and large openings. A mason also places them where new masonry meets existing work. Careful placement relieves stress before a crack can form.

Can soil affect my masonry feature?

Yes, the soil below a feature strongly affects how it moves. Clay-heavy soil, common around McKinney, swells when wet and shrinks when dry. That movement pulls on the foundation and the masonry above it. A solid foundation and a good movement plan help resist it.

Do I need an engineer for large custom masonry?

For big or complex features, a structural engineer is often a smart step. They help with foundation design and how the structure handles movement. A skilled mason handles the joints and material connections. Involving both early helps a large feature last without cracking.

Common Questions Homeowners Ask Before Starting Masonry Projects

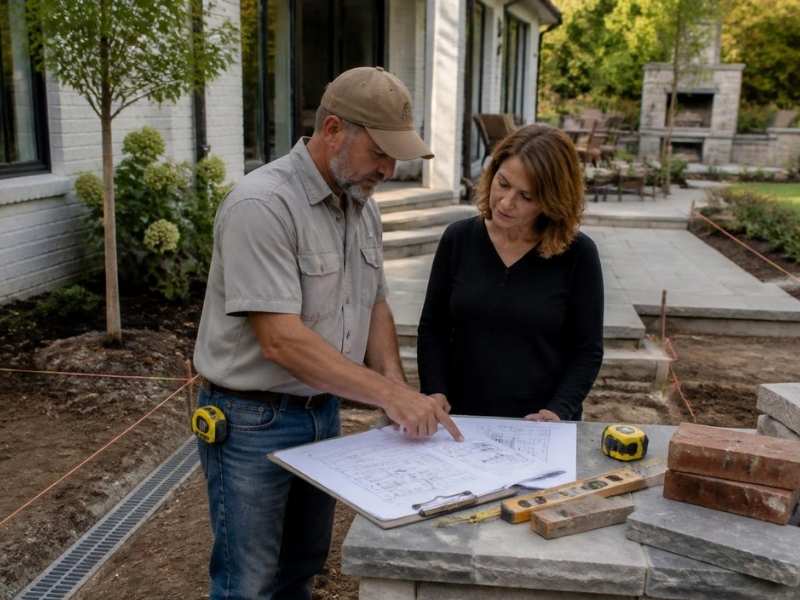
Masonry project planning in McKinney TX showing brick and stone construction preparation before starting residential improvements

A new brick wall or stone patio can look simple from the outside. You pick a design, hire a crew, and wait for the work to start. But the best masonry projects begin before anyone lifts a trowel. A few checks up front protect your yard, your budget, and your property lines. This guide covers the questions smart homeowners ask first. It also shows where a good masonry contractor and a quick survey fit into the plan.

What Should You Check Before Adding Masonry to a Property?

Start with the basics of your site. Look at where the new work will sit and what’s already there. Check the slope of the yard, the spot where water runs after rain, and how close the project is to your property edge. These small details shape the whole plan.

Next, think about permits and local rules. Some masonry work needs a permit, and some doesn’t. This can change by city, county, and project type, so confirm the rules early. A masonry contractor who works in your area often knows what the local office will ask for.

Also check the ground itself. Soft soil, old fill, or buried pipes can all change a design. Fixing a surprise after the crew starts costs far more than a short review now. A little planning at this stage keeps the rest of the job smooth.

How Existing Walls and Foundations Affect New Masonry Work

New masonry often ties into something old. A patio may meet the house. A new wall may sit right next to an old one. When that happens, the old structure matters as much as the new one.

Check the shape your current walls are in first. Look for cracks, leaning, or spots where the mortar has washed out. Older structures can present masonry challenges that need to be addressed before new work connects to the existing feature. If the old wall is weak, adding weight or load to it can make things worse. A masonry contractor should test how sound the base is before building on it or beside it.

Foundations need the same care. A footing that’s too shallow can shift with the seasons. Ground that freezes and thaws can push masonry up and crack it over time. Good footing depth and a stable base keep the finished work straight for years.

When Drainage and Grading Become Part of the Masonry Plan

Water is the main enemy of masonry. If water pools against brick or stone, it soaks in, freezes, and breaks the surface apart. So the way your yard sheds water is part of the plan, not an afterthought.

Grading is the slope of the land. It should carry water away from the house and away from any new walls or patios. When a patio sits in a low spot, it can trap water and stay wet for days. A masonry contractor may add a slight slope, a gravel base, or a drain to move that water out.

This is where a topographic survey can help. It maps the high and low points of your land so the design works with the flow, not against it. Getting the grade right the first time saves you from tearing up finished work later.

What Property Lines and Easements Can Mean for Masonry Projects

Many masonry projects sit near the edge of a lot. A wall, a fence footing, or a mailbox can end up close to a line you can’t see. If it crosses onto a neighbor’s land, you may have to move it. That’s a costly mistake to make after the mortar sets.

An easement is a strip of land that others have a right to use. Utility crews, the city, or a neighbor may hold one on your property. You often can’t build a permanent structure on top of it. Records for these rights can vary by parcel, so check them before you lock in a design.

Knowing where your lines and easements fall protects the whole project. It also helps your masonry contractor place the work in a safe, legal spot. That one step keeps the finished build right where it belongs.

When a Survey Can Help Before Construction Begins

A survey answers the questions guesswork. It shows your true property lines, your easements, and the lay of the land. For work near a boundary or on a sloped lot, that information is worth having early.

You don’t need a survey for every small job. A repair or a patio in the middle of a large yard may not call for one. But when the project sits near a line, ties to a permit, or rests on a tricky grade, a survey removes the doubt. Confirm what you need early, since timing, permits, and closing dates can all depend on it.

Share the survey with your masonry contractor before the design is final. Clear lines and a solid plan work together to keep the build on track. It’s a simple handoff that prevents big problems down the road.

Frequently Asked Questions

Do I always need a permit for masonry work?

Not always, and it depends on the job. Small repairs often need no permit, while walls, large patios, and structures near a line may. Permit rules can vary by city, county, and project type. Ask your local office or your masonry contractor before you start so you’re not caught off guard.

How close to my property line can I build a wall?

That distance is set by local setback rules, and it can change from place to place. Some areas allow a low wall near the edge, while others require a gap. A survey shows where your true line sits, which keeps the wall on your land. Confirm both the line and the local rule before the design is set.

Can bad drainage really damage new masonry?

Yes, and it’s one of the most common causes of early failure. Water that sits against brick or stone soaks in and breaks the surface as it freezes and thaws. Good grading and a solid base move that water away from the work. A masonry contractor should plan for drainage before the first block is laid.

How to Create a Cohesive Look Between Landscaping and Masonry Elements

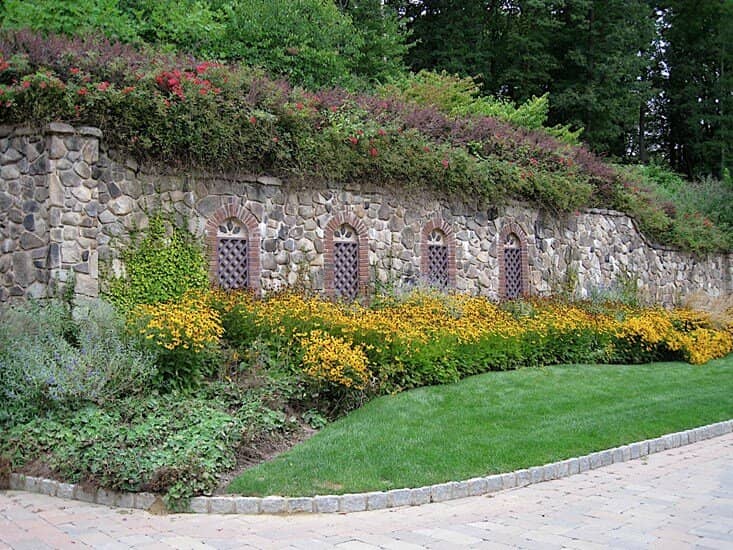
Landscaped residential yard with mature greenery surrounding a brick and stone home and walkway

Good landscape design can make brick and stone look like they belong. A front yard with new plants around an older brick porch can feel calm or feel busy. The difference often comes down to how the plants sit next to the masonry. This guide shows how to plan planting around walls, steps and entry features so the whole exterior reads as one look.

Start With the Yard’s Existing Visual Lines

Your home already has strong lines. The front door, the front walk, the foundation edge and any brick or stone you own all set a pattern. Plan your planting around those lines before you pick a single plant.

Walk out to the street and look back at the house. Notice where your eye lands first. That spot is usually the entry or a stone feature near the door. Good landscape design points the eye toward those spots, not away from them.

Then check the other views. Look from the driveway. Look from the front walk. Look out the main windows where you sit each day. Plants that line up with the walkway or match the angle of a low wall make the yard feel planned. Plants dropped in at random fight the lines the house already has.

Keep your focus on where each plant goes, not on the brick or stone itself. The masonry is already in place. Your job is to set greenery so it agrees with it.

Give Plants Enough Room to Frame Masonry, Not Hide It

A plant’s size on planting day is not its real size. Most shrubs, grasses and small trees grow wider and taller over a few years. Give them room now so they frame your brick or stone later, not bury it.

Read the plant tag before you dig. It lists a mature width and height. Set the plant so its grown size still leaves the wall, step or column in view. A stone column looks best with a little space around it. Plants pressed right against it hide the very feature you paid for.

Framing and covering give two different results. A framed feature has plants on the sides or below that lead the eye to it. A covered feature vanishes behind leaves. Aim to frame. Leave the face of a wall or the front of an entry feature open.

Think about the years ahead too. A young bed can look bare at first. Owners often crowd plants to fill that gap. Two seasons later the same bed hides the steps and blocks the path. Room for growth now saves a lot of pruning and moving later.

Use Repetition to Connect Separate Outdoor Areas

Repeating a few plant shapes or textures across the yard ties it together. This is a quieter design trick, and many owners skip it. Pick one or two plants and use them in more than one spot.

Say you have a rounded shrub near the front steps. Plant the same shrub near the side gate and again by the back patio. Your eye follows that shape from area to area. The whole property starts to feel like one design instead of three separate projects.

Do not repeat everything, though. If every bed uses the same plants in the same order, the yard turns flat and dull. Repeat a form or a texture, then let each area keep its own extras. That balance stays connected but still holds interest.

Keep repeating to plants here. The goal is a planting rhythm that carries across the yard. Your brick and stone already have their own pattern, so let the greenery handle this part.

Balance Hard Edges With Softer Plant Forms

Brick and stone have sharp, straight edges. Those edges look strong, which is good. Next to soft plants, they look even better, because the contrast reads on purpose.

A few plant forms work well for softening a hard edge:

  • Low mounding shrubs that spill over a wall base
  • Ornamental grasses that sway beside a straight column
  • Groundcovers that creep up to the edge of a step
  • Spreading perennials that break up a long, flat border

Use plant height and shape to build a gentle step-down. A tall grass, then a mid-size shrub, then a low groundcover eases the eye from a wall down to the lawn. That slope of heights feels natural. A wall that meets bare grass with nothing in between looks abrupt.

Aim for balance, not a list of perfect plants. Any plant with a rounded or loose shape can soften a firm masonry line. The look you want is calm, where the hard and soft parts share the space.

Plan the Landscape for How It Will Look After Several Growing Seasons

A fresh planting bed and a grown one look very different. Good landscape design plans for the grown version. Picture the yard three or four seasons out, not just the day the last plant goes in.

Growth changes the view in ways that are easy to miss. A shrub doubles in width. A vine climbs past a stone accent. A small tree threw shade where there was sun. Plants also shift by season, full in spring and bare in winter, so the same bed can frame a wall in June and open it up in January.

Think about pruning before you plant. Some plants need a trim twice a year to stay in bounds. If you would rather skip that chore, choose slower or smaller plants near your masonry. Watch the spots where growth could cover a detail you like, such as a stone address block or a nice course of brick at the entry.

A yard that looks perfect on install day can feel crowded by its second summer. Plants that framed the porch now hide it. The walk feels narrow. The fix is to plan for grown size from the start.

For homeowners updating a front yard, this last step matters most. Our clay soil and warm summers push growth fast, and McKinney sits in USDA zone 8b, so many plants keep going for much of the year. Plan your landscape design around the grown size of each plant, and your masonry and greenery will still read as one clean look many seasons from now.

Decorative Masonry Features That Add Style Without Changing Structural Design

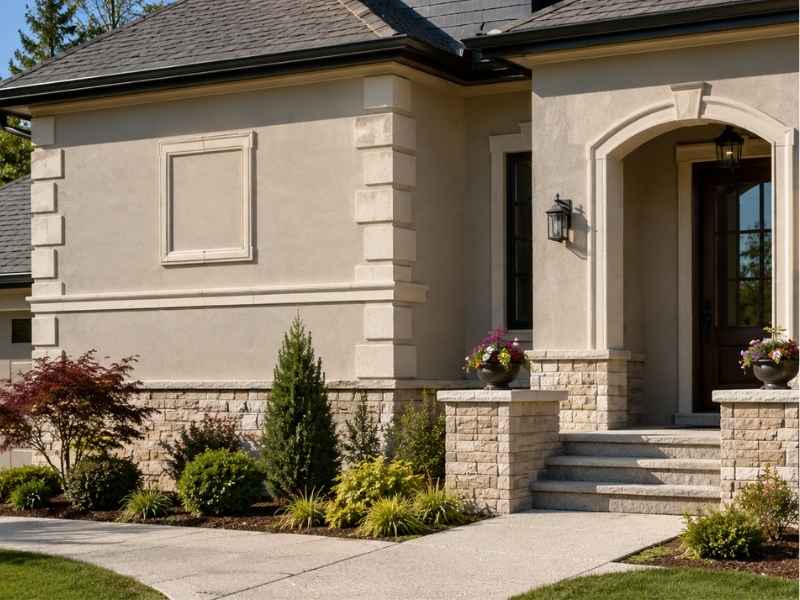
Decorative masonry in McKinney Texas featuring bands, quoins, entry trim, wall caps, and recessed panels that add exterior style.

Not every masonry project means rebuilding a wall. Many homeowners get great results from masonry services that focus only on style, not structure. These features get added onto a wall that’s already there. They give it more character without touching the framework holding the house up. A plain wall can go from flat and forgettable to detailed and sharp with the right touches. Best of all, none of this needs structural changes. It’s about adding style on top of a wall that’s already doing its job.

Add Masonry Bands to Break Up Large Exterior Wall Areas

A big, flat wall can look plain no matter how nice the material is. A narrow, horizontal masonry band gives that wall a visual break. It splits the wall into sections instead of leaving one long, blank surface.

Placement matters a lot here. A band that lines up with a floor level, a window line, or another marker looks planned. One placed at a random height looks like an afterthought. This isn’t about the broader brick patterns already used across a home. It’s a narrow, specific detail added just to break up scale and add interest.

Use Masonry Quoins to Give Exterior Corners More Definition

Quoins are the decorative blocks placed at the outside corners of a building. They do a lot for a home’s overall look. Their size, how far they stick out from the wall, and how they’re spaced all shape how much depth they add to a corner.

None of this needs structural changes or a full decorative stone project. Quoins sit on top of the existing wall as a finishing touch. Done with the right proportions, they can make a plain corner look far more sharp. That gives the whole exterior a stronger, more defined edge.

Frame Entry Openings With Non-Structural Masonry Trim

Trimming around a door, or a set-back entry, can make that spot feel far more finished. This is purely a style choice, not a structural one. It’s meant to frame the entrance and pull the eye toward it, nothing more.

Proportion matters most here. Trim that’s too thick or too thin next to the door throws off the whole look. Getting the end points right, where the trim starts and stops, also keeps the detail looking clean instead of messy. This is strictly about outside framing, not structural beams or brick repair around windows.

Finish Wall Tops and Ledges With Decorative Masonry Caps

Low walls, porch edges, and similar features often look unfinished without a proper cap on top. A decorative cap gives that top edge a clean, complete look instead of leaving it flat or rough.

Getting the size, thickness, and lineup right makes the cap look like it belongs there, not like it was tacked on later. This is separate from retaining walls or mailbox posts, which have their own design needs. Here, the goal is simply finishing off a small wall or ledge with a detail that looks planned.

Introduce Recessed Masonry Panels for Subtle Facade Depth

Sometimes the best style move is a shallow, sunken section built right into the wall. These panels create shadow lines that shift throughout the day as the sun moves. That adds depth to a wall without changing its actual structure.

This works best used here and there, not scattered across every open surface. A large blank wall might do well with one or two of these panels, sized and placed to relate to nearby windows, doors, or other lines on the house. Used with care, recessed panels add real interest without fighting the rest of the home’s look.

Frequently Asked Questions

What are examples of non-structural decorative masonry features? 

Masonry bands, quoins, decorative surrounds, caps, and shallow recessed panels are common examples. Each one is mainly about looks, not about holding up the building.

Can decorative masonry be added without rebuilding an exterior wall? 

Often, yes. Many features can go on as finishes over an existing wall. Still, the wall’s condition, how the new piece attaches, its weight, and other project details need a check first.

What is the difference between decorative masonry and structural masonry? 

Structural masonry helps carry the building’s weight. Decorative masonry is mainly for looks, though it still needs to be put in and supported the right way.

How do homeowners keep decorative masonry from looking excessive? 

Sticking to matching sizes helps a lot. Using a detail here and there, not everywhere, and tying each feature to lines already on the house keeps the look calm instead of busy.

When should decorative masonry details be planned? 

During the design or remodeling planning stage, ideally. Picking sizes, backing, and nearby finishes before work starts makes the whole process go a lot smoother.

Exterior Design Mistakes That Make New Additions Feel Out of Place

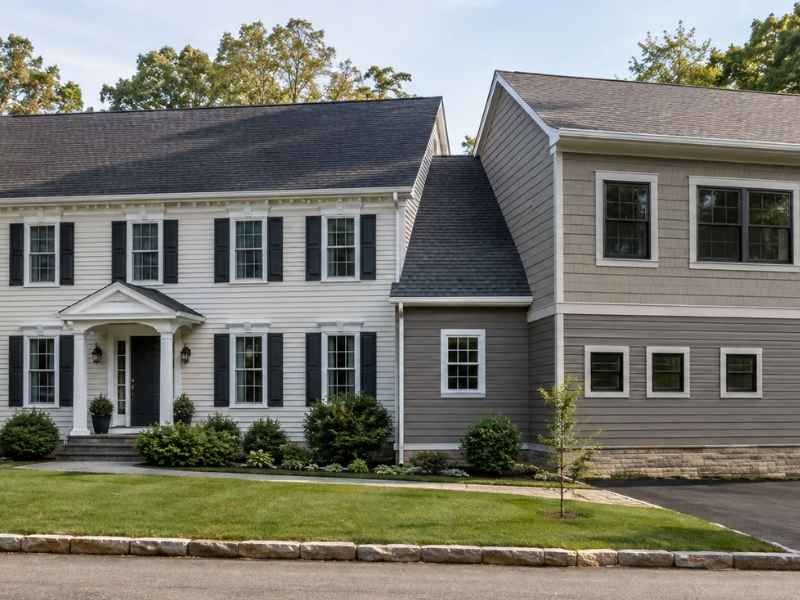
Home additions in McKinney Texas showing exterior design differences that can make a new addition feel out of place.

A lot of home additions end up looking like exactly what they are, an add-on. That’s not because the building work is bad. It usually comes down to a few design choices that make the new part feel separate from the original house. Home additions blend in best when a few key details get planned early, not fixed after the walls are already up. Once framing and finishes are locked in, fixes get expensive fast. Catching problems at the design stage costs far less than catching them after the crew has moved on.

Ignoring the Original Home’s Exterior Proportions

Every house has a certain rhythm to it. Wall heights, window sizes, and the roofline all work together to build that rhythm. When an addition ignores those proportions, even a little, the mismatch shows.

This isn’t about brick patterns or picking the right stone accent. It’s about basic visual balance. A new section with taller walls, oversized windows, or a roofline that doesn’t match the original house will feel off. Most people couldn’t say exactly why, but they’d notice. Getting the proportions right from the start keeps the new addition feeling like part of the same house.

Creating an Abrupt Material Change Between the House and Addition

Switching from one exterior material to another isn’t a problem by itself. Plenty of well-designed homes mix materials. The trouble starts when that switch happens at a random spot on the wall instead of a smart break point.

A material change should land somewhere that makes visual sense, like a corner, an offset, or another clear break in the building’s shape. When it just stops in the middle of a wall for no reason, the addition looks stuck on. Picking the right spot for that switch is a small decision that carries a lot of visual weight.

Misaligning Windows, Doors, and Other Exterior Openings

Windows and doors set up a visual rhythm across the front of a house. When an addition’s window heights, spacing, or sizes don’t match the original structure, that rhythm breaks. People notice, even before they know exactly what’s wrong.

This isn’t about structural issues around openings or repair work near windows. It’s just about alignment. Matching sill heights, keeping even spacing, and sizing new openings to relate to the old ones all help the addition read as one design instead of two parts stitched together.

Overlooking Trim, Fascia, and Exterior Edge Details

Trim and fascia don’t get much attention until they’re wrong. Differences in trim width, fascia depth, soffit details, or corner boards often reveal exactly where the old house ends and the new part begins, even when the bigger design choices are solid.

These smaller pieces do a lot of quiet work. They don’t need to match exactly, but they do need to relate to each other in a way that feels planned. Coordinating these edge details, instead of using whatever trim happened to be handy, makes a real difference in how put-together the finished exterior looks.

Designing the Addition Without Considering the View From the Street

Drawings show a house from angles nobody actually sees in real life. The street view and the driveway view are what people see every day. An addition needs to work from those angles too, not just on paper.

Walls that stick outside, side views that people can actually see, and how the new roof connects to the old one can all look fine in a drawing and still feel off once you’re standing at the curb. Walking the site and checking common views before finishing the design catches problems that a flat drawing just can’t show.

Frequently Asked Questions

Why do some home additions look obviously newer than the original house? 

Differences in proportions, window and door alignment, exterior transitions, and trim details can all make an addition stand out, even when the building work itself is solid.

Do exterior materials on an addition have to match the existing house exactly? 

Not exactly, no. An exact match isn’t required, but the materials should relate to each other through scale, tone, texture, or a well-planned switch point.

Why is window alignment important on a home addition? 

Even window heights and spacing create visual rhythm across the old and new parts of the house. That makes the whole exterior feel like one planned design.

Can trim details make an addition blend better with an existing home? 

Yes. Matched fascia, soffits, corner treatments, and window trim can visually connect two parts of a house without needing the exact same materials everywhere.

When should exterior design coordination happen during an additional project? 

As early as possible, ideally during early design. Waiting until walls, openings, or finishes are already picked makes these changes much harder and more costly to fix.

How Brick and Stone Materials Respond Differently to Heat, Moisture, and Time

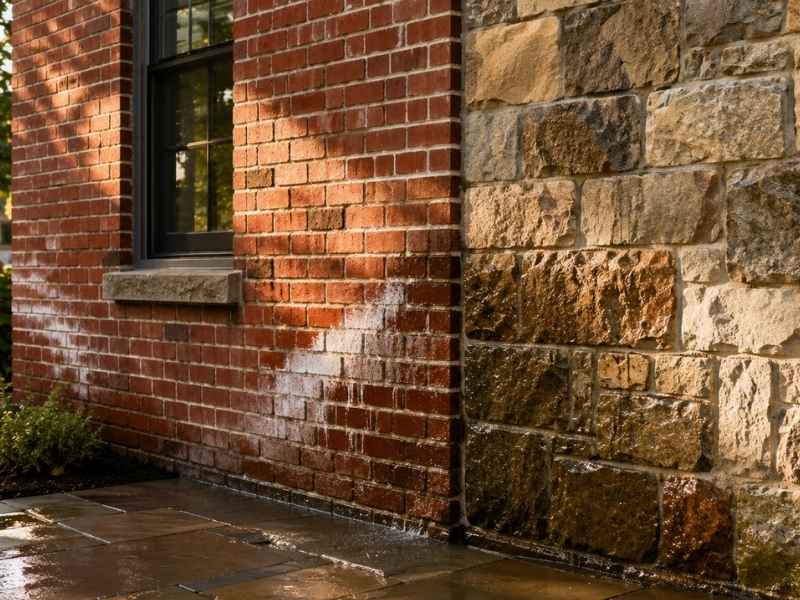
Brick and stone materials in McKinney Texas showing how masonry surfaces respond differently to moisture, sunlight, and weathering.

Brick and stone look like they belong to the same family. In some ways, they do. But masonry materials don’t all act the same way once they’re outside facing real weather. One surface might dry fast after rain while another stays damp and dark for hours. One might feel cool to the touch in full sun while the wall right next to it feels hot. These differences aren’t random. They come down to what the material actually is, down to its structure and makeup. Knowing this helps homeowners understand why two parts of the same house can age so differently.

Compare How Brick and Natural Stone Absorb and Release Moisture

Brick and natural stone shouldn’t be expected to handle water the same way. Each one has its own pore structure, and that structure controls how much water gets absorbed and how fast it dries out again. Even different types of natural stone can behave differently from each other.

This is why testing matters so much for natural stone. Absorption varies by stone type, sometimes by a lot. A homeowner might notice one section of a wall darken after rain while a stone accent nearby barely changes color at all. That’s not a flaw. It’s just how these specific materials handle moisture differently.

Understand Why Brick and Stone Heat Up Differently in Direct Sun

Stand near a brick wall on a hot day, then walk over to a stone one. They likely won’t feel the same. Density, color, surface texture, and overall makeup all play a part in how much heat a masonry surface picks up and holds onto.

This isn’t about fireplaces or firebrick. It’s about how ordinary exterior brick and stone behave under the sun over the course of a day. A darker, denser surface tends to hold more heat than a lighter, more textured one. That difference is easy to feel just by touching the wall in the afternoon.

Watch How Repeated Wet-and-Dry Cycles Change Each Material

Rain falls, then the sun comes out and dries things off. That cycle repeats constantly outside, and brick and stone don’t always respond to it the same way over time. Some surfaces develop small mineral deposits. Others show gradual, uneven changes in color across the surface.

These changes usually aren’t a sign of damage. They’re just what happens when a material goes through the same wet-and-dry pattern year after year. Watching for these small shifts helps homeowners understand what’s normal weathering and what might be worth a closer look.

Expect Natural Stone to Weather Less Uniformly Than Manufactured Brick

Manufactured brick starts out fairly consistent. It’s made under controlled conditions, so most pieces in a batch share similar properties from the start. Natural stone works differently. Its mineral makeup varies from piece to piece, since it comes straight from the earth rather than a factory.

That variation shows up over time. Some stone pieces may weather or oxidize a little differently than the ones right next to them, especially as their minerals slowly react to years of sun and moisture. This kind of uneven change doesn’t mean the stone is failing. It’s simply part of what makes natural stone, well, natural.

Use Material-Specific Performance Data When Choosing Brick and Stone

Not every brick behaves like every other brick, and the same goes for stone. Treating all masonry as interchangeable skips over real differences that matter once the material is actually outside facing the elements.

Absorption rates, density, resistance to environmental exposure, and how a material handles thermal and moisture cycling are all recognized factors when evaluating natural stone specifically. Looking at the properties of the actual product being considered, rather than assuming one type of stone or brick behaves like another, gives homeowners and designers a much clearer picture of what to expect over the years ahead.

Frequently Asked Questions

Does brick absorb moisture differently from natural stone? 

Absorption depends on the specific brick or stone product involved. It’s not accurate to assume one entire material category always absorbs more water than the other.

Why can stone change color after it gets wet? 

Moisture can temporarily deepen the appearance of some stone types. Over longer periods, mineral composition can also influence how a stone’s color or texture gradually changes.

Do dark brick and stone surfaces get hotter in direct sunlight? 

Often, yes, but not always in the same way. Surface color, texture, orientation, and material properties all affect heat gain, so surfaces that look similar may not behave identically in the sun.

Does natural stone always weather evenly?

No. Natural stone has built-in mineral and texture variation, which can lead individual pieces to change differently over years of exposure. Some stone types are specifically evaluated for how they handle environmental and thermal cycling.

Should homeowners compare technical data before choosing brick or stone? 

It helps, especially for masonry that will face a lot of moisture, sun, or temperature swings. Product-specific information gives a clearer picture than choosing based on appearance alone.

How Stone Patios Improve Drainage and Yard Performance

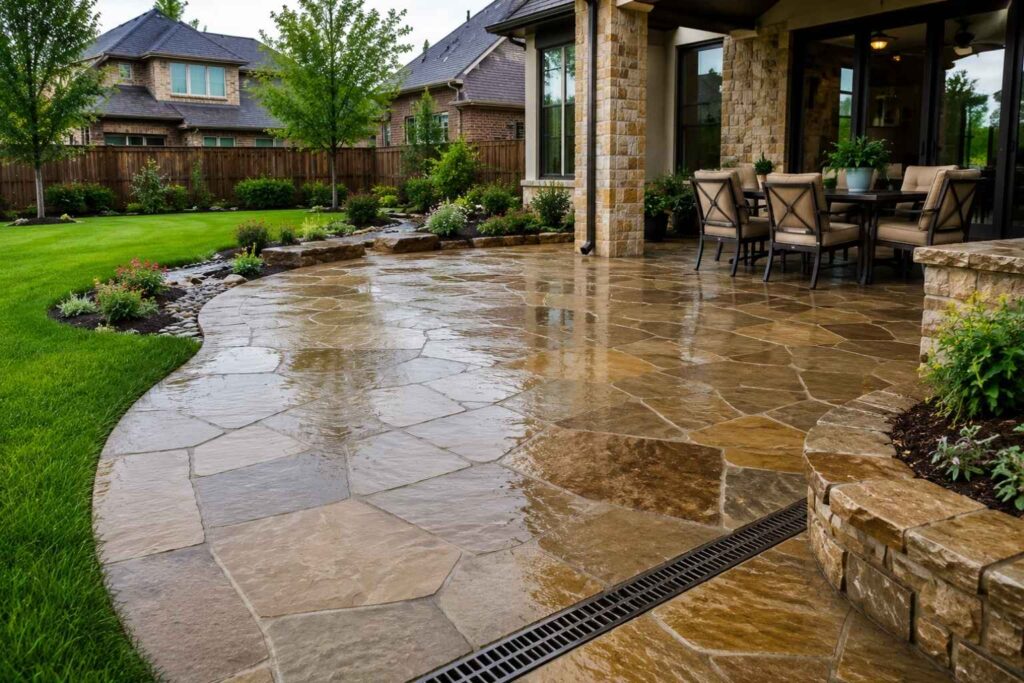
A patio isn’t just a place to put a table and chairs. It can fix or ruin how water moves across a yard. Stone patios, when built right, pull double duty. They give homeowners outdoor space and solve drainage problems at the same time. This matters more than it looks. Poor drainage under a patio can lead to foundation issues and soggy yards years down the road.

How Stone Patio Systems Redirect Water Flow Without Pooling Issues

Water needs somewhere to go. A well-built stone patio gives it a clear path instead of letting it sit and pool.

Here’s how a good patio system handles water flow:

  • The patio surface slopes slightly away from the house, guiding water toward a safe drainage point.
  • Joint spacing between stones lets some water pass through instead of running off in one direction.
  • Edge restraints keep the stone base from shifting, which would otherwise create low spots where water collects.
  • Drainage channels or French drains, when needed, catch excess water before it reaches the patio surface.

A flat patio with no slope is one of the most common causes of standing water. Even a small grade, often just a couple percent, makes a real difference over time.

The Hidden Role of Permeable Joints in Patio Drainage Performance

Most people focus on the stone. Few think about the joints between them. But those small gaps do a lot of work.

Permeable joints matter because:

  • They let rainwater soak into the ground instead of running off across the whole yard at once.
  • They reduce the load on nearby drainage systems during heavy storms.
  • They lower the risk of ice buildup on the surface in colder months, since less water sits on top.
  • They help the patio base stay properly hydrated, which can reduce shifting caused by dry, cracked soil underneath.

Joint material matters too. Polymeric sand, for example, hardens enough to resist weeds but still allows some water through. A fully sealed joint blocks drainage entirely and pushes more water onto the surrounding yard.

Why Proper Base Layers Matter More Than the Stone Surface Itself

The stone gets all the attention. The base underneath does most of the actual work.

A solid base includes:

  1. A compacted layer of crushed gravel, usually four to six inches deep, that allows water to drain through instead of pooling.
  2. A layer of coarse sand on top of the gravel, which helps level the stones and adds another draining layer.
  3. Proper compaction at each stage, since loose material settles unevenly and creates dips over time.
  4. A geotextile fabric layer in some cases, which keeps soil from mixing into the gravel base and clogging its drainage ability.

Skipping any of these layers, or rushing the compaction process, tends to show up within a year or two as uneven settling. Once that happens, low spots start collecting water no matter how well the stone itself was laid.

How Stone Patios Reduce Soil Erosion During Heavy Rainfall Events

Bare soil erodes fast during heavy rain. A properly installed stone patio slows that process down significantly.

Ways a stone patio helps control erosion:

  • It covers exposed soil, reducing the direct impact of heavy rainfall hitting bare ground.
  • It slows water velocity as it moves across the surface, compared to water rushing over open dirt.
  • It directs water to designated drainage points instead of letting it carve random paths through a yard.
  • It reduces mud and sediment runoff into nearby storm drains or neighboring properties.

McKinney sees heavy, fast-moving storms during parts of the year. A patio system designed with erosion control in mind holds up far better than a flat concrete slab with no drainage planning behind it.

The Connection Between Patio Grading and Long-Term Yard Stability

Grading isn’t just about the patio. It affects the whole yard around it.

Here’s why grading matters long term:

  • Water directed away from a patio still has to go somewhere, so overall yard grading needs to account for that flow.
  • Poor grading near a patio can undermine soil stability, leading to settling or shifting years after installation.
  • Consistent grading across the yard prevents new low spots from forming once the patio changes how water naturally moves.
  • Proper grading protects nearby foundations by keeping water from pooling too close to the house.

A patio built without considering the yard’s overall grade often just moves the drainage problem somewhere else instead of actually solving it.

Frequently Asked Questions

Can a stone patio actually prevent yard flooding?

A well-designed stone patio with proper grading and permeable joints can significantly reduce standing water, though severe drainage issues may still require additional solutions such as French drains.

How much slope does a patio need for proper drainage?

Most patios require a slope of about one to two percent away from the structure. This is enough to move water effectively without creating a noticeable incline underfoot.

Do permeable joints require more maintenance than sealed surfaces?

Permeable joints may need occasional replenishment with polymeric sand over time, but they generally help reduce broader drainage issues, which can offset the maintenance requirement.

What happens if the base layer is not properly compacted?

Poor compaction often leads to uneven settling within one to two years, creating low spots where water can collect on the patio surface.

Is a stone patio a good solution for yards with erosion problems?

Yes. When properly designed with grading and drainage in mind, stone patios can help reduce erosion by protecting exposed soil and guiding water flow.

Welcome to McKinney Brick & Stone

McKinney Brick & Stone specializes in stone masonry and brick masonry construction. Our expertise in masonry covers brickwork, block work, stonework, and all sorts of related products and applications. We serve the City of McKinney and the surrounding North Texas communities.

Call us at (469) 947-7793 to discuss your project.

What is Masonry Work?

Seamless Masonry Stone WallsMasonry is building structures from individual units, which are often laid in and bound together by mortar. Common materials of masonry construction are brick, natural stone (such as marble, granite, travertine, and limestone,) cast stone, concrete block, stucco, tile, and glass block. Masonry is a highly durable form of construction.

The strength and durability of masonry are affected by the materials used, the quality of the mortar, the workmanship, and the pattern in which they are assembled. A person who constructs masonry is called a mason, a brick mason, stone mason, or bricklayer.

Applications of Masonry

brick stone wall landscapingMasonry is commonly used for walls and buildings, either inside or outside. Brick and concrete block are the most common types of masonry in use and may be either weight-bearing or a veneer.  Stone, both natural and man-made, is being used more and more for decorative features inside, outside and in backyards. Patios, outdoor kitchens, outdoor fireplaces, fire pits, decorative walls, decking, retaining walls, landscaping or hardscaping, and lots of other amenity applications are common place now. Natural stone masonry can provide very aesthetically pleasing projects.

Advantages of Brick or Stone in Building

  • Bricks and stone masonry increases the thermal mass of a building
  • Brick and stone masonry is non-combustible and provides fire protection
  • Brick and stone masonry walls are more resistant to projectiles, such as debris from hurricanes or tornadoes.
  • Brick and stone masonry weathers well and needs much less maintenance over time than other natural materials.
  • No painting is necessary for brick or stone. Color and finish selections are almost endless.
  • Brick and stone masonry typically lasts longer than wood products
  • Brick and stone masonry has higher compressive strength compared to wood and other natural products.
  • Brick and blockwork walls provide excellent sound insulation.
  • Stone does not warp, swell, bend, splinter, or dent.
  • Brick and stone are versatile in their aesthetic appeal and can work well with other construction materials.
  • Use of brick and stone signals a strong sense of permanence and longevity.

Call McKinney Brick & Stone at (469) 947-7793 for a free quote on your brick or stone masonry project. Or, fill out the contact form to the right.