Common Questions Homeowners Ask Before Starting Masonry Projects
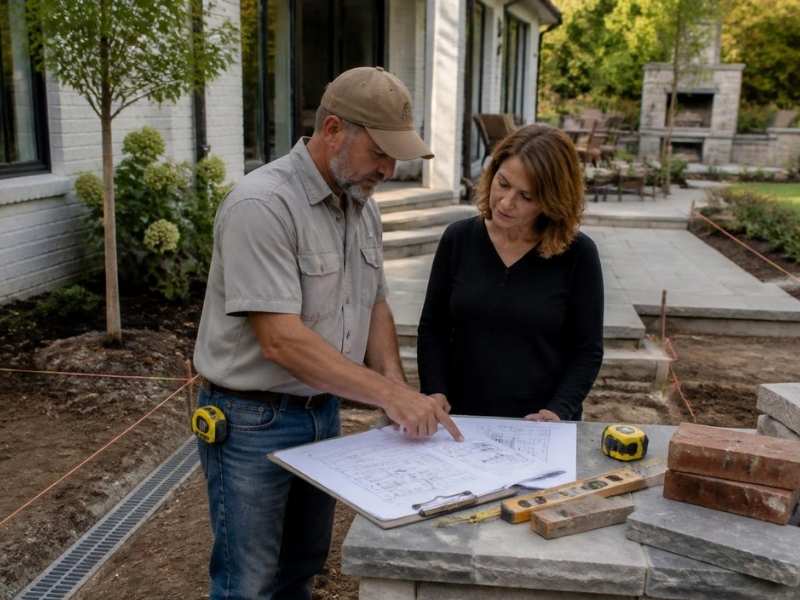
Masonry project planning in McKinney TX showing brick and stone construction preparation before starting residential improvements

A new brick wall or stone patio can look simple from the outside. You pick a design, hire a crew, and wait for the work to start. But the best masonry projects begin before anyone lifts a trowel. A few checks up front protect your yard, your budget, and your property lines. This guide covers the questions smart homeowners ask first. It also shows where a good masonry contractor and a quick survey fit into the plan.

What Should You Check Before Adding Masonry to a Property?

Start with the basics of your site. Look at where the new work will sit and what’s already there. Check the slope of the yard, the spot where water runs after rain, and how close the project is to your property edge. These small details shape the whole plan.

Next, think about permits and local rules. Some masonry work needs a permit, and some doesn’t. This can change by city, county, and project type, so confirm the rules early. A masonry contractor who works in your area often knows what the local office will ask for.

Also check the ground itself. Soft soil, old fill, or buried pipes can all change a design. Fixing a surprise after the crew starts costs far more than a short review now. A little planning at this stage keeps the rest of the job smooth.

How Existing Walls and Foundations Affect New Masonry Work

New masonry often ties into something old. A patio may meet the house. A new wall may sit right next to an old one. When that happens, the old structure matters as much as the new one.

Check the shape your current walls are in first. Look for cracks, leaning, or spots where the mortar has washed out. Older structures can present masonry challenges that need to be addressed before new work connects to the existing feature. If the old wall is weak, adding weight or load to it can make things worse. A masonry contractor should test how sound the base is before building on it or beside it.

Foundations need the same care. A footing that’s too shallow can shift with the seasons. Ground that freezes and thaws can push masonry up and crack it over time. Good footing depth and a stable base keep the finished work straight for years.

When Drainage and Grading Become Part of the Masonry Plan

Water is the main enemy of masonry. If water pools against brick or stone, it soaks in, freezes, and breaks the surface apart. So the way your yard sheds water is part of the plan, not an afterthought.

Grading is the slope of the land. It should carry water away from the house and away from any new walls or patios. When a patio sits in a low spot, it can trap water and stay wet for days. A masonry contractor may add a slight slope, a gravel base, or a drain to move that water out.

This is where a topographic survey can help. It maps the high and low points of your land so the design works with the flow, not against it. Getting the grade right the first time saves you from tearing up finished work later.

What Property Lines and Easements Can Mean for Masonry Projects

Many masonry projects sit near the edge of a lot. A wall, a fence footing, or a mailbox can end up close to a line you can’t see. If it crosses onto a neighbor’s land, you may have to move it. That’s a costly mistake to make after the mortar sets.

An easement is a strip of land that others have a right to use. Utility crews, the city, or a neighbor may hold one on your property. You often can’t build a permanent structure on top of it. Records for these rights can vary by parcel, so check them before you lock in a design.

Knowing where your lines and easements fall protects the whole project. It also helps your masonry contractor place the work in a safe, legal spot. That one step keeps the finished build right where it belongs.

When a Survey Can Help Before Construction Begins

A survey answers the questions guesswork. It shows your true property lines, your easements, and the lay of the land. For work near a boundary or on a sloped lot, that information is worth having early.

You don’t need a survey for every small job. A repair or a patio in the middle of a large yard may not call for one. But when the project sits near a line, ties to a permit, or rests on a tricky grade, a survey removes the doubt. Confirm what you need early, since timing, permits, and closing dates can all depend on it.

Share the survey with your masonry contractor before the design is final. Clear lines and a solid plan work together to keep the build on track. It’s a simple handoff that prevents big problems down the road.

Frequently Asked Questions

Do I always need a permit for masonry work?

Not always, and it depends on the job. Small repairs often need no permit, while walls, large patios, and structures near a line may. Permit rules can vary by city, county, and project type. Ask your local office or your masonry contractor before you start so you’re not caught off guard.

How close to my property line can I build a wall?

That distance is set by local setback rules, and it can change from place to place. Some areas allow a low wall near the edge, while others require a gap. A survey shows where your true line sits, which keeps the wall on your land. Confirm both the line and the local rule before the design is set.

Can bad drainage really damage new masonry?

Yes, and it’s one of the most common causes of early failure. Water that sits against brick or stone soaks in and breaks the surface as it freezes and thaws. Good grading and a solid base move that water away from the work. A masonry contractor should plan for drainage before the first block is laid.
How to Create a Cohesive Look Between Landscaping and Masonry Elements

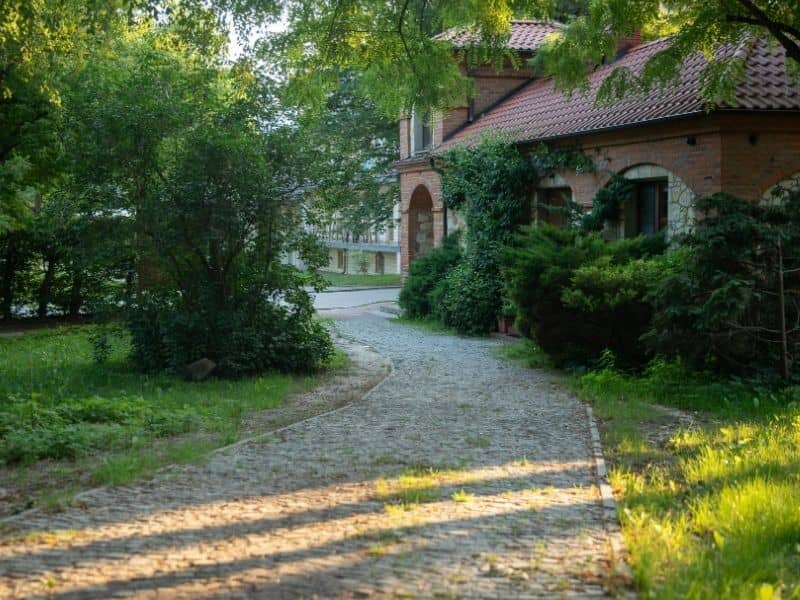
Landscaped residential yard with mature greenery surrounding a brick and stone home and walkway

Good landscape design can make brick and stone look like they belong. A front yard with new plants around an older brick porch can feel calm or feel busy. The difference often comes down to how the plants sit next to the masonry. This guide shows how to plan planting around walls, steps and entry features so the whole exterior reads as one look.

Start With the Yard’s Existing Visual Lines

Your home already has strong lines. The front door, the front walk, the foundation edge and any brick or stone you own all set a pattern. Plan your planting around those lines before you pick a single plant.

Walk out to the street and look back at the house. Notice where your eye lands first. That spot is usually the entry or a stone feature near the door. Good landscape design points the eye toward those spots, not away from them.

Then check the other views. Look from the driveway. Look from the front walk. Look out the main windows where you sit each day. Plants that line up with the walkway or match the angle of a low wall make the yard feel planned. Plants dropped in at random fight the lines the house already has.

Keep your focus on where each plant goes, not on the brick or stone itself. The masonry is already in place. Your job is to set greenery so it agrees with it.

Give Plants Enough Room to Frame Masonry, Not Hide It

A plant’s size on planting day is not its real size. Most shrubs, grasses and small trees grow wider and taller over a few years. Give them room now so they frame your brick or stone later, not bury it.

Read the plant tag before you dig. It lists a mature width and height. Set the plant so its grown size still leaves the wall, step or column in view. A stone column looks best with a little space around it. Plants pressed right against it hide the very feature you paid for.

Framing and covering give two different results. A framed feature has plants on the sides or below that lead the eye to it. A covered feature vanishes behind leaves. Aim to frame. Leave the face of a wall or the front of an entry feature open.

Think about the years ahead too. A young bed can look bare at first. Owners often crowd plants to fill that gap. Two seasons later the same bed hides the steps and blocks the path. Room for growth now saves a lot of pruning and moving later.

Use Repetition to Connect Separate Outdoor Areas

Repeating a few plant shapes or textures across the yard ties it together. This is a quieter design trick, and many owners skip it. Pick one or two plants and use them in more than one spot.

Say you have a rounded shrub near the front steps. Plant the same shrub near the side gate and again by the back patio. Your eye follows that shape from area to area. The whole property starts to feel like one design instead of three separate projects.

Do not repeat everything, though. If every bed uses the same plants in the same order, the yard turns flat and dull. Repeat a form or a texture, then let each area keep its own extras. That balance stays connected but still holds interest.

Keep repeating to plants here. The goal is a planting rhythm that carries across the yard. Your brick and stone already have their own pattern, so let the greenery handle this part.

Balance Hard Edges With Softer Plant Forms

Brick and stone have sharp, straight edges. Those edges look strong, which is good. Next to soft plants, they look even better, because the contrast reads on purpose.

A few plant forms work well for softening a hard edge:

  • Low mounding shrubs that spill over a wall base
  • Ornamental grasses that sway beside a straight column
  • Groundcovers that creep up to the edge of a step
  • Spreading perennials that break up a long, flat border

Use plant height and shape to build a gentle step-down. A tall grass, then a mid-size shrub, then a low groundcover eases the eye from a wall down to the lawn. That slope of heights feels natural. A wall that meets bare grass with nothing in between looks abrupt.

Aim for balance, not a list of perfect plants. Any plant with a rounded or loose shape can soften a firm masonry line. The look you want is calm, where the hard and soft parts share the space.

Plan the Landscape for How It Will Look After Several Growing Seasons

A fresh planting bed and a grown one look very different. Good landscape design plans for the grown version. Picture the yard three or four seasons out, not just the day the last plant goes in.

Growth changes the view in ways that are easy to miss. A shrub doubles in width. A vine climbs past a stone accent. A small tree threw shade where there was sun. Plants also shift by season, full in spring and bare in winter, so the same bed can frame a wall in June and open it up in January.

Think about pruning before you plant. Some plants need a trim twice a year to stay in bounds. If you would rather skip that chore, choose slower or smaller plants near your masonry. Watch the spots where growth could cover a detail you like, such as a stone address block or a nice course of brick at the entry.

A yard that looks perfect on install day can feel crowded by its second summer. Plants that framed the porch now hide it. The walk feels narrow. The fix is to plan for grown size from the start.

For homeowners updating a front yard, this last step matters most. Our clay soil and warm summers push growth fast, and McKinney sits in USDA zone 8b, so many plants keep going for much of the year. Plan your landscape design around the grown size of each plant, and your masonry and greenery will still read as one clean look many seasons from now.

What Makes Natural Stone a Popular Choice for Custom Outdoor Features

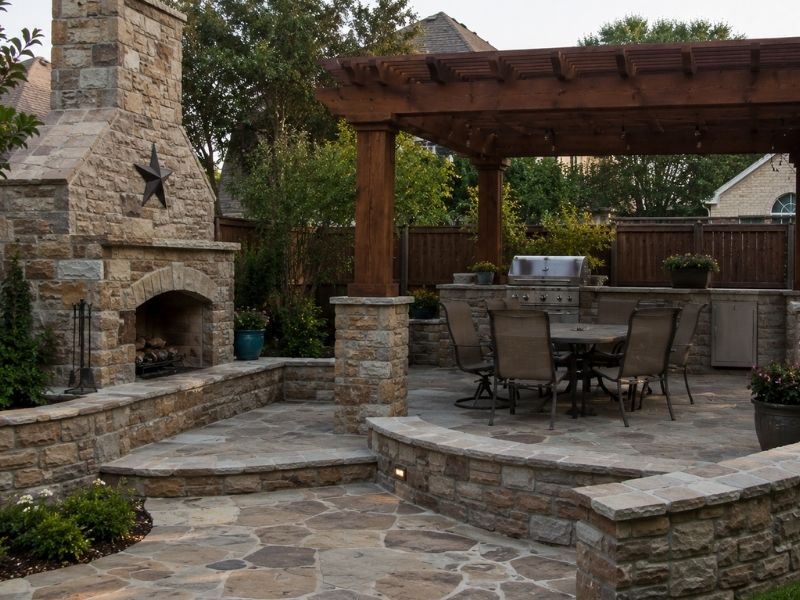
Realistic custom backyard with natural stone patio, fireplace, seating walls, and outdoor kitchen features in McKinney, TX.

Natural stones has a way of making a backyard feel finished. It looks good and lasts outside. Homeowners reach for it when they want an outdoor feature that feels one of a kind. Since every piece comes out of the ground a little different, no two builds turn out exactly alike. That small bit of chance is a big part of why people love it.

Why Natural Stone Works Well for Custom Outdoor Features

Stone starts with an edge that man-made materials struggle to copy. Each slab or block carries its own color, grain and shape. Because of that, a wall or bench built from it never feels stamped out of a factory. You get a look that belongs to your yard and no one else’s.

That natural range also gives you room to plan. You can pick lighter stone for a calm feel or darker stone for something bold. When a builder sets each piece by hand, the feature matches the space around it. So the result feels made for the property instead of dropped onto it.

Stone works for both small touches and large builds. A single accent can lift a plain corner, and a full seating wall can anchor a whole yard. That range lets you start small and grow later.

Natural Stone Gives Every Outdoor Feature a Unique Appearance

Color is the first thing people notice. Stone can run warm and sandy or cool and gray, and many pieces mix several tones at once. As sunlight moves across the surface through the day, those colors shift a little. So the same feature can look one way at noon and softer at dusk.

Texture adds the next layer. Some stone feels rough and rugged. Other cuts come out smooth and clean. Veining, the thin lines that run through many stones, gives each piece its own pattern. You can’t fake that with paint or a stamp.

Homeowners can lean into these traits. If you want a rustic garden, pick stone with heavy texture and mixed tones. If you want a modern patio, choose flatter cuts in one steady color. Either way, the natural marks do the design work for you.

Choosing Natural Stone for Long-Term Outdoor Durability

Outdoor features take a beating. Rain, sun, frost and daily foot traffic all wear on the surface over time. That’s why the type of stone you pick matters so much. Some stones shrug off water and cold, while softer ones can crack or flake in rough weather.

Denser stone tends to last longer outside. Granite and many quartzites hold up well against moisture and heavy use. Softer picks, like some sandstones, may need a sealer or a drier spot. When you match the stone to the weather it will face, the feature stays strong for years.

Where you place a feature counts too. Stone near a pool sees constant splashing, so it needs to handle water without turning slick. A fire feature needs stone that won’t crack under heat. Sort out these details early, and you skip costly repairs later.

Custom Natural Stone Features Can Support Different Backyard Uses

The best stone feature starts with a simple question. How do you actually use your yard? Once you know the answer, the design gets easy. A family that hosts often may want a long seating wall, while a quiet gardener may prefer low stone borders.

Here are a few ways homeowners put natural stone to work:

  • Seating areas that stay cool and sturdy through every season
  • Garden borders that hold soil in place and frame your plants
  • Walkways that guide people through the yard without turning muddy
  • Fire features that give a safe, solid base for warmth on cool nights

Each of these can bend to fit your space. A narrow yard might need a slim path, while a wide one can carry a full patio and a fire pit. When the feature matches how you live outside, you reach for it far more. That’s the real payoff of building around your habits.

How Natural Stone Can Create a More Cohesive Backyard Design

One stone feature is nice, but a set of them can tie a whole yard together. When your walkway, borders and seating share a stone family, your eyes move through the space with ease. Nothing looks random or bolted on. The yard reads as one plan instead of a stack of separate projects.

You don’t have to use the same stone everywhere. Instead, pick tones and textures that sit well next to each other. A gray path can pair with a darker gray wall, and both can frame a lighter garden border. These small links pull the whole design into one steady look.

Placement matters as much as material. A fire feature set near a seating wall gives people a clear spot to gather. Plan these spots together, and the yard starts to feel like one room with no walls.

Frequently Asked Questions

Why is natural stone popular for custom outdoor features? 

Natural stone is popular because each piece looks a little different from the next. That natural range gives homeowners real freedom in how they design. It also carries a distinct look that man-made products rarely match. So the finished feature can feel unique to the property rather than mass produced.

What types of outdoor features can be made with natural stone? 

Natural stone works for many parts of a backyard. Homeowners use it for seating, walkways, garden borders and fire features. It also fits smaller landscape accents that dress up a plain spot. With the right cut and setup, it can shape almost any custom outdoor element you have in mind.

Does every natural stone installation look the same? 

No, and that’s a big part of its charm. Color, texture, shape and veining all shift from one piece to the next. Because of that, two features built from the same stone type can still look different. Each install ends up with its own character.

Is natural stone a good choice for a custom backyard project? 

It can be a strong pick when the details line up. The stone type, the way it’s set and the design all need to suit the space. Local weather and how you use the yard matter too. When these pieces fit together, natural stone holds up well and looks great for years.

How can homeowners choose the right natural stone for an outdoor feature? 

Start with the job the feature needs to do. Then think about the look you want and the materials already around your yard. Local weather and the care each stone needs should guide the choice as well. Weighing all of these together helps you land on a stone that fits both your style and your space.

Why Some Masonry Colors Change After Years of Sun Exposure

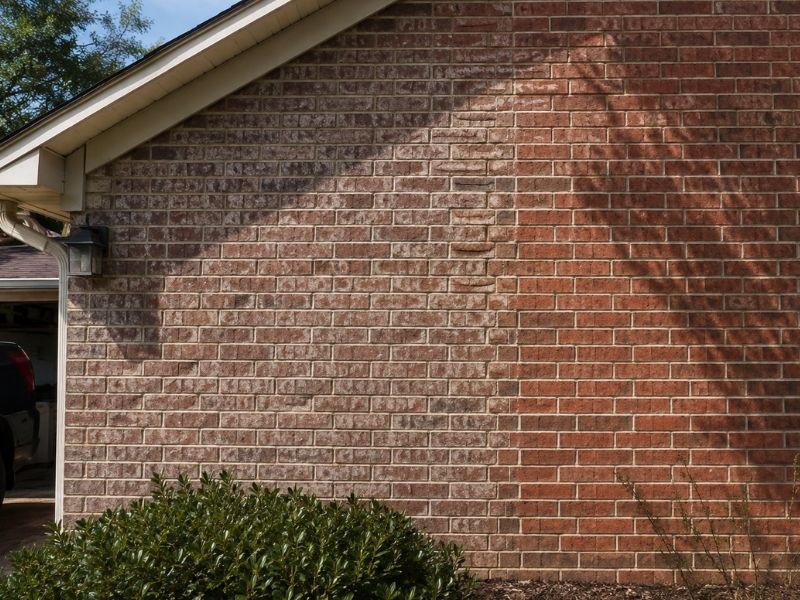
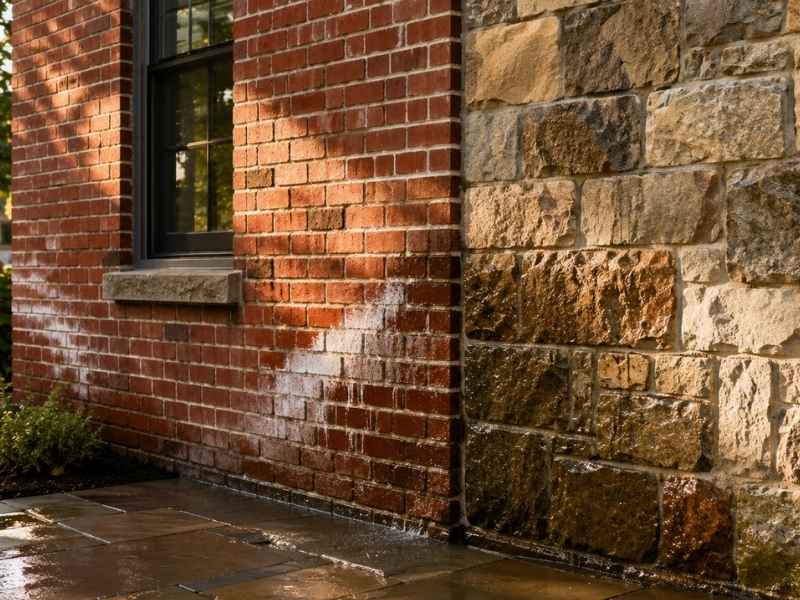
Brick exterior wall showing uneven color changes after years of sun exposure at a home in McKinney, TX.

Homeowners notice it slowly. The brick color that looked deep and even on move-in day starts to look a little softer after a few years. One wall stays rich while another looks faded. Nothing about the house has changed, yet the outside tells a different story. Texas gets a lot of sun, and that sun does quiet work on masonry over time. The good news is that most of these changes are normal. 

How Years of Texas Sun Exposure Can Affect Brick Color

Sunlight is the main reason brick color shifts as a home ages. McKinney sees hot, bright summers with long afternoons of direct light, and that steady exposure adds up. Ultraviolet rays slowly break down the pigments that give brick its tone. Over many seasons, the surface can look lighter or slightly grayed compared to how it started.

The change rarely spreads evenly. West- and south-facing walls take the strongest afternoon sun, so they usually fade first. Meanwhile, north-facing walls stay in shade for most of the day and hold their color longer. That’s why one side of a home can look noticeably different from another, even though every wall used the same brick.

Why Some Brick Colors Fade More Noticeably Than Others

Darker and richer brick colors tend to show fading more than lighter ones. Deep reds, browns, and charcoal tones start with more pigment, so even a small amount of change stands out against the original shade. Lighter tans and buffs shift too, but the difference is harder to see.

How the brick was made also matters. Some bricks get their color all the way through the clay, while others carry a colored coating or a mineral stain on the surface. Coated and stained bricks can fade faster because the color sits on the outer layer where the sun hits hardest. The type of pigment plays a role as well, since natural iron oxide colors usually age more gently than added dyes. Because of these differences, two homes on the same street can age in very different ways.

Sun Exposure and the Difference Between Surface Changes and Material Changes

Not every color change goes deep into the brick. Many shifts happen only on the surface, and those are the easiest to explain. A thin film of dust, pollen, mineral residue, or a white powdery buildup called efflorescence can dull the tone. Wipe or rinse a small spot, and the true color often shows through.

Material changes are different. When the pigment inside the brick itself fades from years of UV, no cleaning will bring the old shade back. Still, faded pigment does not mean the brick is failing. Color and strength are separate things. A wall can look lighter than it did ten years ago and still be solid, sound, and doing its job. Telling surface changes apart from material changes helps you know whether you’re looking at a cosmetic issue or something worth a closer look.

How Surrounding Features Can Create Uneven Brick Color Changes

Shade shapes how brick ages just as much as the sun does. Roof overhangs, deep porches, tall trees, and even a neighbor’s house can shield parts of a wall from direct light. Those protected sections keep their color while the exposed areas around them slowly lighten. Over the years, this creates soft lines or patches where sun and shade meet.

You might see it under an eave, behind a shrub, or along a wall that a fence partly covers. The brick in the shadow looks like the “before,” and the brick in the open looks like the “after.” Sprinklers, gutters, and runoff can add to the pattern by leaving mineral marks on some spots and not others. None of this points to a defect. It’s simply the result of different parts of the home living under different amounts of sun and water.

What Homeowners Can Do When Brick Color Changes Become More Noticeable

Start by figuring out the cause before you think about any repair or cleaning. Walk the outside of the home and compare the shaded walls to the sunny ones. If the difference lines up with sun exposure, fading is the likely answer. If the color change follows drip lines, sprinkler spray, or a stain that runs downward, water or residue is probably the real cause.

Look closely for white powder, dark streaks, green algae, or crusty buildup on the face of the brick. These clues often explain a color shift that has nothing to do with the sun. Take a few photos in the same light over several months so you can track whether the change is slow and even or sudden and patchy. When the cause stays unclear, or when the brick shows cracks, flaking, or crumbling along with the color change, a mason can check whether the surface needs attention. Sorting out the reason first saves money and keeps you from treating a simple sun-fade like a bigger problem.

Frequently Asked Questions

Why does brick color change after years of sun exposure?

Sunlight carries ultraviolet rays that slowly break down the pigments in brick. Over many seasons, those pigments lose some of their depth, so the surface looks lighter or slightly duller. Hot, sunny regions like McKinney speed this up because walls get long hours of direct light. The change is gradual and usually cosmetic rather than a sign of damage.

Does the Texas sun cause all types of brick to fade?

Most brick fades to some degree, but not all of it fades at the same pace. Bricks colored all the way through the clay tend to hold their tone longer than coated or surface-stained ones. Darker, richer colors also show change more clearly than pale tans and grays. So while the sun affects nearly every brick, the amount of visible fading depends on the brick itself.

Why is one side of my brick home a different color than another?

Each side of a house gets a different amount of sun during the day. West- and south-facing walls take the strong afternoon light, so they often fade first. North-facing walls sit in shade longer and keep their original color better. That uneven exposure is the most common reason two walls of the same brick end up looking different.

Can uneven sun exposure make brick color changes more noticeable?

Yes, uneven exposure is one of the biggest reasons color shifts stand out. When part of a wall sits under an overhang or behind a tree, that shaded area stays darker while the open area lightens. The contrast between the two makes the fading easier to spot. This is normal aging, not a flaw in the brick or the wall.

Does fading brick mean the masonry is damaged?

Faded color and damaged masonry are two different things. A wall can lose some of its original tone from years of sun and still be strong and stable. Real trouble shows up as cracks, flaking, crumbling, or loose mortar, not just a lighter shade. If color change comes with any of those signs, it’s worth having a professional take a look.

Choosing Exterior Finishes That Complement Existing Brick Homes

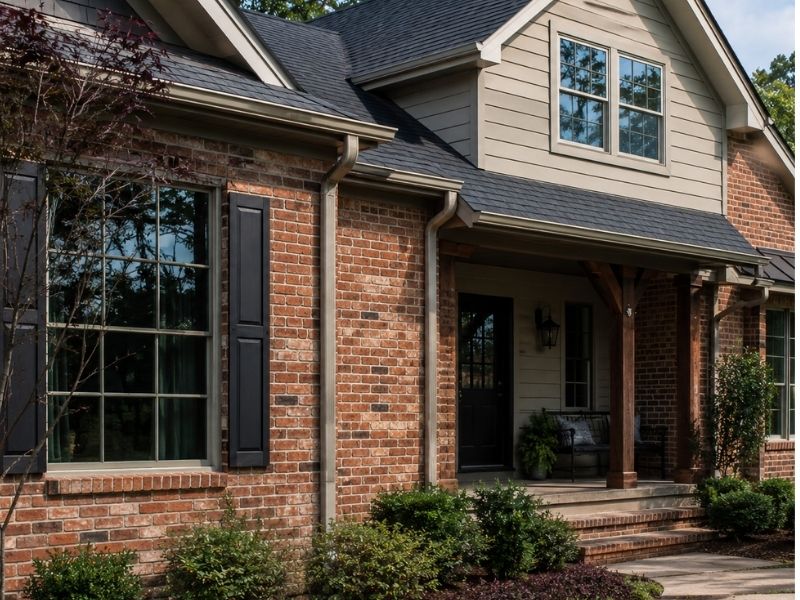
Exterior renovation of an existing brick home in McKinney, TX, featuring complementary siding, trim, roofing, and wood accents.

An exterior renovation gets harder when your home already has brick. Brick carries color, texture, and age that new materials have to live next to. You don’t need to match it or hide it. You just need finishes that sit well beside it. Do that and the whole house looks planned. Miss it and the new work looks bolted on.

Matching New Exterior Materials to the Existing Brick’s Undertones

Start by reading the brick’s undertone, not just its main color. Most brick leans warm, cool, or neutral underneath the surface shade. Red and brown brick usually run warm. Gray and some tan brick can run cool. Once you know the undertone, you can pick finishes that agree with it. Warm brick pairs well with creamy whites, soft greens, and earthy siding tones. Cool brick sits better with grays, cooler whites, and darker charcoal finishes. Mixed brick, which blends several colors, gives you more freedom since it already holds a range of tones. Pull one color from that mix and build your palette around it. You’re coordinating undertones here, not copying the brick, and that difference keeps the look natural.

Using Texture Contrast Without Making an Older Brick Home Look Disconnected

Brick already brings a lot of texture. So the smart move is to balance it, not compete with it. A smooth finish like flat panel siding or clean stucco can calm a busy brick wall and give the eye a place to rest. On the other hand, adding more rough texture next to brick can make an older home feel heavy and cluttered. Contrast works best when one surface stays quiet. If your brick is rough and varied, lean toward smoother new finishes. If your brick is flat and uniform, a little added texture can bring life without clashing. Keep the change gradual so the old and new parts still read as one home. Small, steady contrast beats a sharp jump every time.

Choosing Exterior Finishes for Additions, Garages, and Other New Sections

New additions and garages create a spot where old brick meets new material. That seam is where most projects succeed or fail. To keep it clean, carry something familiar from the original home into the new section. That could be a matching roofline, a shared trim color, or a band of the same brick at the base. Proportion matters too. A large blank wall of new siding next to detailed brick can look off, so break it up with windows, trim, or a change in material partway up. Place the transition at a natural corner or edge rather than the middle of a flat wall. When the new section borrows a few cues from the old one, it feels added on purpose instead of stuck on later.

Coordinating Roof, Trim, Doors, and Accent Materials During an Exterior Renovation

Brick never stands alone on a house. Your roof, trim, doors, gutters, and any stone or metal all share the same view. So judge the brick as part of that whole group, not by itself. Start with the pieces you can’t easily change, like the roof color and the brick. Build the rest of your palette to agree with those fixed features. Pick a trim color that softens the gap between the brick and the siding. Choose a door color that adds a little pop without fighting the brick tone. Keep your accent materials in the same temperature family, warm with warm or cool with cool. When every element pulls in one direction, nothing on the house competes for attention during an exterior renovation.

Testing Exterior Finish Combinations Before Making Permanent Changes

Never commit to a finish based on a small chip or a screen image. Colors shift a lot once they’re outside and next to real brick. So get large samples and hold them right against the brick wall. Look at them in morning light, midday sun, and evening shade. A siding color that looks warm at noon can turn gray and flat by dusk. Check the samples on both the sunny and shady sides of the house since each side reads differently. Leave the samples up for a few days and walk past them the way visitors will. This slow test costs almost nothing, yet it saves you from a color clash you can’t undo later. Trust what you see outdoors over what you saw in the store.

Frequently Asked Questions

What exterior finishes work best with an older brick home?

Fiber cement siding, wood or engineered trim, stucco, and stone all pair well with older brick. The best pick depends on your brick’s undertone and texture rather than a single rule. Warm brick suits earthy siding and creamy trim, while cooler brick suits grays and crisp whites. Choose a finish that shares the brick’s temperature so the two surfaces feel related.

Should new siding match the existing brick color exactly?

No, an exact match rarely works and often looks flat. Brick has natural color variation that flat siding can’t copy, so a direct match tends to fall short. Instead, pull one tone from the brick and use a lighter or softer version of it for the siding. That gives you a coordinated look with enough contrast to keep both surfaces interesting.

Can different exterior materials be combined with brick?

Yes, brick mixes well with siding, stucco, wood, metal, and stone when the tones agree. The trick is limiting yourself to two or three main materials so the house stays calm. Give each material its own clear area rather than scattering them across the walls. Keep all of them in the same warm or cool family, and the mix will look intentional.

How do I choose trim colors that complement existing brick?

Trim works best as the bridge between the brick and the rest of the finishes. Pick a color a few shades lighter or darker than the brick, staying in the same undertone. Creamy whites and soft tans suit warm brick, while cooler whites and grays suit cool brick. Test the trim color right against the brick outdoors before you paint anything.

What should I consider before adding a new exterior finish to an older home?

Look at the fixed features first, meaning the brick, the roof, and anything you won’t replace. Match your new finish to those elements instead of choosing it on its own. Check how the finish handles your climate and how much upkeep it needs over time. Then test full samples against the brick in real daylight before you make the change permanent.

Decorative Masonry Features That Add Style Without Changing Structural Design

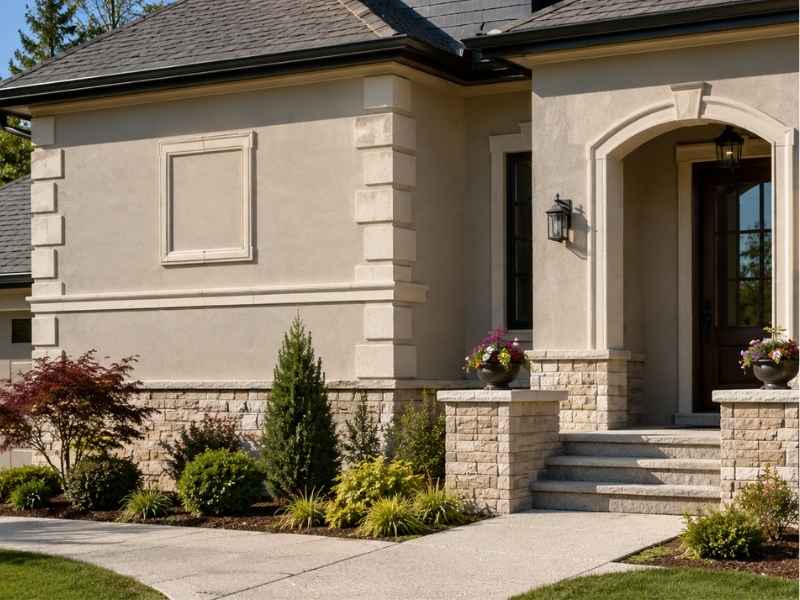
Decorative masonry in McKinney Texas featuring bands, quoins, entry trim, wall caps, and recessed panels that add exterior style.

Not every masonry project means rebuilding a wall. Many homeowners get great results from masonry services that focus only on style, not structure. These features get added onto a wall that’s already there. They give it more character without touching the framework holding the house up. A plain wall can go from flat and forgettable to detailed and sharp with the right touches. Best of all, none of this needs structural changes. It’s about adding style on top of a wall that’s already doing its job.

Add Masonry Bands to Break Up Large Exterior Wall Areas

A big, flat wall can look plain no matter how nice the material is. A narrow, horizontal masonry band gives that wall a visual break. It splits the wall into sections instead of leaving one long, blank surface.

Placement matters a lot here. A band that lines up with a floor level, a window line, or another marker looks planned. One placed at a random height looks like an afterthought. This isn’t about the broader brick patterns already used across a home. It’s a narrow, specific detail added just to break up scale and add interest.

Use Masonry Quoins to Give Exterior Corners More Definition

Quoins are the decorative blocks placed at the outside corners of a building. They do a lot for a home’s overall look. Their size, how far they stick out from the wall, and how they’re spaced all shape how much depth they add to a corner.

None of this needs structural changes or a full decorative stone project. Quoins sit on top of the existing wall as a finishing touch. Done with the right proportions, they can make a plain corner look far more sharp. That gives the whole exterior a stronger, more defined edge.

Frame Entry Openings With Non-Structural Masonry Trim

Trimming around a door, or a set-back entry, can make that spot feel far more finished. This is purely a style choice, not a structural one. It’s meant to frame the entrance and pull the eye toward it, nothing more.

Proportion matters most here. Trim that’s too thick or too thin next to the door throws off the whole look. Getting the end points right, where the trim starts and stops, also keeps the detail looking clean instead of messy. This is strictly about outside framing, not structural beams or brick repair around windows.

Finish Wall Tops and Ledges With Decorative Masonry Caps

Low walls, porch edges, and similar features often look unfinished without a proper cap on top. A decorative cap gives that top edge a clean, complete look instead of leaving it flat or rough.

Getting the size, thickness, and lineup right makes the cap look like it belongs there, not like it was tacked on later. This is separate from retaining walls or mailbox posts, which have their own design needs. Here, the goal is simply finishing off a small wall or ledge with a detail that looks planned.

Introduce Recessed Masonry Panels for Subtle Facade Depth

Sometimes the best style move is a shallow, sunken section built right into the wall. These panels create shadow lines that shift throughout the day as the sun moves. That adds depth to a wall without changing its actual structure.

This works best used here and there, not scattered across every open surface. A large blank wall might do well with one or two of these panels, sized and placed to relate to nearby windows, doors, or other lines on the house. Used with care, recessed panels add real interest without fighting the rest of the home’s look.

Frequently Asked Questions

What are examples of non-structural decorative masonry features? 

Masonry bands, quoins, decorative surrounds, caps, and shallow recessed panels are common examples. Each one is mainly about looks, not about holding up the building.

Can decorative masonry be added without rebuilding an exterior wall? 

Often, yes. Many features can go on as finishes over an existing wall. Still, the wall’s condition, how the new piece attaches, its weight, and other project details need a check first.

What is the difference between decorative masonry and structural masonry? 

Structural masonry helps carry the building’s weight. Decorative masonry is mainly for looks, though it still needs to be put in and supported the right way.

How do homeowners keep decorative masonry from looking excessive? 

Sticking to matching sizes helps a lot. Using a detail here and there, not everywhere, and tying each feature to lines already on the house keeps the look calm instead of busy.

When should decorative masonry details be planned? 

During the design or remodeling planning stage, ideally. Picking sizes, backing, and nearby finishes before work starts makes the whole process go a lot smoother.

Exterior Design Mistakes That Make New Additions Feel Out of Place

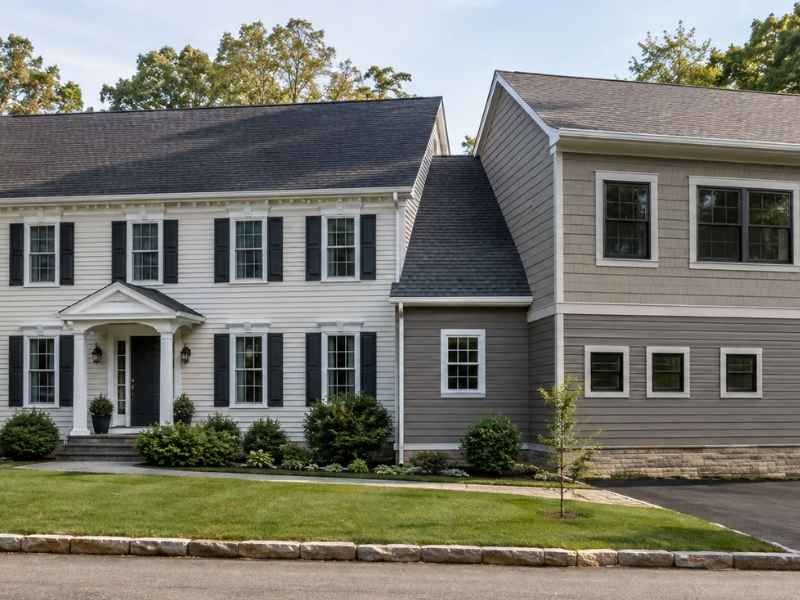
Home additions in McKinney Texas showing exterior design differences that can make a new addition feel out of place.

A lot of home additions end up looking like exactly what they are, an add-on. That’s not because the building work is bad. It usually comes down to a few design choices that make the new part feel separate from the original house. Home additions blend in best when a few key details get planned early, not fixed after the walls are already up. Once framing and finishes are locked in, fixes get expensive fast. Catching problems at the design stage costs far less than catching them after the crew has moved on.

Ignoring the Original Home’s Exterior Proportions

Every house has a certain rhythm to it. Wall heights, window sizes, and the roofline all work together to build that rhythm. When an addition ignores those proportions, even a little, the mismatch shows.

This isn’t about brick patterns or picking the right stone accent. It’s about basic visual balance. A new section with taller walls, oversized windows, or a roofline that doesn’t match the original house will feel off. Most people couldn’t say exactly why, but they’d notice. Getting the proportions right from the start keeps the new addition feeling like part of the same house.

Creating an Abrupt Material Change Between the House and Addition

Switching from one exterior material to another isn’t a problem by itself. Plenty of well-designed homes mix materials. The trouble starts when that switch happens at a random spot on the wall instead of a smart break point.

A material change should land somewhere that makes visual sense, like a corner, an offset, or another clear break in the building’s shape. When it just stops in the middle of a wall for no reason, the addition looks stuck on. Picking the right spot for that switch is a small decision that carries a lot of visual weight.

Misaligning Windows, Doors, and Other Exterior Openings

Windows and doors set up a visual rhythm across the front of a house. When an addition’s window heights, spacing, or sizes don’t match the original structure, that rhythm breaks. People notice, even before they know exactly what’s wrong.

This isn’t about structural issues around openings or repair work near windows. It’s just about alignment. Matching sill heights, keeping even spacing, and sizing new openings to relate to the old ones all help the addition read as one design instead of two parts stitched together.

Overlooking Trim, Fascia, and Exterior Edge Details

Trim and fascia don’t get much attention until they’re wrong. Differences in trim width, fascia depth, soffit details, or corner boards often reveal exactly where the old house ends and the new part begins, even when the bigger design choices are solid.

These smaller pieces do a lot of quiet work. They don’t need to match exactly, but they do need to relate to each other in a way that feels planned. Coordinating these edge details, instead of using whatever trim happened to be handy, makes a real difference in how put-together the finished exterior looks.

Designing the Addition Without Considering the View From the Street

Drawings show a house from angles nobody actually sees in real life. The street view and the driveway view are what people see every day. An addition needs to work from those angles too, not just on paper.

Walls that stick outside, side views that people can actually see, and how the new roof connects to the old one can all look fine in a drawing and still feel off once you’re standing at the curb. Walking the site and checking common views before finishing the design catches problems that a flat drawing just can’t show.

Frequently Asked Questions

Why do some home additions look obviously newer than the original house? 

Differences in proportions, window and door alignment, exterior transitions, and trim details can all make an addition stand out, even when the building work itself is solid.

Do exterior materials on an addition have to match the existing house exactly? 

Not exactly, no. An exact match isn’t required, but the materials should relate to each other through scale, tone, texture, or a well-planned switch point.

Why is window alignment important on a home addition? 

Even window heights and spacing create visual rhythm across the old and new parts of the house. That makes the whole exterior feel like one planned design.

Can trim details make an addition blend better with an existing home? 

Yes. Matched fascia, soffits, corner treatments, and window trim can visually connect two parts of a house without needing the exact same materials everywhere.

When should exterior design coordination happen during an additional project? 

As early as possible, ideally during early design. Waiting until walls, openings, or finishes are already picked makes these changes much harder and more costly to fix.

How Brick and Stone Materials Respond Differently to Heat, Moisture, and Time

Brick and stone materials in McKinney Texas showing how masonry surfaces respond differently to moisture, sunlight, and weathering.

Brick and stone look like they belong to the same family. In some ways, they do. But masonry materials don’t all act the same way once they’re outside facing real weather. One surface might dry fast after rain while another stays damp and dark for hours. One might feel cool to the touch in full sun while the wall right next to it feels hot. These differences aren’t random. They come down to what the material actually is, down to its structure and makeup. Knowing this helps homeowners understand why two parts of the same house can age so differently.

Compare How Brick and Natural Stone Absorb and Release Moisture

Brick and natural stone shouldn’t be expected to handle water the same way. Each one has its own pore structure, and that structure controls how much water gets absorbed and how fast it dries out again. Even different types of natural stone can behave differently from each other.

This is why testing matters so much for natural stone. Absorption varies by stone type, sometimes by a lot. A homeowner might notice one section of a wall darken after rain while a stone accent nearby barely changes color at all. That’s not a flaw. It’s just how these specific materials handle moisture differently.

Understand Why Brick and Stone Heat Up Differently in Direct Sun

Stand near a brick wall on a hot day, then walk over to a stone one. They likely won’t feel the same. Density, color, surface texture, and overall makeup all play a part in how much heat a masonry surface picks up and holds onto.

This isn’t about fireplaces or firebrick. It’s about how ordinary exterior brick and stone behave under the sun over the course of a day. A darker, denser surface tends to hold more heat than a lighter, more textured one. That difference is easy to feel just by touching the wall in the afternoon.

Watch How Repeated Wet-and-Dry Cycles Change Each Material

Rain falls, then the sun comes out and dries things off. That cycle repeats constantly outside, and brick and stone don’t always respond to it the same way over time. Some surfaces develop small mineral deposits. Others show gradual, uneven changes in color across the surface.

These changes usually aren’t a sign of damage. They’re just what happens when a material goes through the same wet-and-dry pattern year after year. Watching for these small shifts helps homeowners understand what’s normal weathering and what might be worth a closer look.

Expect Natural Stone to Weather Less Uniformly Than Manufactured Brick

Manufactured brick starts out fairly consistent. It’s made under controlled conditions, so most pieces in a batch share similar properties from the start. Natural stone works differently. Its mineral makeup varies from piece to piece, since it comes straight from the earth rather than a factory.

That variation shows up over time. Some stone pieces may weather or oxidize a little differently than the ones right next to them, especially as their minerals slowly react to years of sun and moisture. This kind of uneven change doesn’t mean the stone is failing. It’s simply part of what makes natural stone, well, natural.

Use Material-Specific Performance Data When Choosing Brick and Stone

Not every brick behaves like every other brick, and the same goes for stone. Treating all masonry as interchangeable skips over real differences that matter once the material is actually outside facing the elements.

Absorption rates, density, resistance to environmental exposure, and how a material handles thermal and moisture cycling are all recognized factors when evaluating natural stone specifically. Looking at the properties of the actual product being considered, rather than assuming one type of stone or brick behaves like another, gives homeowners and designers a much clearer picture of what to expect over the years ahead.

Frequently Asked Questions

Does brick absorb moisture differently from natural stone? 

Absorption depends on the specific brick or stone product involved. It’s not accurate to assume one entire material category always absorbs more water than the other.

Why can stone change color after it gets wet? 

Moisture can temporarily deepen the appearance of some stone types. Over longer periods, mineral composition can also influence how a stone’s color or texture gradually changes.

Do dark brick and stone surfaces get hotter in direct sunlight? 

Often, yes, but not always in the same way. Surface color, texture, orientation, and material properties all affect heat gain, so surfaces that look similar may not behave identically in the sun.

Does natural stone always weather evenly?

No. Natural stone has built-in mineral and texture variation, which can lead individual pieces to change differently over years of exposure. Some stone types are specifically evaluated for how they handle environmental and thermal cycling.

Should homeowners compare technical data before choosing brick or stone? 

It helps, especially for masonry that will face a lot of moisture, sun, or temperature swings. Product-specific information gives a clearer picture than choosing based on appearance alone.

Brick Patterns That Change the Look and Feel of Home Exteriors

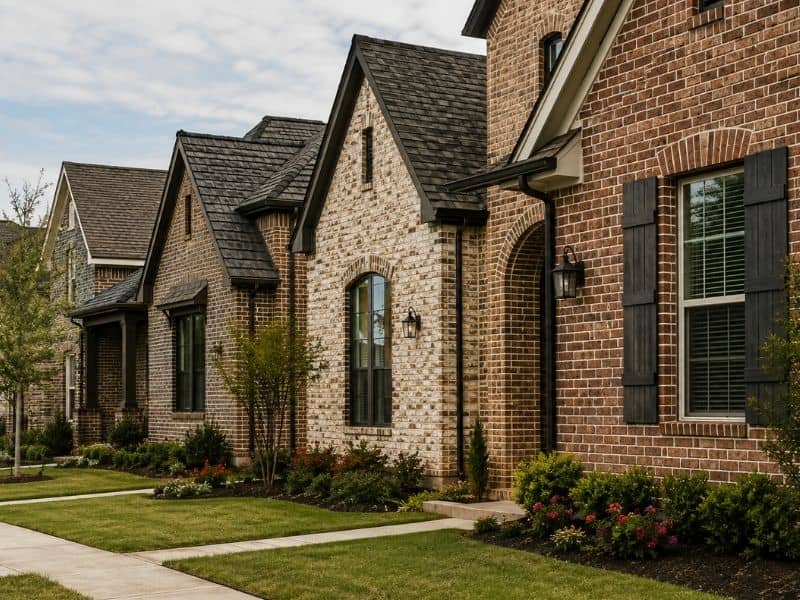
Brick patterns on traditional and modern home exteriors in McKinney, Texas

Brick design is about more than color. The way bricks line up on a wall can change how a whole house feels from the street. Some patterns look neat and traditional. Others feel loose and modern. Homeowners are often surprised at how much a simple layout choice can shift a home’s overall style. If you’re working from a construction survey, that document already shows your exact wall lines and elevations, which makes it easier to picture how a new brick pattern will actually sit on your facade.

Running Bond vs. Stack Bond for Different Exterior Styles

Running bond is the pattern most people picture when they think of brick. Each row shifts halfway over the row below it, creating a staggered look that reads as classic and familiar. It works on almost any style of home, which is part of why it shows up so often on older and newer builds alike.

Stack bond is the opposite. Every brick lines up directly above the one below it, forming clean vertical and horizontal lines. This creates a more geometric look with sharp, repeating grid lines. On a modern home with flat roof lines and large windows, stack bond can feel intentional and current. On a home with more traditional trim and detailing, the same pattern can feel too rigid. The choice comes down to whether you want the wall to feel steady and traditional, or crisp and structured.

Herringbone and Basketweave Patterns as Exterior Accents

Herringbone lays bricks at an angle, forming a zigzag that catches light differently than a flat pattern. Basketweave arranges small groups of bricks in alternating directions, creating a woven look. Both patterns are busier than running bond or stack bond, so they work best on a smaller section of the exterior rather than the whole house.

A herringbone panel below a bay window or a basketweave insert near an entry can turn a plain wall into something worth a second look. These patterns pair especially well with older architectural styles, since they echo detail work you’d find on historic homes. They can also work on updated exteriors when used sparingly, as long as the rest of the facade stays simple enough to let the accent stand out instead of competing with other busy elements.

How Brick Pattern Scale Affects the Appearance of a Home

Scale changes how a pattern reads from the street. Tight, repetitive patterns with small joints tend to make a wall feel dense and detailed. From a distance, this can make a home look more textured and grounded. Up close, though, a tightly packed pattern can feel overwhelming on a smaller house, since there’s less flat space for the eye to rest.

Looser, more open layouts with wider joints do the opposite. They make a wall feel calmer and give the brick more breathing room. On a large elevation, this openness can keep the house from feeling too heavy or busy. On a smaller home, it can actually make the exterior feel bigger, since there’s less visual clutter competing for attention. Matching pattern scale to house size is one of the easiest ways to avoid a mismatched look.

Using Brick Layouts to Connect Traditional and Modern Home Styles

Brick pattern is one of the few design choices that can bridge two very different architectural styles on the same street. A traditional running bond pattern paired with modern trim colors and simple black window frames can create a house that feels updated without losing its classic bones. On the flip side, a stack bond pattern combined with a gable roof and traditional shutters can soften a modern layout so it doesn’t feel out of place next to older homes nearby.

The key is looking at what’s already fixed on the house. Roof shape, window placement, and trim style aren’t easy to change, so the brick pattern should work with those features instead of against them. A pattern that ignores the home’s existing lines will always look like an afterthought, no matter how well it’s installed.

Choosing a Brick Design That Keeps the Exterior Visually Balanced

Every brick pattern pulls a certain amount of attention. Simple patterns fade into the background and let other features, like a porch, a door color, or landscaping, take the spotlight. Complex patterns do the opposite. They become the focal point, so everything else needs to stay simpler to avoid competing.

Before choosing a layout, think about what you actually want people to notice first. A house with a striking front door or a detailed porch railing usually looks best with a quieter brick pattern that supports those features rather than pulling focus away from them. A plainer home with fewer architectural details can handle a bolder pattern, since there’s less competition for attention. Balance isn’t about picking the fanciest option. It’s about matching the pattern’s visual weight to what the rest of the house is already doing.

Frequently Asked Questions

What is the most common brick pattern for home exteriors? 

Running bond is by far the most common choice. Its staggered rows create a familiar, easy-to-read look that works across almost every architectural style, from older colonials to newer builds.

Which brick pattern looks most modern? 

Stack bond tends to read as the most contemporary option. Its aligned grid lines create a clean, geometric look that pairs well with flat roof lines and minimal trim.

Which brick pattern is best for a traditional-style home? 

Running bond and herringbone accents both work well on traditional homes, since they echo patterns often seen on older, historic builds. Neither is a strict rule, though, since plenty of traditional homes use other layouts successfully.

Can different brick patterns be used on the same house? 

Yes. A common approach is using one primary pattern across most of the exterior and a second pattern, like herringbone or basketweave, as a smaller accent near an entry or a window.

How do I choose the right brick design for my home? 

Look at your home’s architectural style, the size of the facade, and any existing features you want to highlight. The pattern should support those elements rather than pull attention away from them.

What Homeowners Should Know Before Adding Decorative Stone Features

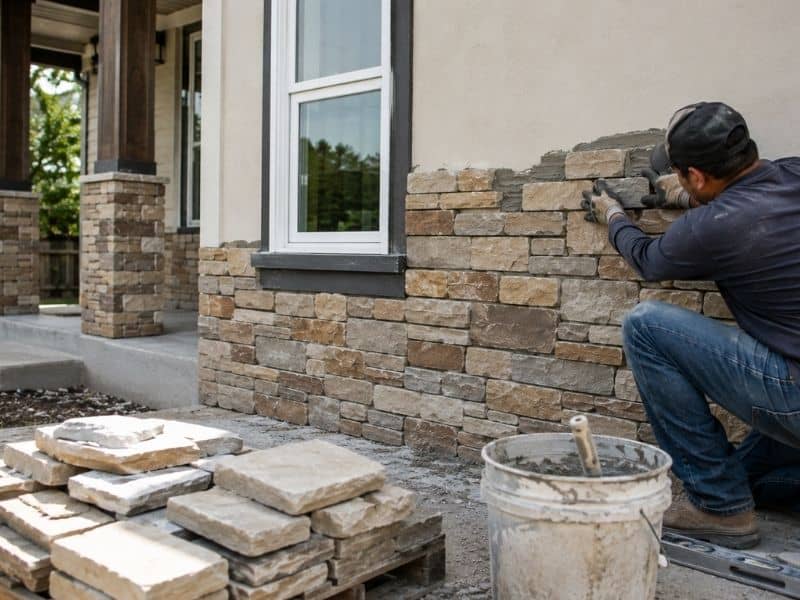
Mason installing stone veneer on a home exterior during a renovation project in McKinney, Texas.

Stone veneer is one of the easiest ways to give a house more character without a full remodel. It costs less than real stone, weighs less too, and it can turn a plain wall into the best part of your front yard. Homeowners often add it around the front door, on a porch column, or across one accent wall. If you already have a construction survey of your property, this is a good time to pull it out. It tells you where your lot lines, walls, and utility lines sit, so your contractor can plan the stone work without surprises. 

Choosing Stone Veneer That Fits the Home’s Exterior Style

Not every stone works with every house. A rugged, rough-cut stone looks great on a farmhouse but can feel out of place on a sleek modern build. Before you pick anything, look at your home’s current colors and shapes. Brick homes usually pair well with warm gray or tan stone. Homes with dark trim can handle a bolder, darker stone without looking too heavy.

Texture matters just as much as color. Smooth, flat stone gives a cleaner, more modern feel. Rough, jagged stone brings a more natural, cabin-style look. Pattern counts too. Some stone comes in even rows, like bricks. Other stones are stacked randomly, which feels more organic. Bring home a few sample pieces and set them against your siding in daylight. Colors can look very different indoors than they do outside.

Where Decorative Stone Features Add the Most Visual Impact

Stone veneer works best when it draws the eye to one spot instead of covering everything. The front entry is the most common choice. A stone surround around the door frames it and makes it the star of the whole exterior. Porch columns are another strong option, especially on homes with covered front porches, which are common across McKinney neighborhoods.

An accent wall near the garage or below a window can also break up a large, flat surface. Some homeowners choose a stone base that wraps around the bottom third of the house, which adds weight and grounds the design. The goal is balance. Too little stone can look like an afterthought. Too much can hide the architecture you’re trying to highlight. Pick one or two spots and let them stand out.

Preparing the Existing Surface for Stone Veneer Installation

The surface underneath your new stone matters more than most homeowners expect. Wood siding, stucco, and brick each need different prep work before installation can begin. A contractor will usually check for soft spots, cracks, or old paint that could keep the stone from sticking properly.

Moisture is the biggest concern. If water gets trapped behind the veneer, it can cause damage over time that you won’t see until it’s already serious. That’s why a weather-resistant barrier and proper flashing go in before a single stone is placed. If your home has any past water stains, warped boards, or bubbling paint, those areas need to be fixed first, not covered up. Skipping this step is one of the most common reasons stone veneer fails early.

How Stone Veneer Changes the Look of Exterior Renovations

Adding stone during a bigger renovation changes more than just one wall. It shifts the balance of the whole exterior. A house with plain siding can suddenly feel more grounded once stone appears near the base or the entry. The texture contrast alone makes flat siding look sharper by comparison.

This is also why coordination matters. New stone should work with your existing trim color, your front door, and your roof shade, not fight against them. If you’re planning other updates at the same time, like new siding or a repainted door, choose those colors first. Then match the stone to that palette instead of the other way around. A renovation looks planned when every piece points back to the same overall style.

Maintenance Considerations for New Decorative Stone Features

Stone veneer doesn’t need much upkeep, but it isn’t maintenance-free either. Rinsing it with a garden hose a few times a year keeps dirt and pollen from building up. For tougher grime, a soft brush and mild soap work fine. Avoid pressure washers on close range, since they can wear down the joints between stones.

Check the veneer once or twice a year for cracks, loose pieces, or discoloration. These small issues are easy to fix early but can turn into bigger repairs if ignored. Keep an eye on the area right below the stone too. If you notice soft ground, pooling water, or plant growth pressed against the base, move sprinklers or plants away so moisture doesn’t sit against the surface.