Outdoor Kitchen Masonry That Stays Cleaner Around Grease and Cooking Heat

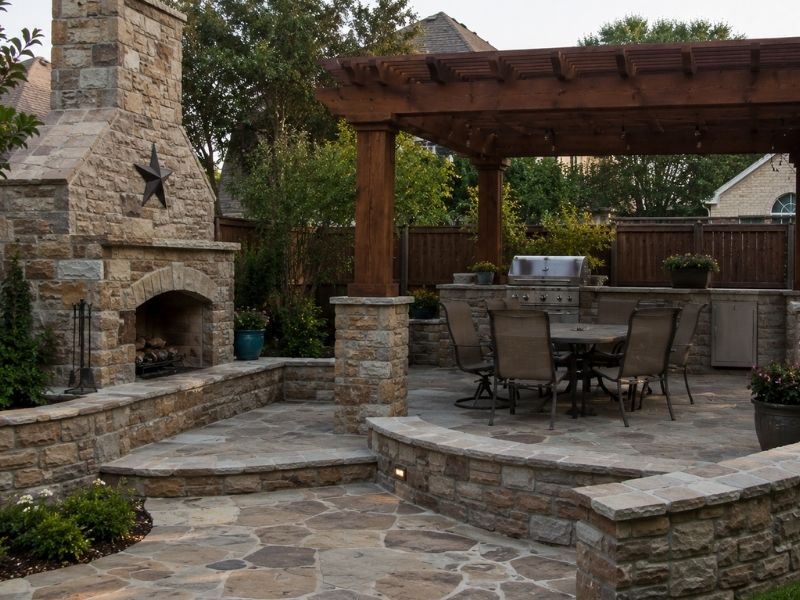
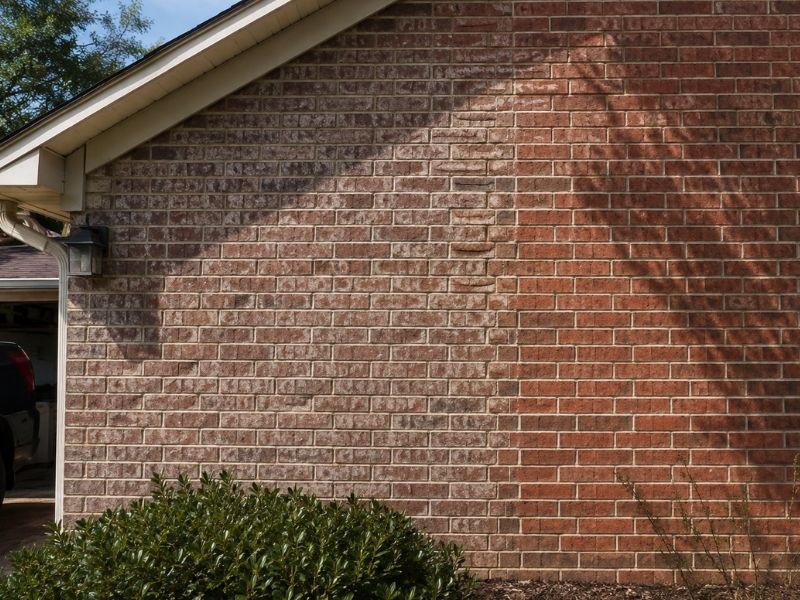
Clean outdoor kitchen masonry around a built in grill in McKinney Texas

An outdoor kitchen gets used a lot in McKinney, Texas, where people grill almost all year long. But all that cooking means grease, smoke, and heat hit the brick and stone around your grill again and again. Pick the wrong materials, or skip a few small details, and you end up scrubbing stains that never fully come out. The good news is that most of this comes down to choices made before the kitchen is even built. Here’s what actually keeps outdoor kitchen masonry looking clean instead of dirty.

Choose Dense Masonry Surfaces Around Grills and Prep Areas

Not all brick and stone act the same way once grease touches them. Some materials soak up oil like a sponge. Once that happens, smoke and grease in the air start to darken the surface for good. Rough, bumpy stone looks nice in photos, but every little dip and groove becomes a spot where grime settles in and stays put.

Solid, tightly finished masonry does not soak up grease as easily. A quick wipe after cooking actually works, instead of just pushing grease deeper into tiny holes in the surface. When picking materials for the space right around the grill and counter, pick something solid, not just something that looks bumpy or textured. Save the rougher stone for spots farther from the heat and splatter, where looks matter more than easy cleaning.

Reduce Deep Mortar Joints That Collect Grease and Food Debris

Mortar joints are the thin lines of cement between bricks or stones. They seem like a small detail until you’re trying to clean around one for the fifth time this month. Deep, rough, or uneven joints act like tiny ditches. Grease, crumbs, and sauce drips settle in and dry there, and a rag alone won’t get it out.

A flat or slightly curved joint leaves much less space for food and grease to grab onto. A skilled mason can keep joints tight and even without making the finished kitchen look plain. This is a small detail most homeowners never think to ask about, yet it makes a real difference every time someone cooks.

Protect Masonry Behind the Grill From Heat and Smoke Stains

The wall right behind a grill takes a beating. It soaks up heat, catches rising smoke, and gets hit with grease every time something sizzles on the grates. Plain decorative stone or brick often was not built to handle that kind of heat and mess. Stains show up faster than most homeowners expect.

A proper wall behind the grill needs heat-proof material, enough space between it and the appliance, and a surface that can actually be wiped clean without getting damaged. Trying to save money here usually backfires within a season or two, once smoke stains set in and won’t come off no matter how hard you scrub.

Add Drip Edges and Overhangs to Keep Grease Off Cabinet Faces

Countertops that sit flush with the cabinet below them create a straight path for oil, sauce, and rain to run right down the brick or stone. Over time, that steady drip leaves streaks near doors, drawers, and corners, exactly the spots people notice first.

A countertop that sticks out a bit past the cabinet, with a small drip edge cut underneath, changes that path. Instead of running down the cabinet face, the liquid drips off the edge and misses the masonry below. It’s a small detail, easy to forget during planning, but it saves a lot of scrubbing later. Ask about drip edges before the countertop is built, since adding one afterward is much harder.

Plan Accessible Cleaning Zones Around Outdoor Kitchen Appliances

A grill jammed tight against a smoker, with barely enough room to slide a hand between them, is a cleaning nightmare waiting to happen. Grease pools in the gaps nobody can reach, and spills sit there for weeks because cleaning them means practically taking the whole setup apart.

Leave real space around each appliance while you are still planning the kitchen. Grease trays should actually pull out once everything is installed, not get blocked by a cabinet edge. Panels that need to open for cleaning or repairs need enough room to swing all the way open. A little extra planning here means spills get wiped up the same day they happen, instead of turning into a stain that needs strong cleaner and an hour of scrubbing.

Frequently Asked Questions

What masonry material is easiest to clean in an outdoor kitchen? 

It comes down to how solid the surface is, how rough it feels, how the joints are built, and the finish, not simply whether the kitchen uses brick or stone. Smooth, solid surfaces are usually easier to keep clean than rough stone that traps grease in its grooves.

Should outdoor kitchen masonry be sealed against grease? 

A sealer made for outdoor masonry can help block some grease, depending on the material. It has to match the exact brick, stone, and mortar you have, plus the location and how much heat that spot will face.

Can grease permanently stain brick or natural stone? 

Yes, soft or bumpy masonry can soak up oil if a spill sits there too long. Wiping up a spill right away, using a cleaner made for that specific material, works far better than scrubbing hard with strong chemicals after the stain has already set in.

What should be installed behind an outdoor grill? 

A wall material that won’t burn, can handle heat, and wipes clean easily, built with the space the grill maker says you need around it. Plain decorative stone that wasn’t made to handle this kind of heat is not a safe stand-in.

How often should masonry around an outdoor kitchen be cleaned? 

A light wipe-down should happen right after any cooking session where grease splatters. Deeper cleaning depends on how often you cook, what fuel you use, how much weather the area gets, and how rough or soft the masonry is to start with.

When a Brick Mason Rebuilds a Wall Section Instead of Repointing It

Brick mason rebuilding a damaged brick wall section instead of repointing after identifying loose bricks, deep mortar failure, and wall movement in McKinney, TX.

A crack keeps widening between the same two courses, or a patch of brick bulges out from the rest of the wall. A professional brick mason has to decide whether fresh mortar will fix it or whether that section needs to come apart and go back together. Repointing works when the bricks are sound and only the joints have worn. Once the brick has lost its bond or the wall has shifted out of line, packing in new mortar just hides the problem. This article explains how a mason tests the wall, identifies signs that repointing will not hold, establishes the limits of a rebuild, and puts the section back together so the same failure does not return. Knowing the difference helps you plan the right repair the first time.

How a Brick Mason Tests Whether the Bricks Are Still Secure

A brick mason starts a repair by finding out how much of the wall still holds together. Repointing only replaces worn mortar between sound bricks. So the first job is to learn whether the problem stops at the joint surface or reaches into the brick itself.

The mason presses and taps individual bricks to feel for movement. A brick that rocks, shifts or sounds hollow has lost its grip on the mortar around it. One loose brick near the surface is often a small fix. Several loose bricks across the same area point to a bigger problem the joints alone can’t solve.

Next comes a look at the joints and the courses nearby. Shallow erosion, where only the outer face of the mortar has worn away, usually calls for repointing. Deeper trouble shows up when bricks on either side of a joint have pulled apart, or when a whole row has drifted out of line. At that point the bond is failing, not just the mortar face, and repointing won’t bring it back.

When Deep Mortar Deterioration Makes Repointing Insufficient

Mortar can fool you. The face of a joint might look crumbled and soft while the mortar an inch back stays firm and tight. That kind of surface wear is normal, and it’s exactly what repointing is built to fix. The mason rakes out the soft outer layer and packs in fresh mortar against the sound material behind it.

The picture changes when the damage runs most of the way through the joint. If the mason rakes into a joint and keeps hitting loose, sandy or empty space, there’s little solid mortar left to build against. Fresh mortar needs something firm to bond to and press against. Pack it into a joint that’s hollow all the way back, and it has nothing to hold it in place.

Once too much of the joint depth is gone, repointing turns into a patch that won’t last. The wall may hold for a season, then loosen again as the weak core keeps giving way. When a mason finds deep, widespread mortar loss across a section, taking that section apart and rebuilding it is the repair that holds.

Wall Movement That Requires Bricks to Be Removed and Reset

Some walls have a problem that fresh mortar can’t touch. A section may bulge outward, lean to one side or show bricks that have slipped out of their row. Cracks that keep widening between courses are another clear sign. All of these mean the masonry has shifted away from where it was built to sit.

Repointing swaps out old mortar for new. It does nothing to move a brick back into place. A leaning or bulging wall is already out of alignment, and packing new mortar into the joints just locks the crooked shape where it is. Worse, it can hide the movement for a while and let it keep going out of sight.

That’s why a mason treats real movement as a rebuild trigger, not a repointing job. To straighten a bulged or leaning section, the bricks have to come out and go back in true. There’s no way to reposition a wall from the joints alone. The moment a section has clearly moved, the fix means removing the affected brick and resetting it.

How a Brick Mason Establishes the Limits of the Rebuild

Before any brick comes out, the mason decides how far the rebuild has to reach. The goal is simple. Remove the damaged masonry until you reach brick and joints that are still firm, still in line and still bonded to the wall. The rebuilt section then ties into solid work on every side.

This often means the repair area is larger than the damage you can see. Loose or shifted brick at the edge of a failure won’t give a stable base for new work. If a mason rebuilds right up against a brick that’s already half-detached, the new section has a weak seam built into it from day one. Cutting back to sound brick makes the finished repair stronger than a tight patch around the ugliest spot.

The mason also reads how the courses line up around the opening. Brick walls carry load along their rows, so the edges of a rebuild need to lock into the existing pattern cleanly. Stepping the removal back to firm, well-aligned brick gives the new courses something square to build from. It takes out more material up front, but it leaves no soft border for the next failure to start at.

Rebuilding the Wall Section Without Repeating the Original Failure

With the section opened up, the mason cleans or matches the brick and resets it in the wall’s original bond pattern. Old brick that’s still sound often goes back in after the loose mortar is removed. Where brick is broken or spalled, a professional brick mason brings in replacements that match the size, color, and texture of the wall as closely as the job allows. Fresh mortar of a compatible type ties the whole section back together.

Resetting brick correctly matters, but it isn’t the whole repair. A wall section rarely fails on its own. Something usually pushed it there, and rebuilding without fixing that cause just resets the clock on the same problem. The mason looks past the brick to determine what drove the failure.

The usual culprits sit behind or beneath the visible wall. Weak or missing support can let a section sag or bow over time. Water that keeps soaking the same spot breaks down mortar and rusts the metal ties that hold brick to the structure. Worn-out anchors, movement in the wall behind the brick, or poor drainage can continue causing damage long after a repair is completed. The rebuild lasts when those conditions are corrected first and the brick is reset into a wall that is ready to support it.

How a Stone Mason Blends Utility Access Into an Outdoor Feature

Stone mason in McKinney, TX blending utility access into an outdoor feature with a stone-faced panel covering reachable gas and electrical connections.

A well-built outdoor feature often hides a working system inside it. Behind the stone of a grill island, a fountain, or a fire feature sit valves, wires, and connections that someone will need to reach one day. A good stone mason plans for that day before the first stone goes down. When access gets ignored, the fix later means tearing into finished masonry to reach a shutoff or a box. Building the access in from the start keeps the feature good-looking and easy to service for years to come.

Locate Every Service Point Before Design Begins

You can’t build around something you haven’t mapped. Valves, cleanouts, electrical boxes, irrigation controls, and gas connections all need to be found and marked before the design is set. Each one is a spot a person will have to reach again someday. Knowing where they sit shapes the whole layout of the feature from the start.

These service points can change the size, position, and shape of the masonry more than people expect. A valve that has to stay reachable might shift a wall a few inches or determine where an opening goes. A cleanout buried under a solid stone base becomes a major problem the first time a drain backs up. A gas connection sealed behind finished stone can force a full teardown for a repair that should have taken minutes. Planning these details early allows professional masonry services to design the feature around real access needs instead of running into costly problems halfway through construction.

Access Panels Should Follow the Stone Pattern

An access point doesn’t have to break up the look of a feature. Framed access doors, removable faced panels, coordinated covers, and lift-off caps can all carry the same stone as the surface around them. Done well, the opening reads as part of the pattern rather than a patch stuck on top of it. The eye slides right past it without stopping.

The key is planning the panel as part of the design, not adding it once the stone is up. A panel worked in from the start lines up with the coursing and matches the joints around it. One cut in later almost always looks like an afterthought, with mismatched edges and a frame that fights the surrounding pattern. When the access piece gets the same care as the rest of the face, it hides in plain sight while still opening the moment someone needs it. That balance between looks and function is the whole point of doing it early.

Leave Room to Reach and Repair

An access point only helps if a person can actually use it. Utilities packed in too tight leave no room for a hand, a tool, or a replacement part. A shutoff you can see but can’t turn is nearly as useless as one you can’t reach at all. Space is what makes access real rather than just a nice idea.

Planning that space means thinking about the whole job someone might do there. A valve needs room to operate, not just room to look at. Routine maintenance, inspection, and swapping out worn equipment all take working clearance around the part. A mason who leaves enough space saves the next person from cutting into good stone to finish a simple repair. That room costs almost nothing to plan into the design and a real fortune to carve back in after the fact.

Openings Hide Best Along Design Breaks

Where an opening sits decides how much it stands out. An access point dropped in the middle of a clean stone face pulls the eye straight to it. Placed at a natural break in the design, that same opening nearly disappears. Smart positioning does most of the work of hiding it.

Corners, cabinet doors, material transitions, seating divisions, and shifts in the stone pattern all make good homes for an opening. These spots already interrupt the surface, so a panel there blends into a break the eye is expecting anyway. A cover that lines up with a cabinet door looks like part of the cabinetry. A panel set at a change in material reads as part of that transition rather than a separate feature. Lining the opening up with an intentional break keeps it fully usable while making it far harder to spot.

Coordinate With the Right Trade First

Different systems come with different rules, and a mason isn’t the one who sets them. Plumbing, electrical, gas, irrigation, and mechanical parts each carry their own needs for clearance, venting, labeling, and access. Building stone around a service point without checking those needs first can trap a component that was supposed to stay reachable or vented.

A quick coordination step with the right trade heads that off:

  • Plumbing needs room to work shutoffs and clear cleanouts
  • Electrical boxes need code clearance and covers that stay reachable
  • Gas connections need proper ventilation and an accessible shutoff
  • Irrigation controls need access to valves and wiring
  • Mechanical equipment may need airflow and space for service

Checking with the trade before the masonry closes in means the stone works with the system instead of against it. The mason builds once, the utility stays safe and serviceable, and nobody has to reopen a finished feature to fix a detail that a short conversation would have solved. That coordination is what separates a feature that looks good on day one from one that still works twenty years down the line.

Retaining Wall Corner Movement That Calls for a Professional Inspection

Retaining wall corner movement in McKinney, TX showing separated blocks, shifted capstones, moisture staining, soil erosion, and a professional structural inspection.

A retaining wall holds back soil day after day, and the corners take some of the hardest strain. When two wall sections meet, they carry pressure coming from two directions at once. That’s why trouble often shows up at a corner before it appears anywhere else along the run. Watching those meeting points closely can catch a small problem while it’s still cheap and simple to fix. The signs below show what corner movement looks like and when it turns serious enough to call a professional.

Separation Where Two Sections Meet

The place where two wall sections join is a natural weak point. When that joint starts pulling apart, you’ll usually notice it there first. Widening gaps, cracked joints, shifted caps, and blocks that no longer line up can all point to sections moving in different directions. These signs mean the two runs aren’t holding together the way they were built to.

Not every crack spells trouble. A thin surface crack can come from normal curing or minor settling and never grow into anything real. The changes worth taking seriously are the ones that keep moving. A gap that widens over several months, a cap that keeps creeping out of place, or a joint that opens a little more each season shows movement that hasn’t stopped. A crack you can watch grow is a very different thing from one that’s held steady for years. When a change keeps building on itself, it earns a closer look instead of a quick smear of patch material.

Compare How Each Face Lines Up

A corner ties two wall faces together, and they don’t always move as a pair. One side might lean outward while the other holds its line. One face can bulge or twist while its neighbor stays flat. Checking both faces against each other tells you far more than studying a single side on its own.

The trick is to look from more than one position. Standing straight in front of a wall hides a lot, since a slow lean or a gentle bulge barely registers head-on. Step off to the side, sight down the length of each face, and study the corner from a few angles and distances. Movement that’s invisible from the front often jumps out the moment you view the wall along its length. Comparing the two faces this way shows which side is doing the pushing and which one is starting to give. That difference usually points straight toward where the real problem sits.

Soil Pressure Builds Up at the Return

Every retaining wall pushes back against the soil behind it, and that pressure isn’t equal everywhere. Near a corner or a wall return, force can stack up from two directions at once. Anything resting on the retained soil adds to the load. The more weight sitting above the wall, the harder the corner has to work to hold everything in place.

A lot of ordinary features raise that pressure without anyone giving it a thought. A raised planting bed full of wet soil adds real weight. A driveway, a shed, a patio, or a stack of stored materials near the top all press down on the ground the wall is holding. A steep grade change behind the corner makes the load heavier still. When you notice heavy features close to a wall return that’s already showing movement, that extra pressure is often part of the cause. Taking some of that load off, by moving stored material or reshaping a bed, can ease the strain, though a corner that’s already shifting may need more than that to set right.

Trace Water Trouble at the Joint

Water likes to gather where two wall sections meet. A corner can funnel runoff toward one narrow spot, and if the drainage there isn’t keeping up, moisture builds in the soil behind the wall. Wet soil weighs more and pushes harder, so a drainage problem at a corner can be the very thing driving the movement you see.

The clues are usually right there once you know what to look for. Staining down the face, soil that stays damp long after a rain, and small ruts of erosion all hint at water pooling nearby. Sediment washed out at the base, a drainage outlet that sits plugged, or backfill carried off by runoff tell the same story. When these signs cluster around a corner that’s moving, water is likely feeding the problem. Clearing a blocked outlet or fixing where the runoff lands can slow it down. Steady washout next to a leaning corner, though, is a clear sign to get a proper assessment before the damage spreads.

Know When a Professional Should Step In

A careful look at a corner tells you a great deal, yet some situations call for trained eyes. A professional inspection weighs the wall height, how far the wall has visibly moved, the drainage around it, any soil that’s washed away, the loads sitting above, and any hint of uneven settling underneath. All of those factors read together give a much clearer picture than any single clue on its own.

The plain truth is that the exact cause often can’t be judged from the surface. What looks like a simple drainage fix can trace back to a failing footing or soil shifting well below the blocks. Serious warning signs may require professional retaining wall repair, not a hopeful guess or a temporary surface fix. A wall leaning noticeably, a face bulging outward, cracks that keep widening, or movement that just won’t settle all belong in that group. When those turn up at a corner, an expert can find the real cause and plan a repair that holds, rather than a cover-up that looks fine right until the next heavy rain.

Brick Pavers Near Entry Doors Need a Plan for Threshold Drainage

Brick pavers near entry doors with proper threshold clearance and a channel drain directing rainwater away from the entrance

Brick pavers installed near an entry door require careful planning to help manage drainage around the threshold. The finished elevation, surface slope, and direction of water runoff all influence how effectively water is directed away from the doorway and adjacent masonry. If these details are overlooked, water can collect near the entrance and increase the risk of moisture-related problems over time. Planning drainage before installation helps create an entry that performs well while supporting the long-term durability of both the pavers and the surrounding structure. 

Slope Carries the Water Away

The first requirement is straightforward. Water landing on the paved area, whether from rain, roof runoff or irrigation, has to travel away from the door rather than toward it. That happens through slope, generally a gentle fall away from the house that people won’t notice underfoot but water will follow reliably. Something in the range of a quarter inch of drop per foot works for most entries.

The complication is that entries rarely slope in one clean direction. A landing usually needs to shed water away from the house, away from any steps, and toward a place where the water can actually go without flooding a bed or washing out mulch. Setting those elevations means thinking about the whole surface at once rather than sloping each piece independently. Roof runoff deserves particular attention, since a downspout discharging near an entry can deliver more water in five minutes than the surface was designed to move. Redirecting that flow underground or well away from the paved area removes most of the load before the pavers ever see it.

The Height Relationship Between Pavers and the Threshold

Paver height relative to the door threshold decides how much protection the entry has. Pavers set too high leave no vertical separation, so any water that ponds even briefly sits at the same level as the door sill and finds its way under it. Building codes and door manufacturers generally call for a drop from the threshold to the finished surface outside, and honoring that gap gives the assembly a margin during heavy rain.

This gets overlooked most often on retrofit work. Adding pavers over an existing concrete stoop raises the surface by the thickness of the paver plus its setting bed, which can be two inches or more, and that alone can eliminate the clearance the original construction had. Installers who plan for it either remove material first, adjust the elevations across the landing, or step the surface down away from the door. Checking the existing threshold height and calculating the finished elevation before ordering material prevents a situation that gets discovered only when the pavers are already down and the door no longer has any protection at all.

Drainage Features Where Slope Isn’t Enough

Some entries can’t shed water by grade alone. A landing tucked between a house wall and a raised planting bed, a recessed entry, or a walkway running downhill toward the door all trap water in ways that slope can’t fully solve. Those situations call for something that collects water and carries it off.

A channel drain set across the approach and connected to a solid pipe handles most of these conditions well, provided the outlet actually goes somewhere and doesn’t just discharge two feet away. A small area drain at a low point works for pockets, and a French drain along the uphill side intercepts water before it arrives. Whatever the method, it needs maintenance access, because a drain packed with leaves performs exactly like no drain at all. These features cost far less when they’re installed during the excavation than when someone cuts a finished surface apart to add them, so identifying the need belongs in the planning conversation.

Connecting to Steps, Porches and Adjacent Masonry

Entries are busy places for masonry. Pavers meet steps, porch slabs, walkways, low walls and sometimes a foundation face, and each connection involves materials that move at different rates and hold water differently. A rigid mortar bond between a flexible paver field and a concrete stoop cracks predictably, right where everyone sees it.

Good connections plan for both movement and drainage. Soft joints filled with flexible sealant, small elevation changes, and coursing that runs into the adjacent element rather than dying into it awkwardly all help. Drainage has to continue through the transition too, since a step or wall placed across the natural fall line becomes a dam that holds water against the house. Where a paver surface abuts a porch or foundation, keeping water from collecting in that seam protects both the masonry and whatever sits behind it. Appearance matters at these points as well, because the entry is the part of a property people look at closely and from a standing distance.

Plan the Whole Entry, Not Just the Paving

The best entry surfaces come from treating the area as a single system. Grading, roof drainage, irrigation, planting beds, lighting and the paved surface all interact, and a change to any one of them affects the others. Irrigation spraying onto pavers keeps them damp and encourages growth in the joints. A planting bed built up higher than the paved area sends water back across it every time it rains.

Sequencing keeps the work efficient. Conduit for entry lighting, sleeves for future irrigation and any drain lines belong in the ground before the base course goes down, and doing that during excavation costs a fraction of trenching through finished work. Selecting the pavers, the step treads and any adjacent stone at the same time gives a match that later purchases rarely produce. An entry planned this way keeps water where it belongs through years of heavy storms, and it still looks the way it did on the first day.

Masonry Mailbox Openings That Protect Doors, Numbers, and Delivery Access

Masonry mailbox openings with clear door space, visible address numbers, lighting, and convenient curbside delivery access

Masonry mailbox design should balance appearance with everyday function. The mailbox opening needs to accommodate typical mail, the door should operate without interference from the surrounding masonry, address numbers should remain easy to read from the street, and the installation should provide convenient access for both mail delivery and property owners. Considering these practical details before construction begins helps create a masonry mailbox that complements the home while remaining functional and easier to use over time. 

Size the Opening Around Real Mail

The mailbox insert determines the opening, and that order matters. Choose the box first, then build the masonry to fit it, because trying to force a standard box into an opening someone framed by eye produces gaps, binding doors and mortar chipped away in frustration. Most homeowners underestimate what arrives in a week, since catalogs, padded envelopes and small parcels take up considerably more room than letters do.

Door clearance is the detail most often missed. A door needs to open fully without striking the stone around it, and the swing needs clear space in front. Stone or brick set flush to the door edges leaves no tolerance for the slight settling every masonry structure experiences, so a small reveal around the box saves trouble later. Depth deserves thought as well, since a box recessed too far into thick masonry puts mail out of comfortable reach. Building a sleeve or frame into the masonry rather than mortaring directly against the box also makes replacement possible when the insert eventually wears out.

Keep the Address Numbers Readable

Address numbers do more than help the mail arrive. Emergency responders looking for a house at night depend on them, and a number hidden behind a shrub costs time that matters. Numbers should read clearly from a vehicle moving at normal street speed, from both directions, in daylight and in the dark.

Several things affect whether they actually do:

  • height, since numbers set too low disappear behind parked cars and snow banks
  • contrast between the numbers and the masonry behind them
  • character size, with four inches generally treated as a practical minimum
  • lighting, either a small fixture or numbers with a reflective finish
  • landscaping that will grow to cover the face within a season or two
  • orientation, so numbers face the street rather than the driveway

Mounting method matters too. Numbers pinned into mortar joints hold better than numbers glued to a stone face, and metal characters set with proper anchors survive weather that adhesive alone won’t.

Place the Footing Where It Can Do Its Job

Footing placement involves more than depth. Position relative to the curb and the driveway decides whether the mailbox stays usable and intact, since a structure set too close to the pavement edge gets clipped by delivery trucks, snow equipment and drivers cutting a turn short. Setting it back a reasonable distance while keeping mail within arm’s reach from a vehicle window takes a little measuring, and postal guidance on height and setback gives a starting point worth confirming locally.

Ground conditions under the footing shape how long the structure stays plumb. Soil that holds water, ground disturbed during driveway construction, and areas that receive concentrated runoff all deserve attention before concrete goes in. A compacted base, a footing sized for the mass above it and depth appropriate for local conditions cost very little during construction. Utility locates belong in this stage too, since irrigation lines, low voltage lighting and buried services frequently run along the front of a property exactly where the footing wants to go.

Leave Room for People to Use It

A mailbox sits at the meeting point of a driveway, a sidewalk, a lawn and a street, and all of those affect the approach. A carrier working from a vehicle needs a clear path to the door without leaning over landscaping or stepping into a planting bed. A homeowner walking out for the mail wants a surface that stays firm underfoot rather than turning to mud after rain.

Nearby features can quietly make the mailbox awkward. Gates that swing into the approach, decorative boulders, irrigation heads, mature plantings and driveway columns all reduce usable space around the structure. Steep grade at the curb causes similar trouble, since standing on a slope while sorting mail is nobody’s preference. Placing the structure where it clears these obstacles, and leaving a small paved or stabilized area at the base, makes the difference between a mailbox people use easily and one they work around. Thinking through winter conditions helps too, because whatever gets piled at the curb ends up in that same space.

Check Neighborhood Standards Before Building

Communities with masonry mailboxes often established those standards deliberately, and the rules usually outlive the original developer. Requirements can cover stone or brick type, mortar color, overall height and width, cap style, address number format, lighting and exactly where the structure may sit relative to the property line.

Reading the governing documents before selecting materials avoids an expensive correction. Many associations require written approval before construction and want a description of materials and dimensions submitted in advance, and a mailbox built without that approval can be ordered modified at the owner’s cost. Local rules sometimes apply as well, particularly regarding how close a solid structure may sit to a public road, since a heavy masonry object at the pavement edge raises safety questions in some jurisdictions. Gathering both sets of requirements early lets a mason build once and build correctly.

Why Stone Fireplace Joints May Change When the Fire Heats Up

 Stone fireplace joints showing mild mortar wear and sandy debris near a heated firebox

Stone fireplace joints naturally experience small amounts of movement as the masonry heats up during use and cools afterward. Over time, repeated heating and cooling cycles can contribute to normal wear in mortar joints, particularly when combined with age, moisture, or other environmental conditions. Understanding how these changes affect a stone fireplace helps homeowners recognize the difference between expected movement and signs that may require maintenance or repair. Regular evaluation of the masonry and mortar can help identify developing issues before they become more significant. 

Heat Moves Every Part of the Assembly

Stone, mortar and firebrick all expand when they get hot, but they don’t expand at the same rate. Dense stone reacts slowly and modestly, mortar responds more readily, and firebrick sitting directly in the flame path sees far higher temperatures than anything else in the structure. Those differences create tiny amounts of shear at every joint, since two materials bonded together are trying to change size by slightly different amounts.

A single fire produces movement measured in fractions of a millimeter, which nobody notices. The effect comes from repetition. Each heating and cooling cycle works the bond between stone and mortar a little, and over many seasons the weakest joints begin to loosen. The firebox and the area immediately above it take the hardest use, since that’s where temperatures climb fastest and drop furthest. Masonry farther from the fire moves less and generally lasts longer. This is why deterioration in a stone fireplace almost always starts near the opening and works outward rather than appearing evenly across the whole face.

Mortar Gives Way Before the Stone Does

Mortar is designed to be the softer, more sacrificial part of a masonry system, and that design choice matters here. A mortar softer than the surrounding stone absorbs movement and wears out gradually, which protects the stone. A mortar harder than the stone forces the stone faces to take the stress instead, and spalled or chipped stone is a far more expensive repair than repointing.

Wear shows up in predictable ways. Joints look recessed or hollow compared to the stone face, small sections crumble when touched, and fine cracks run along the joint line rather than through the stone. Sandy residue collecting on the hearth is a common early clue that joints are breaking down above. Once a joint opens far enough, heat and combustion gases have a route into the masonry behind, and moisture has one too. Repointing at that stage stays a straightforward job. Delaying it lets the deterioration reach deeper courses, where the repair means taking apart and rebuilding rather than raking out and refilling.

Firebox Condition Affects Everything Around It

The firebox does the hardest work in the whole assembly, so its condition shapes how the surrounding stone performs. Firebrick develops hairline cracks from thermal cycling, and refractory mortar between those bricks erodes from repeated heating combined with the acidic residue that combustion leaves behind. Neither problem looks dramatic at first.

The consequences reach past the firebox itself. Gaps in the firebrick let heat contact the structural masonry that was never meant to take direct flame, and that heat accelerates joint deterioration in the stonework outside. Smoke and gases entering through those gaps can stain adjacent walls and carry moisture into the assembly. Owners sometimes notice performance changes first, such as fires that draw poorly or heat felt on the wall beside the fireplace. Because much of this sits out of easy view, a visual check of the face tells you almost nothing about the firebox. Looking inside, with a light and a mirror or a camera, belongs in any honest evaluation of a fireplace’s condition.

Water Makes Seasonal Movement Worse

Moisture in masonry changes the whole picture, because wet mortar behaves differently than dry mortar under temperature swings. Water absorbed into joints expands when it freezes, and that expansion pushes mortar apart from the inside. A joint already loosened by years of heating cycles takes far more damage from that than a sound one would.

The water usually arrives from above rather than through the face. A cracked chimney crown, a missing or damaged cap, failed flashing at the roof line, or open joints on an exterior chimney all let rain into the system. That water travels down through the masonry, and it carries dissolved salts with it that leave white deposits on the stone as it evaporates. Those deposits often show up as the first visible sign of a moisture path nobody knew existed. Controlling the water at its entry point does more for the long term condition of the joints than any repair to the joints themselves, so leaks get fixed before repointing starts.

Regular Inspections Catch Change While It’s Small

The value of periodic inspection comes from comparison. One look tells you the current condition, and repeated looks tell you whether something is moving. A joint that appeared slightly recessed two years ago and now shows a quarter inch of loss is a different situation than one that hasn’t changed.

Most homeowners get good results from an annual check before burning season, with a professional inspection at a longer interval or whenever something changes. A chimney professional evaluates the flue liner, the crown, the cap, the flashing, the firebox and the smoke chamber, which covers the parts an owner can’t reasonably see. Between those visits, watching for sandy debris on the hearth, loose joints near the opening, white staining on the stone, water marks on nearby walls and any change in how the fireplace draws will flag most developing problems. Repairs made at that stage stay modest. Repairs made after a season of ignoring the signs rarely do.

How Stone Pavers Improve Outdoor Living Spaces

Aerial view of a natural stone paver patio with outdoor dining, fire pit, seating walls, and landscaped backyard in McKinney, TX.

Everybody compares stone pavers to the other pavers. Almost nobody compares them to the thing they’re actually replacing, which is a slab of poured concrete with a broom finish. That’s the real decision on most projects, and it gets made on price in about four minutes. Ten years later, one of those two surfaces still looks like something and the other one has a crack running corner to corner.

The crack question settles it

Poured concrete is one rigid piece. Soil moves underneath it, and a rigid piece that can’t move cracks instead. Control joints help by telling the crack where to go, and they don’t stop it from happening.

Pavers are hundreds of separate pieces with sand between them. The same soil movement travels through the joints, and the surface flexes rather than breaking. A settled area shows up as a dip you can lift and reset in an afternoon.

That’s the argument in one paragraph. Every other advantage below is downstream of it.

Repair is the thing nobody prices

A cracked slab has two options. Live with it, or demolish and repour the whole thing, which means new concrete that won’t match anything nearby.

A damaged paver area has a third option. Pull the affected units, fix what’s underneath, put them back. Nobody can tell it happened, provided you kept extra units from the original run.

That flexibility matters more over time than any style choice. Utilities get trenched. Tree roots arrive. A hot tub shows up in year six and needs a bigger base. All of those are ugly on a slab and routine with pavers.

Water has somewhere to go

A slab sheds every drop of rain to its edges. That water concentrates and heads somewhere, often toward the house or across a neighbor’s yard.

A paver surface has joints, and some water moves through them into the base. Permeable systems take that further with open-graded aggregate designed to hold and infiltrate stormwater. Some jurisdictions give credit for permeable paving in their drainage calculations, so it’s worth asking your building department.

Don’t oversell this to yourself. Standard pavers with polymeric sand shed most water like any hard surface does. The permeable version is a different product with a different base, and it costs more.

Comfort you can feel

Surface temperature is a real difference and it’s rarely mentioned. Light colored stone runs cooler underfoot than dark concrete in direct sun, and that’s the difference between a patio people use in July and one they look at through the window.

Texture matters at the same level. A wire-cut or textured paver holds traction when wet, and a smooth troweled slab gets slick. Around a pool or on any slope, that’s a safety issue and not an aesthetic one.

Glare is the third one. A big pale slab throws light back into the house all afternoon. Broken up into units with joints, the same area reads softer.

Where a slab still wins

Price, on day one. A broom finish slab is cheaper per square foot than any real stone paver, and if the budget stops at the number, the slab wins and that’s a legitimate call.

Speed is the other one. Pour, finish, wait, done. A paver installation is slower because it’s a hand-set process, and on a large area the labor difference is significant.

Under a permanent structure, a slab often makes more sense. A garage floor, a shed pad or a foundation isn’t a place for pavers. Match the surface to the job instead of picking a favorite.

And where a deck wins

Wood and composite decking beats pavers wherever you’re more than a step or two above grade. Building a paver terrace on fill to reach a raised door is expensive and it settles.

Decking also spans over slopes, and a paver surface has to be built up to meet them. On a steep lot, that’s the whole ballgame.

What actually improves the space

Level changes do more for an outdoor area than material choice. A single step between two paved areas defines them as separate rooms, and stone units handle that transition cleanly with a solid cap.

Edges are the other one. A paver surface needs a restraint at every open edge or it spreads outward over years. Restraint done right disappears. Done wrong or skipped, it’s the first thing that fails.

Curves are where pavers pull ahead of everything. A slab wants to be a rectangle, because forming a curve costs money. Units follow any shape you draw, and the cuts are the only added cost.

Ask these before you choose a surface

  • What’s the ten-year plan for this area, including utilities and future structures?
  • Does anything need to get dug up under this surface later?
  • Is stormwater a permit issue on this property, and is there permeable credit available?
  • How much sun does this area take in summer, and who’s walking on it barefoot?
  • Is this at grade, or does it need to reach a raised door?
  • What’s the price gap between the slab and the pavers, and what does the repair cost look like on each?

That last question is the honest one. Run both numbers over ten years, not one. The slab wins the quote and loses the decade, and if a contractor won’t discuss that with you, get another quote.

Frequently Asked Questions

Are Stone Pavers Better Than a Concrete Patio?

Stone pavers often provide better long-term performance because individual units can move slightly with the base and be repaired without replacing the entire surface. Concrete slabs are more likely to develop permanent cracks when the ground shifts, and repairs are usually more noticeable.

Do Stone Pavers Improve Drainage?

Yes, especially when installed as a permeable paving system. Standard stone pavers shed most surface water, while permeable systems allow water to pass through the joints into an engineered base below. Some municipalities also recognize permeable paving as part of stormwater management requirements.

Do Stone Pavers Stay Cooler Than Concrete?

Light-colored natural stone generally remains cooler under direct sunlight than many concrete surfaces. Textured stone also provides better traction when wet, making it a practical choice for pool decks, walkways, and sloped outdoor areas.

When Is a Concrete Patio the Better Option?

Concrete may be the better choice when minimizing upfront cost, meeting a tight construction schedule, or supporting permanent structures such as garages or storage buildings. The best material depends on the intended use, budget, and long-term maintenance expectations.

Can Damaged Stone Pavers Be Repaired?

Yes. One of the biggest advantages of stone pavers is that individual sections can be lifted, the base repaired, and the original stones reinstalled without replacing the entire surface. Keeping extra pavers from the original installation also makes future repairs blend in more naturally.

Brick Masonry Details That Improve Structural Performance

Close-up of a brick veneer wall with visible weep holes, flashing, and clean mortar joints on a residential home in Mckinney, TX.

The brick on your house is holding up almost nothing. On most homes built in the last seventy years, brick masonry is a single layer hung on a wall that does the actual work, and the brick’s job is to handle water and weather. That surprises people, and it changes what matters. Performance lives in a handful of details you can’t see once the wall is finished.

How Brick Veneer Protects the Building

A brick veneer is one wythe thick, which means one brick deep. Behind it sits an air space, then a weather barrier, then the framed or block wall carrying the load. Water gets through brick and mortar, and the design assumes it will.

That assumption is the whole system. Water passes the brick, runs down the back face, hits flashing and exits through weep holes. Block that path and the wall stops working, because trapped water rots sheathing, rusts ties and breaks brick faces during freeze cycles. Most veneer failures trace back to water that got in and couldn’t leave.

Why Wall Ties Matter in Brick Masonry

Ties are the metal strips that connect the brick to the wall behind it. They carry wind load from the veneer back to the structure, and they’re the only thing keeping a heavy wall vertical. You never see them and they decide everything.

Spacing is set by code, both vertically and horizontally, and those numbers are minimums rather than goals. Ties also have to be embedded properly in the mortar joint, not just poking into it. A tie that misses the joint or sits in a thin smear of mortar is decoration.

Corrosion is the slow failure. Ties need corrosion resistance suited to the wall, and cheap unprotected metal in a wet cavity has a shelf life. Ask what the ties are made of, because nobody volunteers it.

Keeping the Drainage Cavity and Weep Holes Clear

The gap between the brick and the sheathing lets water run down and drain out. Code sets a minimum width, and masons fill it with mortar droppings all day long. Droppings bridge the gap and carry water straight across to the sheathing. Good crews keep the cavity clean as they go, and a mortar net or drainage mat at the base catches what falls.

Weep holes are the exit. They’re the small openings at the base of the wall, sitting directly on top of the flashing, and code sets a maximum spacing and a minimum size. People do terrible things to them. They caulk them shut because they look like gaps, they plant shrubs against them, and they let mulch pile up to the bottom course.

The base of a brick wall should be visible and clear. Anything covering the weeps drowns the wall. That’s a maintenance problem with a repair bill attached.

Flashing Directs Water Away From the Wall

Flashing is the waterproof layer that catches water in the cavity and pushes it back out. It goes at the base of the wall, above every window and door, under sills and at any shelf angle. Each one is a place water collects.

End dams are the detail nobody checks. Flashing over a window has to turn up at both ends, or water runs off the side and into the wall. Missing end dams are one of the most common defects in new brickwork, and you can’t see them once the brick is up.

The flashing also has to extend past the face of the brick and get cut flush. Tucked back behind the face, it drips into the wall instead of out of it. That’s a two-inch mistake that ruins a wall over a decade.

Allowing for Natural Movement in Brick Walls

Clay brick takes on moisture after it leaves the kiln and expands permanently over years. Concrete masonry does the opposite and shrinks as it cures. Two materials in one building move in two directions, and something has to give.

Brick veneer gets expansion joints, which are soft gaps that let the wall grow without cracking. They belong at corners, at long runs and where the wall geometry changes. Concrete block gets control joints, which are a different thing for the opposite problem.

Miss the joints and the wall cracks where it wants to. That crack usually lands at a corner or over an opening, and it looks like a foundation problem to anyone who hasn’t checked. Plenty of expensive foundation calls are actually a missing expansion joint.

Lintels and Mortar Support Long-Term Performance

A lintel is the steel or masonry piece carrying brick over a window or door. It needs bearing on solid brick at each end, and code sets a minimum length for that bearing. Steel lintels rust, and a rusting lintel swells and lifts the brick above it, which shows up as a horizontal crack right over a window. Galvanized or coated steel costs more and buys decades.

Mortar runs the other way from what people expect. Stronger is worse, because mortar should be weaker than the brick around it, so that movement cracks the joint instead of the unit. A cracked joint gets repointed. A cracked brick gets replaced.

Type N suits most above-grade veneer, and Type S goes where more lateral strength is needed. Type M is a specialty product with no business in a typical house wall, even though it sounds like the premium option. Head joints matter too, since the vertical gaps between bricks are where crews cut corners, and a partly filled head joint is a funnel.

What to Verify Before a Brick Masonry Project Is Finished

  • What are the ties made of, and at what spacing?
  • How is the cavity kept clear of mortar droppings?
  • Where are the weeps, and are they clear of grade and mulch?
  • Does the flashing have end dams at every opening?
  • Does the flashing extend past the brick face?
  • Where are the expansion joints on this elevation?
  • What mortar type is being used, and why that one?

Walk the wall before the scaffolding comes down. Every item here is visible during construction and invisible after. That’s not an accident, and it’s why bad brickwork sells so well.

Frequently Asked Questions

Is Brick Masonry Structural on a House?

On most homes built within the last several decades, brick masonry serves as a veneer rather than the primary structural support. The structural wall behind the brick carries the building loads, while the brick protects against weather and improves the exterior appearance. Older solid masonry buildings are constructed differently.

What Are Weep Holes and Why Are They Important?

Weep holes allow moisture that enters the brick veneer to drain out of the wall system. Water travels behind the brick, reaches the flashing, and exits through these openings. Keeping weep holes clear of mulch, soil, and sealants helps prevent trapped moisture and long-term wall damage.

Why Do Brick Veneer Walls Crack Around Corners?

Brick naturally expands over time as it absorbs moisture, making properly placed expansion joints essential. Without these joints, stress often builds near corners and long wall sections, leading to cracks that are frequently mistaken for foundation problems.

What Type of Mortar Should Be Used for Brick Masonry?

Type N mortar is commonly used for above-grade brick veneer, while Type S is often selected where greater lateral strength is required. The mortar should remain slightly softer than the brick so movement occurs in the joints instead of damaging the masonry units.

How Can You Tell if Brick Masonry Was Installed Correctly?

Look for clear weep holes, properly installed flashing, visible expansion joints, consistent mortar joints, and straight brick courses. Also check above windows and doors for horizontal cracks that may indicate lintel or moisture-related problems. These details often reveal the quality of the installation before issues become more serious.

Can Painted Brick Be Restored to Its Original Appearance?

Partially restored painted brick exterior showing white paint being removed to reveal the original red brick on a home in McKinney, TX.

Somebody painted it white in 2016 and now you want the brick back. Painted brick can be stripped, and the honest range of outcomes runs from very good to permanently worse. Which one you get was mostly decided years ago, by the painter, not by you. The one thing you control is whether you test before you commit.

Setting Realistic Expectations for Painted Brick Restoration

You’ll almost never get it back to original. A skilled strip can pull off most of the coating and leave a wall that reads as brick again from the sidewalk. Up close you’ll still find paint in the pores, and the color will sit slightly off from a wall that was never touched.

Set that expectation before you spend a dollar. People who go in expecting factory-new brick end up unhappy with a genuinely good result. People who expect a weathered old wall are usually pleased.

Why the Brick’s Protective Surface Matters

Brick comes out of the kiln with a hard outer face. That skin is dense, it sheds water and it carries the color. Everything underneath it is soft and thirsty.

Break the skin and the brick starts drinking. Water gets in, salts move around, and the face begins to crumble over a few seasons. That’s the risk in every removal method, and it’s why aggressive cleaning ruins more brick than paint ever did.

So the real question isn’t whether the paint will come off. It’s whether the skin survives the process.

How Different Paint Types Affect Removal Results

Brick comes out of the kiln with a hard outer face. That skin is dense, it sheds water and it carries the color. Even professional brick cleaning is designed to preserve this protective surface rather than wear it away. Everything underneath it is soft and thirsty.

Latex and acrylic soaked into the pores. Those grip hard and they’re the reason so many strips end with a shadow of color left behind. Elastomeric coatings are the worst of the group, because they were built to stretch and stick to masonry forever.

Nobody knows what’s on your wall until someone tests it. Layers stack too, so a 1970s oil base under two coats of latex behaves like neither one.

Why Every Painted Brick Project Needs a Test Patch

Pick a small area that nobody sees. Behind a downspout works. Run the method there and let it sit through a rain cycle before you judge it.

A test patch tells you three things: how much paint releases, whether the brick face survives and what the cleaned brick actually looks like. That last one surprises people most. The brick under the paint may be a color you don’t want.

Chemical Paint Removal Methods for Brick

Masonry-safe strippers work by softening the paint so it can be washed or peeled away. The good ones come as a thick paste and get covered with a laminate cloth, which holds them wet for hours or days. Slow is the point.

The process is messy and it isn’t cheap. You’ll do multiple applications on a layered wall, plus a neutralizing rinse afterward if the product is caustic. Runoff has to be captured, because it’s paint waste and it’s regulated.

Match the chemistry to the coating. A stripper that eats oil paint may do nothing to elastomeric. This is where an experienced contractor earns the fee, and where a general painter usually guesses.

Why Abrasive Blasting Can Permanently Damage Brick

Sandblasting takes paint off fast. It also takes the fired skin with it, and that damage is permanent. The National Park Service has warned about abrasive cleaning on historic masonry for decades, and Preservation Brief 6 covers exactly this failure.

Soda and other soft media get sold as the gentle option. Gentle is relative, and pressure, distance and operator skill decide the outcome more than the media does. I’ve seen soda blasting go fine and I’ve seen it chew a wall.

If someone quotes you a fast blast for a low price, that price is the tell. Speed on painted brick is a warning, not a feature.

Understanding Ghosting After Paint Removal

Ghosting is the faint color left in the pores after a strip. It shows most in raking light and after rain. On a big elevation it can look like a shadow of the old paint scheme.

You can chase it with more chemistry and more rinsing, and each round costs brick face. At some point the smart move is to stop. A little ghosting on a hundred-year-old wall reads as patina, and most people stop noticing within a month.

When Repainting Is a Better Option Than Stripping

Some walls shouldn’t be stripped. Soft handmade brick, salvaged brick and anything already spalling will lose face in the process. A wall with failing units needs repair before it needs cosmetics.

Mineral paint and limewash are worth a look here. Both breathe, which matters on brick, and limewash weathers to something that looks a lot less like paint. Neither one gets you back to bare brick, and both beat trapping moisture under another coat of latex.

Brick staining is the third option. Stain soaks in instead of coating over, so the texture stays. It works on bare brick and on some stripped walls, and it can even out ghosting better than another strip round will.

Questions to Ask Before Hiring a Brick Restoration Contractor

  • What coating is on the wall, and how many layers, confirmed by test?
  • Where’s the test patch, and how long will it weather before you decide?
  • Which stripper chemistry, and is it rated for masonry?
  • Who captures the runoff, and how is the waste handled?
  • Is any blasting involved, and if so, at what pressure and by whom?
  • What does the contractor say the finished wall will look like, in writing?
  • What’s the fallback plan if the test patch takes the face off?

Ask every one of these before signing. The answers are free now. A wall with the skin blasted off is not a fixable mistake.

Frequently Asked Questions

Can paint be completely removed from brick?

Rarely. Chemical stripping can remove most paint, but coatings that have penetrated the brick’s pores often leave behind a faint shadow known as ghosting. Older oil-based paints generally come off more completely than latex or elastomeric coatings. The goal is usually to restore the appearance of natural brick rather than achieve a completely paint-free surface.

Does removing paint damage brick?

It can if the wrong removal method is used. Brick has a durable fired outer surface that protects it from moisture and weathering. Abrasive techniques can strip away this protective layer and expose the softer material underneath. Masonry-safe chemical stripping products are typically much less damaging than aggressive mechanical methods.

Is sandblasting painted brick a bad idea?

Yes. Sandblasting removes the brick’s protective fired surface along with the paint, causing permanent damage. It is generally not recommended for painted brick because it can shorten the life of the masonry. Even softer blasting methods require careful evaluation and experienced application.

How much does it cost to strip painted brick?

The cost depends on the type of paint, the number of existing layers, the size and accessibility of the wall, and local labor rates. Multiple paint layers often require additional applications, increasing the overall cost. A test patch is usually the best way to determine the appropriate removal method and provide an accurate estimate.

Should I repaint instead of stripping?

In some cases, repainting is the better option. Older, softer, or deteriorated brick may be damaged during paint removal. Breathable finishes such as mineral paint, limewash, or brick stain can improve the appearance while allowing moisture to escape, making them a practical alternative to complete paint removal.